Create an AWS Outpost - Featured Image

How to Create an AWS Outpost

Create an AWS Outpost

Upon ordering Outpost capacity, you will be able to pick out from various Outpost configurations. Every configuration offers a mixture of EC2 instance types as well as EBS volumes.

What are the requirements before you create an AWS Outpost? (Prerequisites)

  • First you should know that an Outpost site represents the physical location selected for AWS to start installing your Outpost equipment. Prior to ordering capacity, you will need to make sure that your site has all the needed requirements for AWS Outposts.
  • You should already possess an AWS Enterprise Support plan.

Step One: How can you create an AWS Outpost?

  1. Go straight to the AWS Outposts console using the following link https://console.aws.amazon.com/outposts/.
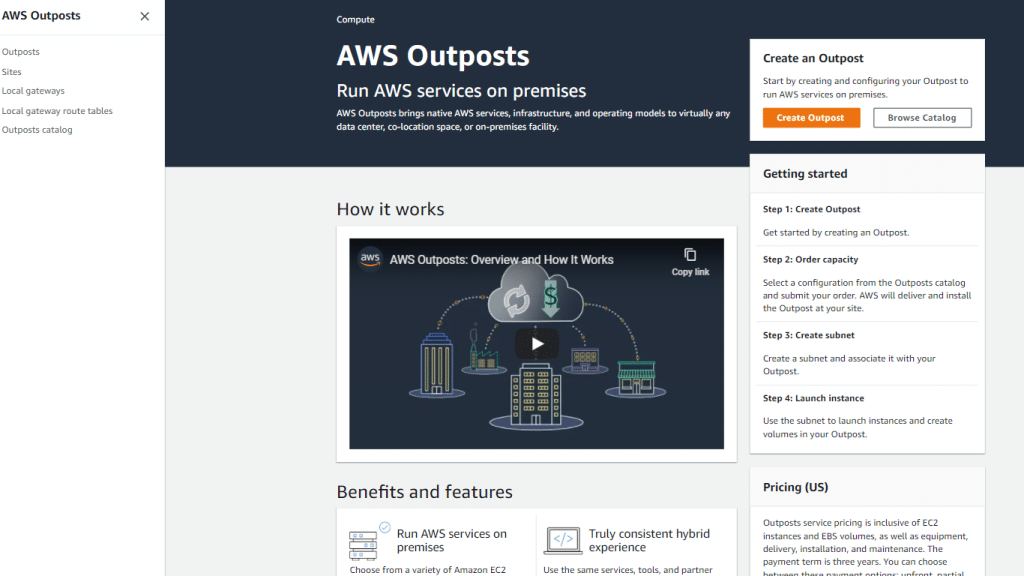
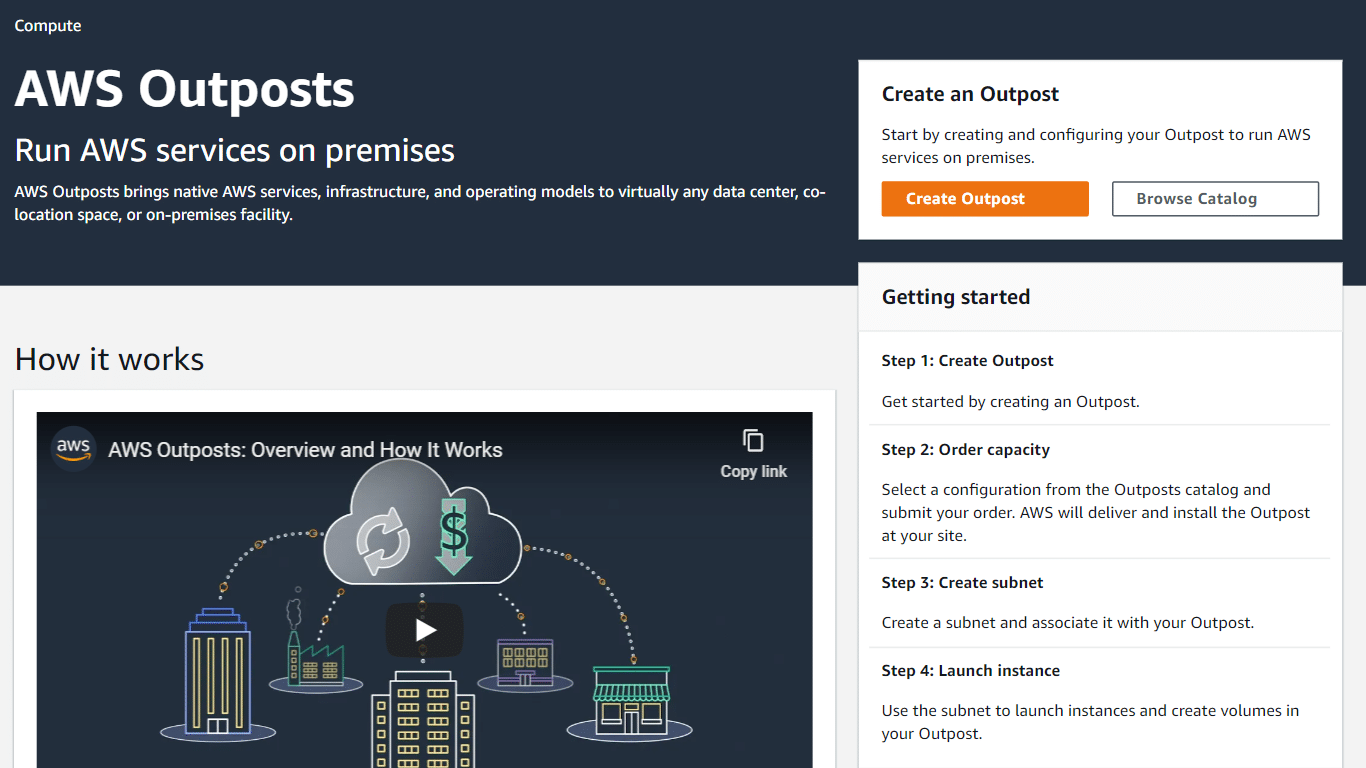
    Create an AWS Outpost - Outposts console

    Create an AWS Outpost – Outposts console


  2. Choose Outposts from left navigation pane.
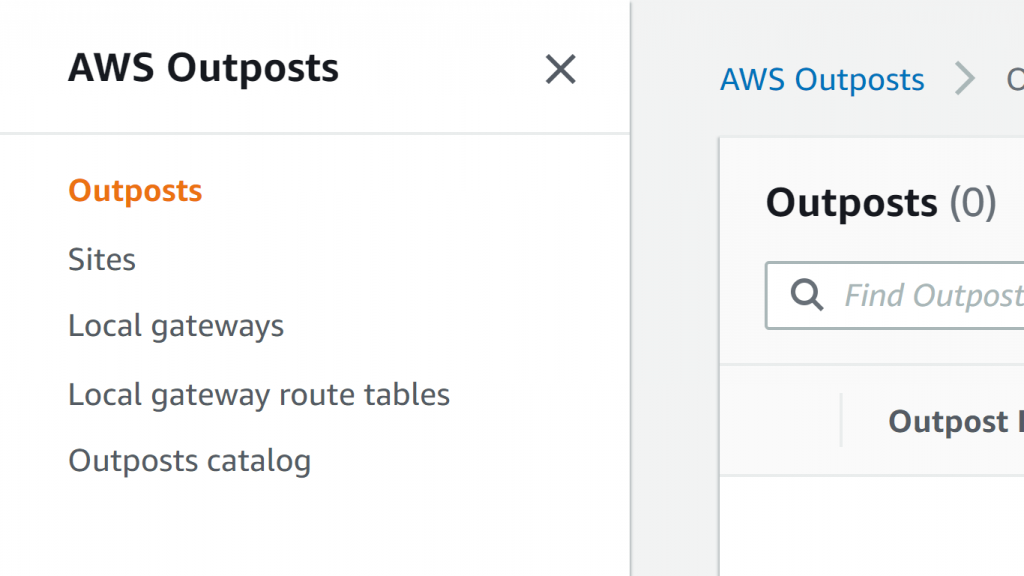
    Create an AWS Outpost - Outposts section

    Create an AWS Outpost – Outposts section


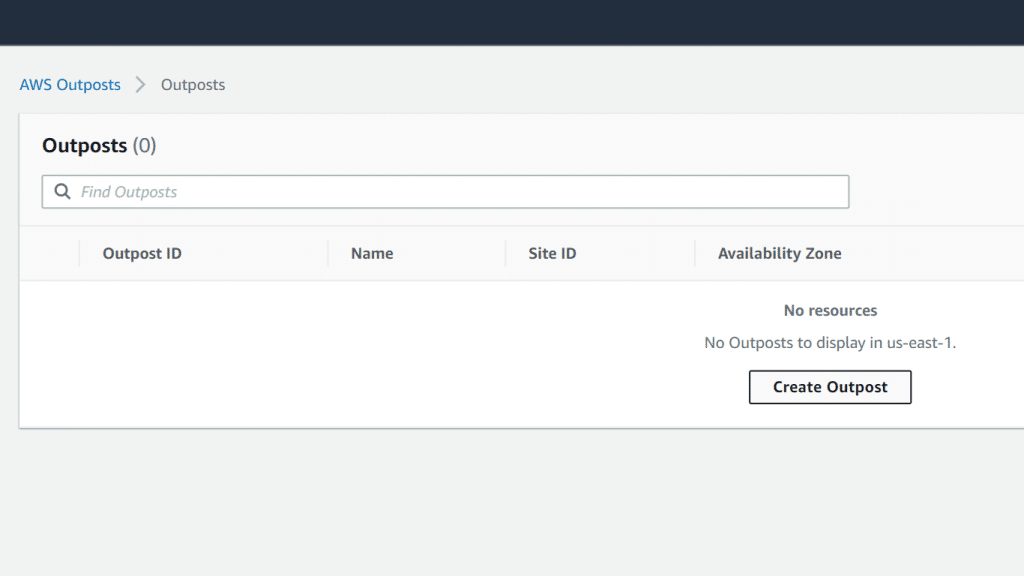
  3. Click on Create Outpost.
    Create an AWS Outpost - Create Outpost

    Create an AWS Outpost – Create Outpost


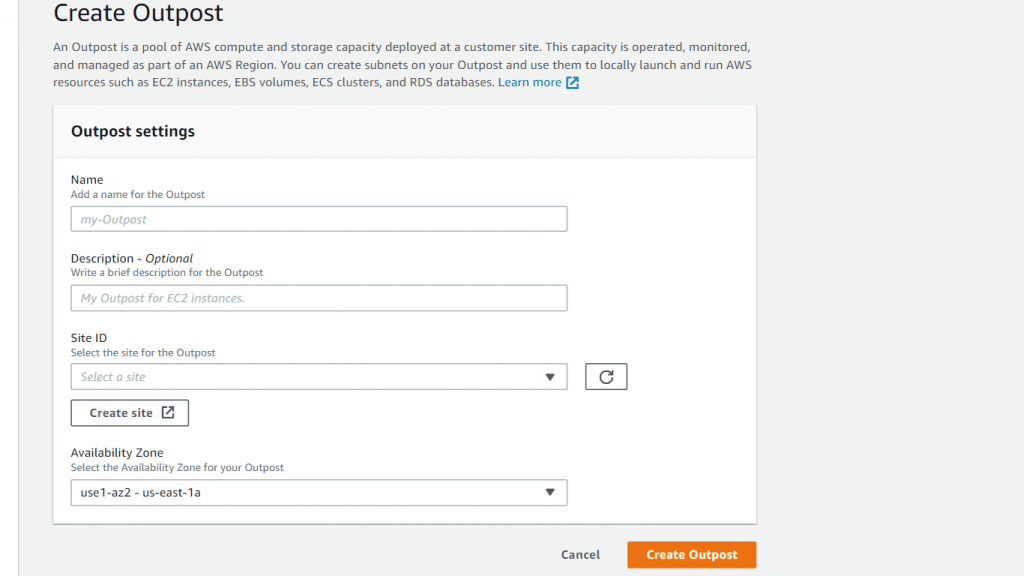
  4. Enter a Name and a Description.
    Create an AWS Outpost - Outposts settings

    Create an AWS Outpost – Outposts settings


  5. For Site ID section, click on Create site. Finish then submit the form, and pick your newly created site.
  6. Pick an Availability Zone.
  7. Click on Create Outpost.

This is how quick and simple it is to create an AWS Outpost, and now carry on to learn how to start working with Outposts.

Step Two: How to order Outpost capacity after you create an AWS Outpost?

  1. Go straight to the AWS Outposts console using the following link https://console.aws.amazon.com/outposts/.
  2. From navigation pane, click on Outposts catalog, then go over the below steps:
    1. Pick a capacity configuration. In case the already available capacity configurations do not fulfill your requirements, it is possible for you instead to go with requesting a custom capacity configuration.
    2. Click on Place order.
    3. Pick your newly created Outpost.
    4. Click on Place order.
  3. With the AWS Outposts console, you will be able to view your order’s status. You will find that initially the status of your order is going to be set as order received. Within 3 business days, you will be contacted by an AWS representative. As soon as your order’s status becomes Order processing, you are going to get an email confirmation. In case more info is needed for the AWS installation team, you will be contacted by an AWS representative.

You can contact the AWS Support in case of having some questions regarding your order.

  1. As a final step to fulfilling your order, a date and time will be scheduled with you. Also, you are going to get a checklist of the items needed for verification or being provided prior to the installation. You will find the AWS installation team coming to your site the day you have scheduled the date and time. AWS team is going to start rolling the rack to the position which was identified and your electrician may then begin powering this rack. Network connectivity is going to be established by the team for the rack over the uplink which you have previously provided, then they will start configuring the capacity of the rack. The installation finishes as soon as you have confirmed that your Outpost’s EC2 and EBS capacities are available from your account.


After you create an AWS Outpost, how can you work with Outposts?

You are able to manage Outposts in a manual manner for the sake of completing tasks for example: to add tags, or update names and descriptions.

Managing Outpost tags

It is possible for you to tag your Outposts for the sake of better identifying them or categorizing them in association with your organization’s requirements.

For managing Outpost tags, using the AWS Outposts console, go through the below steps:

  1. Go straight to the AWS Outposts console using the following link https://console.aws.amazon.com/outposts/.
  2. From navigation pane, click on Outposts.
  3. Pick your needed Outpost, then click on Actions, Manage tags.
  4. Now, you can add or remove a tag if you want.

For adding a tag, click on Add new tag then go through the below:

    • In the section of Key, fill in a key name.
    • In the section of Value, fill in a key value.

For removing a tag, click on Remove which is located at the right side of the tag’s Key and Value.

  1. Click on Save changes.

Managing Outpost name and description after you create an AWS Outpost

The Outpost’s name and description can be changed as needed.

For the sake of managing Outpost tags using the AWS Outposts console, go through the below steps:

  1. Go straight to the AWS Outposts console using the following link https://console.aws.amazon.com/outposts/.
  2. From navigation pane, click on Outposts.
  3. Pick the needed Outpost, then click on Actions, Edit Outpost.
  4. Change the name as well as the description as required.

In the section of Name, fill in a name.

In the section of Description, fill in a description.

  1. Click on Save changes.

Viewing Outpost details after you create an AWS Outpost

Outpost details may be viewed through either the Outposts console, or the CLI;

How to view Outpost details using the AWS Outposts console?

  1. Go straight to the AWS Outposts console using the following link https://console.aws.amazon.com/outposts/.
  2. From navigation pane, click on Outposts.
  3. Pick the needed Outpost, then click on Actions, View details.


How to view Outpost details using the AWS CLI?

You can use the GetOutpost CLI command to view details when you create an AWS Outpost.
AWS Lambda Extensions

Delete a Studio Domain - Featured Image

How to Delete a Studio Domain on AWS

Delete a Studio Domain

Upon onboarding to SageMaker Studio through IAM authentication, the Studio will create a domain associated with your account. This domain is made up of a list of configuration settings, an Elastic File System (EFS) volume and authorized users. The EFS volume includes the users’ data, such as resources, keep in notebooks and artifacts. Users may possess various apps that support the execution experience and the reading of their consoles, terminals and keep in notebooks.

If you’d like to return Studio to its previous state prior to onboarding, you are required to delete this domain. Keep in mind that the EFS volume will not get deleted when you delete the domain.

You will have to delete the domain in case you’d like to switch your authentication modes from IAM to SSO.

If you want to delete a studio domain, make sure it does not contain user profiles. If you want to delete a user profile, make sure it does not contain non-failed applications.

Upon deleting these resources, the below will occur:

  • App: Data such as notebooks and files that are found in a user’s home directory is going to be saved. Keep in notebook data which is not saved, is going to be lost.
  • User profile: User now can’t sign in to Studio and can’t access to their home directory, yet the data is not going to be deleted. Data can be retrieved by an admin from the EFS volume where it is stored for the account of this user.

Keep in mind

Admin permission is needed for your ability to delete a studio domain.

Only an app having a status of “InService” may be deleted, and it should be shown as Ready in Studio. An app having a Failed status will not require to get deleted so that the containing domain is deleted. Using Studio, if you try to delete an app having a failed state you will receive an error.

How can you delete a Studio Domain using the Studio?

In order for you to delete a studio domain, go over the below steps:

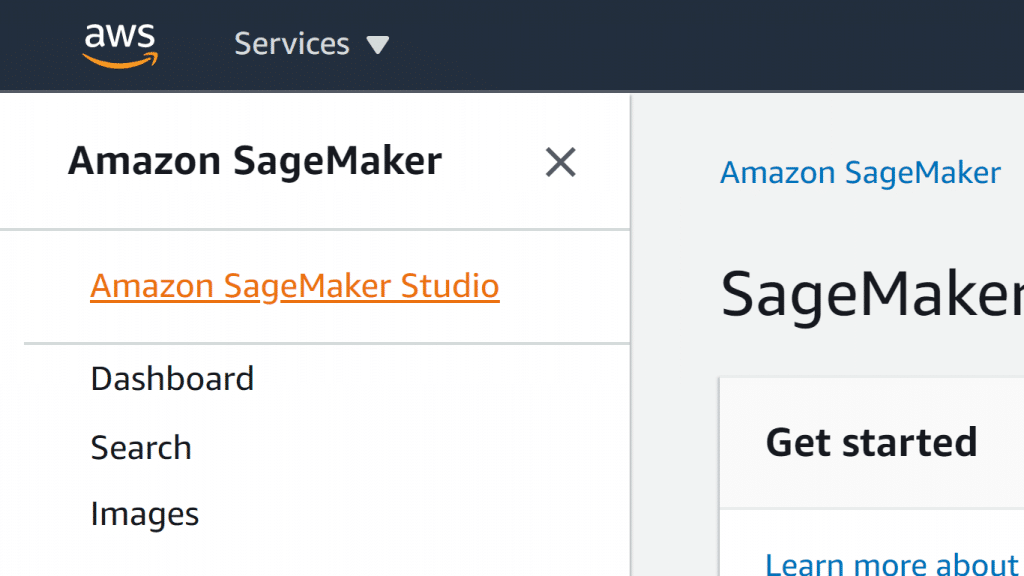
  1. Go straight to the SageMaker console.
    Delete a Studio Domain - SageMaker Console

    Delete a Studio Domain – SageMaker Console


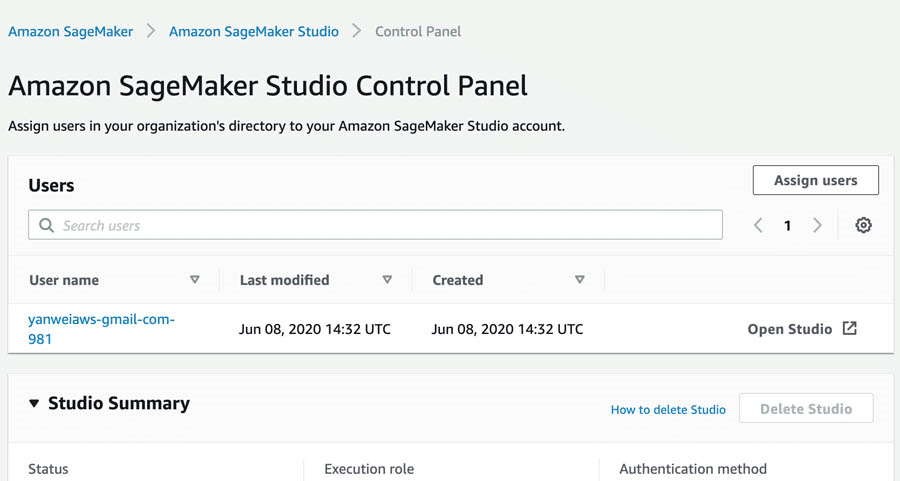
  2. Click on Amazon SageMaker Studio located on the top left, so that you are sent to the Amazon SageMaker Studio Control Panel.
    Delete a Studio Domain - Amazon SageMaker Studio

    Delete a Studio Domain – Amazon SageMaker Studio


  3. Go over the below steps once again for every user found in the User name list.
    Delete a Studio Domain - User name list

    Delete a Studio Domain – User name list


    • Select the needed user.
    • From the page named User Details, for every non-failed app from the Apps list, click on Delete app.
    • From the dialog of Delete app, click on Yes, delete app, enter “delete” inside the confirmation field, then click Delete.
    • As soon as every app’s Status is shown as Deleted, click on Delete user.

Keep in mind

Upon deleting a user, this user will no longer have access to the EFS volume containing the data of the user, among which are “keep in notebooks” and different artifacts.

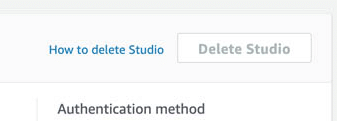
4. As soon as every user gets deleted, click on Delete Studio.

Delete a Studio Domain - Delete Studio

Delete a Studio Domain – Delete Studio

5. From the dialog of Delete Studio, click on Yes, delete Studio, enter “delete” in the confirmation field, then click on Delete.

How can you delete a SageMaker Studio Domain using the CLI?

In order for you to delete a studio domain, go over the below steps:

  1. Get a list of the domains found in your account.

aws –region Region sagemaker list-domains

  1. Get a list of the apps for the domain which is going to get deleted.

aws –region Region sagemaker list-apps \

–domain-id-equals DomainId

  1. Start deleting every app found in the list.

aws –region Region sagemaker delete-app \

–domain-id DomainId \

–app-name AppName \

–app-enter AppEnter \

–user-profile-name UserProfileName

  1. Get a list of the user profiles that are found in the domain.

aws –region Region sagemaker list-user-profiles \

–domain-id-equals DomainId

  1. Start deleting every single user profile found in the list.

aws –region Region sagemaker delete-user-profile \

–domain-id DomainId \

–user-profile-name UserProfileName

  1. End by deleting the domain.

aws –region Region sagemaker delete-domain \

–domain-id DomainId

This is how easy it would be for you to delete a studio domain and switch back to your previous SageMaker Studio. Once you delete a domain your authentication mode will be changed from IAM to SSO.

AWS Lambda Extensions

Create A Model - Featured image

How to Create A Model using the AWS SageMaker Console

AWS SageMaker: Create A Model


To create a model through the AWS Console, go over the below steps:


But first, you may ask why do you need to create a Model for SageMaker?

A SageMaker Model refers to the custom inferencing module which is made up of two important parts: custom model and docker image that has the custom code.

Your model must get hosted in one of your S3 buckets and it is highly important that it be a “tar.gz” type of file which contains a “.hd5” type of file. So, let’s say that you have a model with a name “final_fifa_2020_v5.hd5”, you will need to have a “final_fifa_2020_v5.tar.gz” located in the chosen S3 bucket which includes your model file.

Why is this necessary when you create a model?

It is necessary since this is the way that SageMaker is built: In order for it to read the specified file, you must first untar it then copy this file into the “/opt/ml/model/” directory.

In case you want to create a model through the AWS console GUI, you will find this to be a very easy process.

  1. Sign in to your AWS account and pick your desired region.
  2. Head straight to Amazon SageMaker console using the following link https://console.aws.amazon.com/sagemaker/home (Or through using the Services menu and searching for Amazon SageMaker).
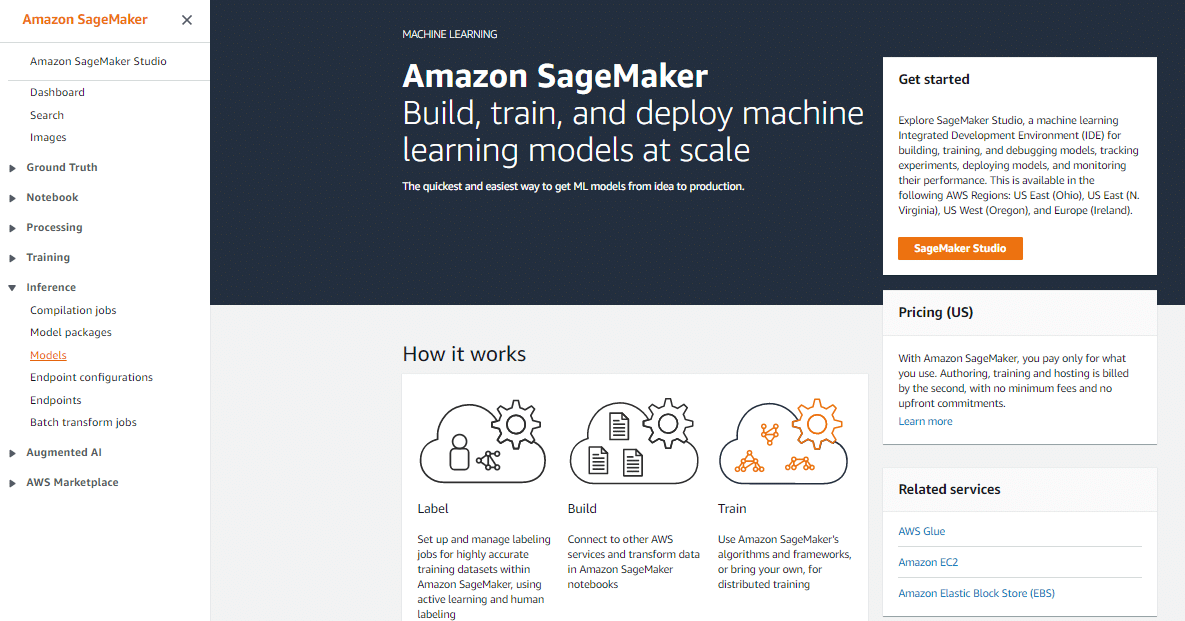
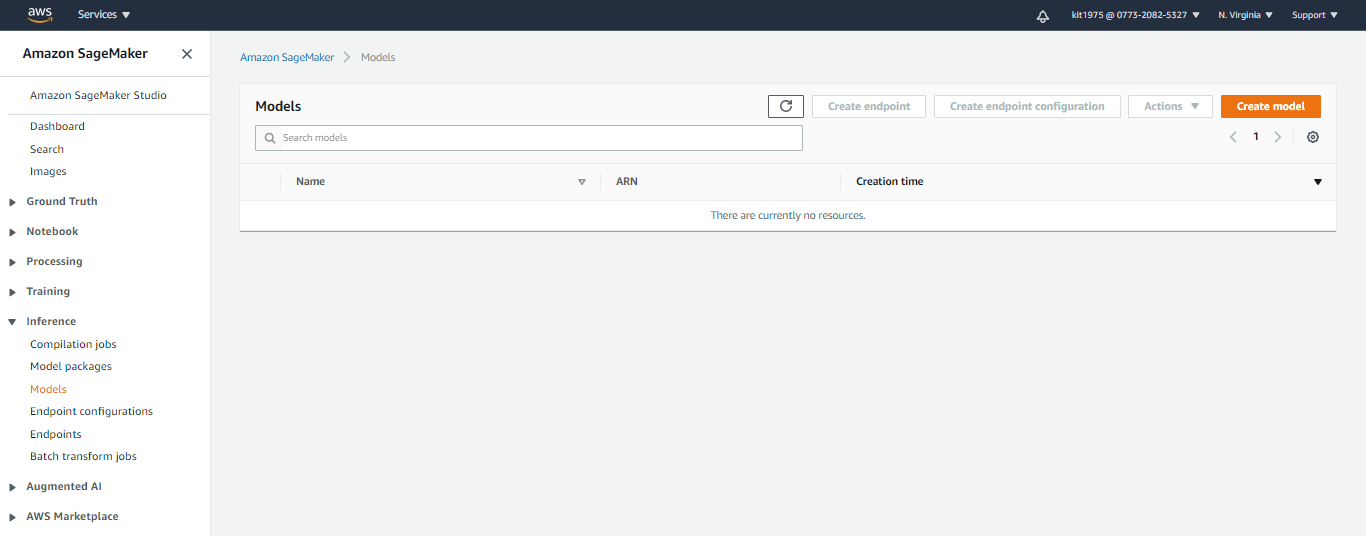
    Because in this article we aim to learn how we can build our own inferencing model, we should for now ignore the Ground Truth, Notebook, Processing and Training sections, and jump directly to the Inference section. Create A Model - Inference Section Create A Model – Inference Section
  3. From below the Inference section, select the option Models so that you get sent to the SageMaker models view. Noting will be shown in the list in case you have no models created before.
  4. Pick the Create model button which is located in the upper right corner.
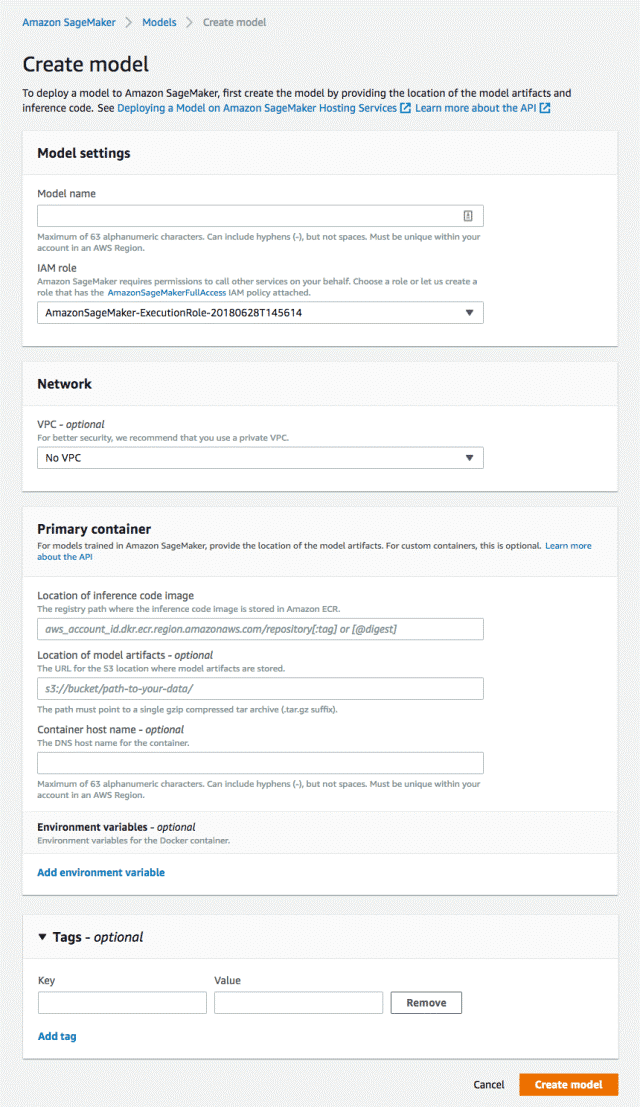
  5. At this point you will need to supply the necessary parameters for creating a model.

    Create A Model - Create Model Settings Page

    Create A Model – Create Model Settings Page

Go over what you need to do for each of the below needed parameters.

  • First: Model Settings
    • Model Name
      You simply have to enter a unique name for your new model.
    • IAM Role
      Create A Model - Select Existing IAM Role

      Create A Model – Select Existing IAM Role

      In this section you will have to specify the IAM role you want to use for operating this particular model. In case you have previously created roles, you may select a specific one from the provided list. However, it is preferably better if you go ahead with creating a new one for every model.

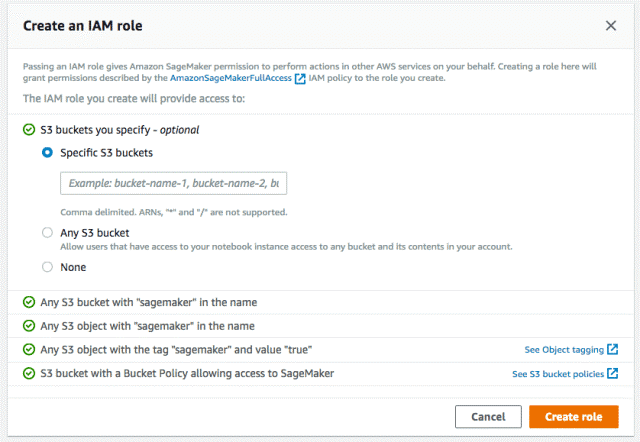
In case you click on Create a new role, you will see a pop-up window which will allow you to start configuring your new role.

Create A Model - Create an IAM Role

Create A Model – Create an IAM Role

You will find that it’s possible for you to restrict the role to just one specific S3 bucket. You can either choose to enter the bucket name where you have the custom model hosted in, or any other S3 bucket or simply none at all.

  • Second: Network
    • VPC (Virtual Private Cloud)
      In case you have a VPC configured that you’d like to utilize with this model, you may choose it. In case you’d like not to do so, simple leave the network section as it is.
  • Third: Primary Container
    In this section you get to enter the details required for the custom docker image as well as which model to be used.

-Location of inference code image
This section refers to your docker image’s ECS name in the AWS ECR. For getting your image ID, head straight to ECS using the Services menu then click on Repositories which is located below Amazon ECR on the left panel.
Your image ID should be similar to the one shown below:
account_id.dkr.ecr.eu-west-1.amazonaws.com/final_fifa_2020:1.0
And the “0” represents the docker image’s tag which will be deployed using SageMaker.

-Location of model artifacts (optional)
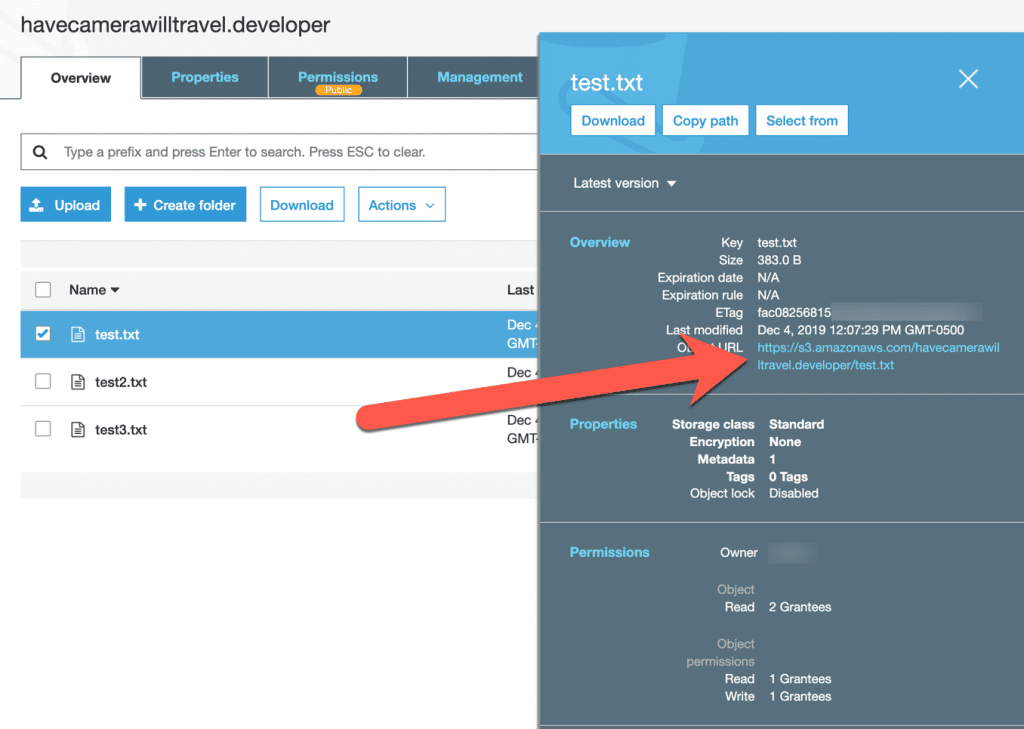
This section represents your custom model’s location, which mostly is an S3 link.
This link may be copied from your S3 bucket, such as follows:

Create A Model - S3 Bucket Link

Create A Model – S3 Bucket Link

When you create a model, you will need to copy this link then paste it to be your location. However, you must be certain that the file type is “tar.gz” and that it includes the model “.hd5” file having the exact file name.

-Container hostname (optional)
In case you’d like to set a different DNS, this can be done in this section, but it may be ignored because it is optional.

  • Fourth: Tags
    Here you can set tags according to what you want to search for. This will help you in finding your model easily and it will aid you for billing purposes, in the case that you already have created a lot of models.
  1. Upon entering all the required information, to create a model, click on the button Create model and watch as your model gets created.

This is how simple it would be for you to start using Amazon SageMaker in order to create a model, then set off with your journey using the SageMaker Studio.

How to configure a new client on AWS

Configure a New Client - Featured Image

How to Configure a New Client on AWS?

AWS Chatbot: Configure a New Client

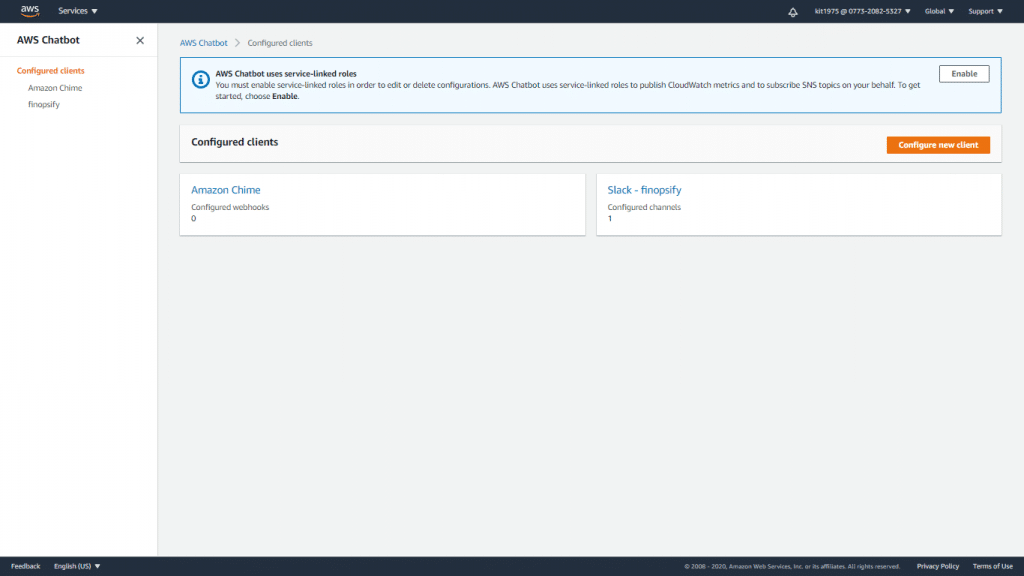
AWS Chatbot may get utilize for the sake of experimenting with ChatOps across multiple AWS regions. You just have to configure a new client to get started.

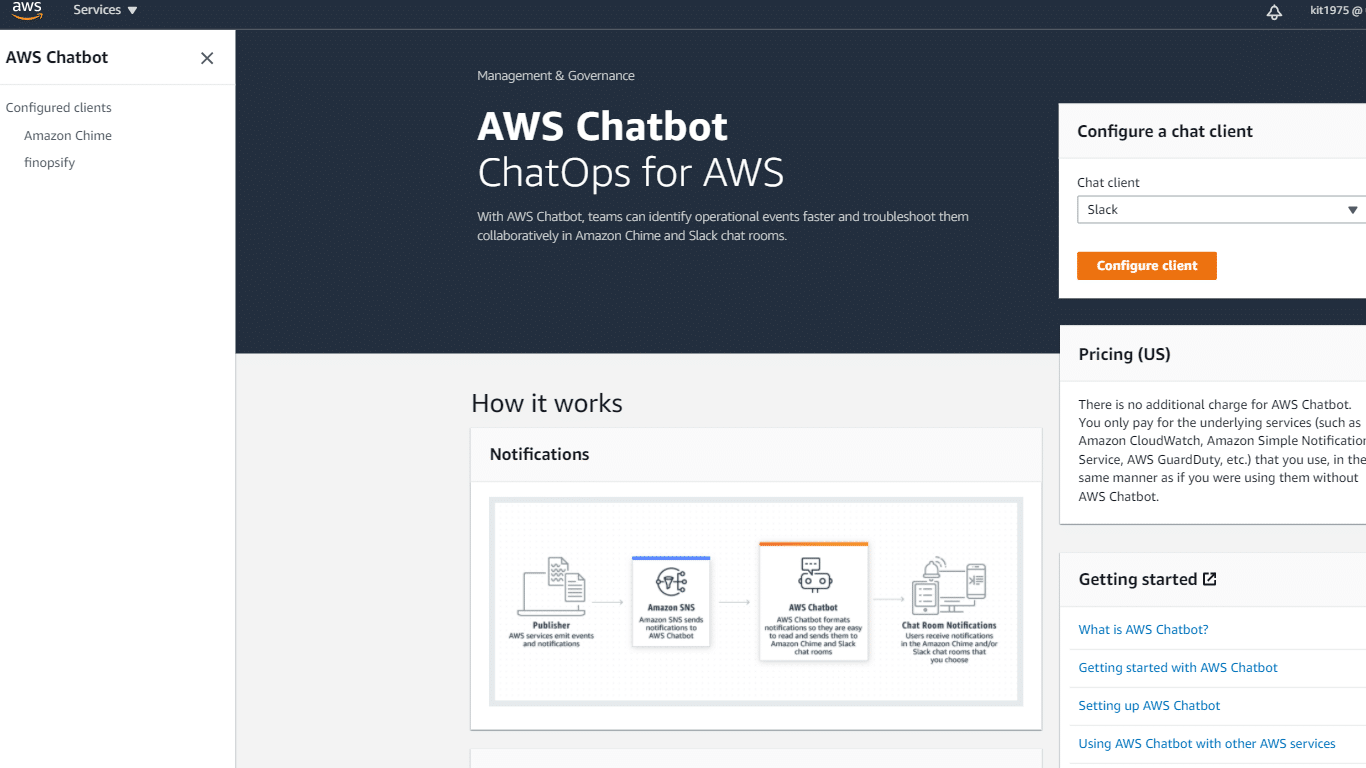
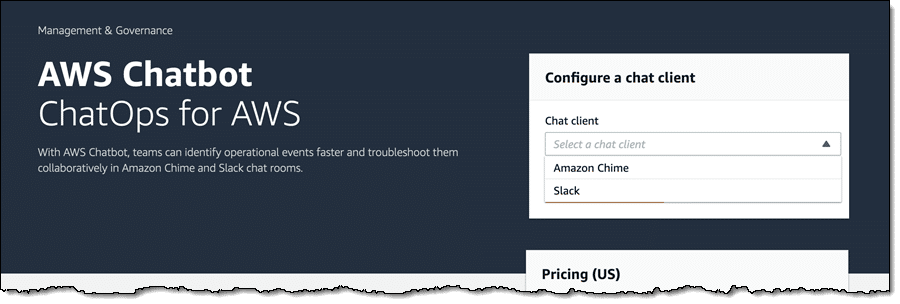
It may get you connected to your Chime chatrooms as well as your Slack channels in merely a couple of minutes. You just have to go straight to the AWS Chatbot Console, pick your Chat client, then click on the option Configure client to begin:

Configure a New Client - AWS Chatbot

Configure a New Client – AWS Chatbot

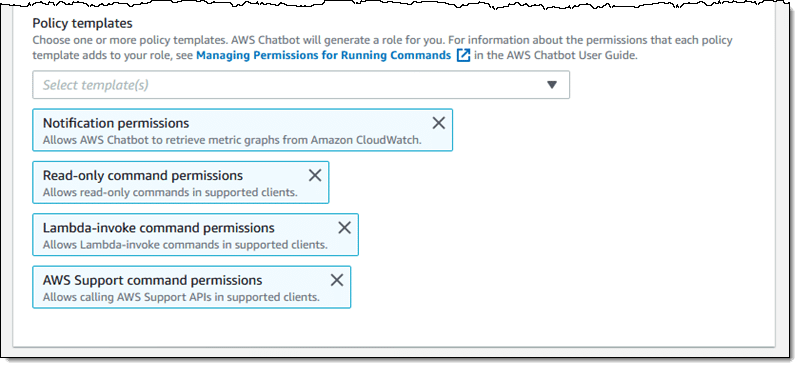
As part of the configure a new client process, you will have the opportunity to either pick an already existing IAM role or to begin with creating another new one from given templates. This selected role is going to grant AWS Chatbot with the required permissions to access CloudWatch metrics, as well as the ability to start running commands, responding to notification actions, invoking Lambda functions, and also generating support cases:

Configure a New Client - Policy Templates

Configure a New Client – Policy Templates

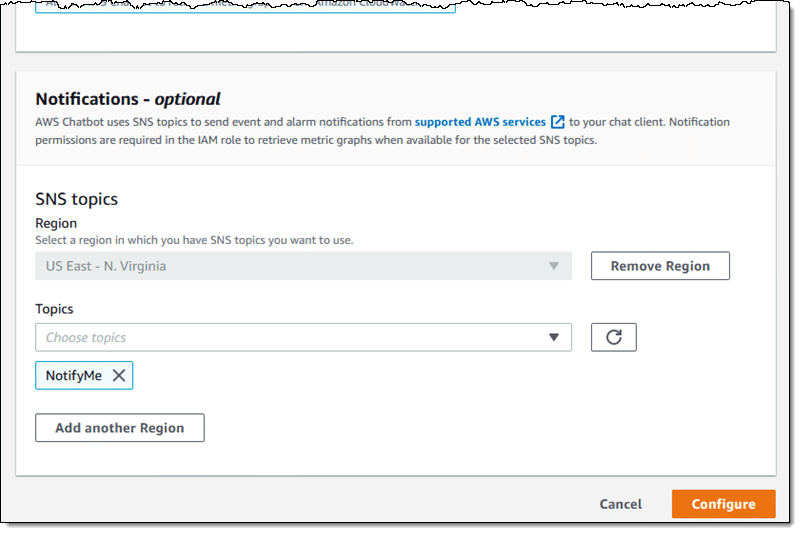
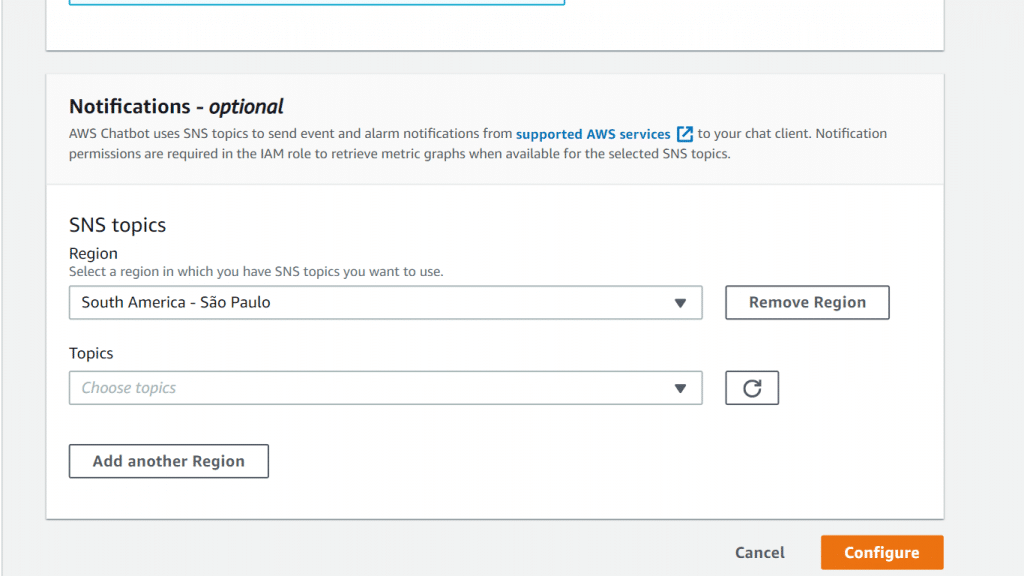
AWS Chatbot will listen on SNS topics for the sake of learning about events and alarm notifications in every associated region:

Configure a New Client - Notifications

Configure a New Client – Notifications

It is also possible for you to start setting up CloudWatch Alarms in whichever region that you use for choosing a topic, then utilize them for the sake of sending notifications to AWS Chatbot.

Keep in Mind
You are capable of utilizing the AWS Chatbot right now for no extra charge. You only need to pay for added services like CloudWatch, or SNS, just like in the case that you are working with them outside AWS Chatbot. Also, you will have to pay whatever charges that are accompanied with your usage of your chat client.


How to set up AWS Chatbot with Slack and configure a new client?

In order to grant AWS Chatbot the ability to send notifications to your Slack channel, AWS Chatbot needs to be configured with Slack. Owners of Slack workspaces are capable of approving to the utilization of the AWS Chatbot, where all workspace users have the ability to configure the workspace for receiving notifications or running commands.

In order for you to configure a new client, you will need to follow the below steps:

  1. Go straight to the AWS Chatbot console using the following link https://console.aws.amazon.com/chatbot/.
    Configure a New Client - AWS Chatbot configure new client

    Configure a New Client – AWS Chatbot configure new client


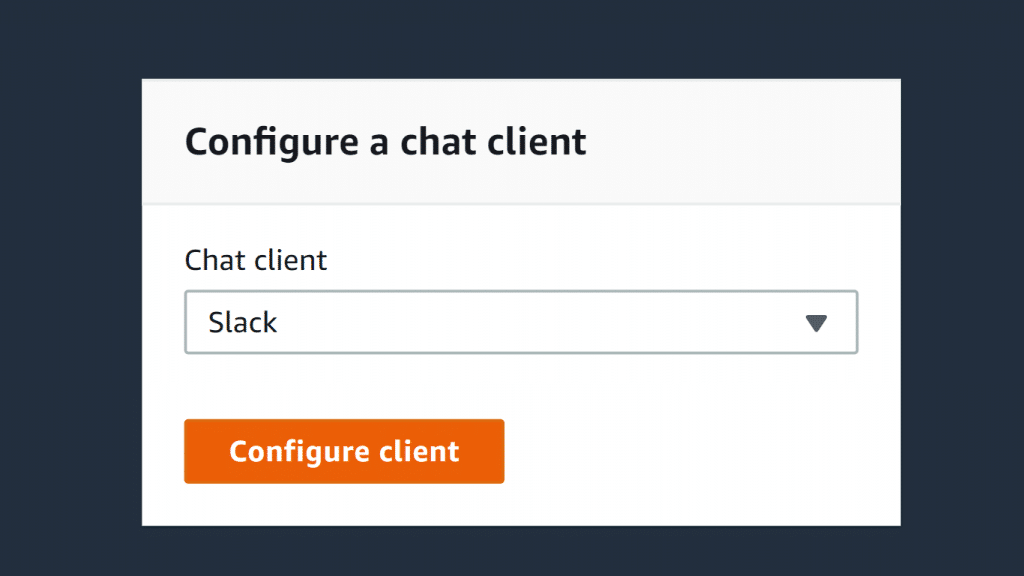
  2. For the section of Configure a chat client, click on the option Slack, then click on Configure client.
    Configure a New Client - configure slack chat client

    Configure a New Client – configure slack chat client


  3. Using the upper dropdown list, select which Slack workspace you’d like to utilize with AWS Chatbot.

You can set up an endless number of workspaces for AWS Chatbot, but they should be set up one by one.

  1. Click on the option Allow.
  2. From the page of Workspace details, either select to carry on using the console or using a CloudFormation template:
    • For the sake of utilizing a CloudFormation template, you will have to copy and paste the Workspace ID which is located below Workspace details.
    • For the sake of carrying on using the console, click on the option Configure new channel.
  3. For the section of Configuration details, fill in a particular name to give to your configuration. It needs to be unique and not used across your account. It may not get edited in after being created
  4. In case you’d like to enable logging for this configuration, click on the option Publish logs to Amazon CloudWatch Logs.

Keep in mind

When you use CloudWatch Logs, you are going to get charged an extra amount of money.

  1. In the section of Slack channel, select which channel you’d like to use.

Keep in mind

You are capable of utilizing private Slack channels when working with AWS Chatbot. If you want that, click on the option Private channel. In Slack, start off by copying the Channel ID of your private channel through clicking the right-mouse-button on the channel name from the left pane. Then, select Copy Link.

Channel ID: string found at the URL’s ending such as the following: AB3BBLZZ8YY.

In AWS Chatbot, finish by pasting the ID inside the field titled Channel URL.

This is how you can configure a new client to be a private slack channel.

  1. Set the IAM permissions used by the chatbot in order to message your Slack chat room:
    1. In the section of IAM role, click on the option Create an IAM role using a template. In case you’d like to utilize an already existing role, click on the option Use an existing role. For the sake of using an already existing IAM role, it must be modified for being used with AWS Chatbot.
    2. In the section of Role name, fill in a specific name. It’s accepted characters are as follows: A-Z, a-z, 0-9, .\w+=,.@-_.
    3. In the section of Policy templates, click on the option Notification permissions. It’s the AWS Chatbot’s IAM policy template, which grants the required Read and List permissions for CloudWatch logs, events and alarms, as well as for SNS topics.
  2. Select which SNS topics you want for sending notifications to the Slack channel.
    • . In the section of SNS Region, select which AWS Region that you want for hosting the SNS topics for this specific AWS Chatbot subscription.
  1. In the section of SNS topic, select which Amazon SNS topic you want for the client subscription. The selected topics will specify what content will be sent to the Slack channel. In case the region includes extra SNS topics, you may select them from the same dropdown list.
  2. For adding an SNS topic from a different AWS Region to the notification subscription, click on the option Add another Region.
  1. Finally, to configure a new client, simply click on Configure.

From this moment, any notifications coming from supported services publishing to the selected SNS topics are going to show in the Slack channel.

An infinite number of channels can be configured, having as much topics as required.

Keep in mind

In case you choose to configure a new client as a private Slack channel, you will need to run the /invite @AWS command in Slack for the sake of inviting the AWS Chatbot to the chat room.

After you configure a new client, your selected SNS topics need to be configured in the services for which you want to receive notifications.

This is how easy and swift it is for you to configure a new client using the AWS Chatbot console.

After you configure a new client, you can go forward with receiving notifications of your choice.

Cloudflare AWS S3

Configure Chime Webhooks - Amazon Chime

How to Configure Chime Webhooks (Step by Step)

Configure Chime Webhooks

In order for you to Configure Chime Webhooks, you will need to start by Setting up AWS Chatbot with Amazon Chime:

To be able to set up AWS Chatbot for Amazon Chime, you must copy the webhook URL provided for your team’s chat room from Amazon Chime.

What must be done prior to going forwards with how to configure chime webhooks?

You will need to be an admin of an Amazon Chime chat room. Also, you must have the possibility to be able to manage webhooks.

To configure Chime Webhooks for your Amazon Chime client, go over the below listed steps:

  1. Go to Amazon Chime.
  2. In the section of Amazon Chime, pick a specific chat room which you’d like to set up to receive notifications through AWS Chatbot.
  3. Click on the Room settings icon located at the upper right, then click on the option Manage Webhooks and Bots.

Amazon Chime will show you the webhooks associated with the chat room.

Keep in mind

It is possible to get various webhooks in just one Amazon Chime chat room.

4. For the selected webhook, click on the option Copy URL then click on Done.

In case you would like to create a new webhook for the chat room, click on the option Add webhook. Fill in the Name field with a specific name to give to the webhook, then click on the option Create. Now, carry on to learn how to configure chime webhooks.

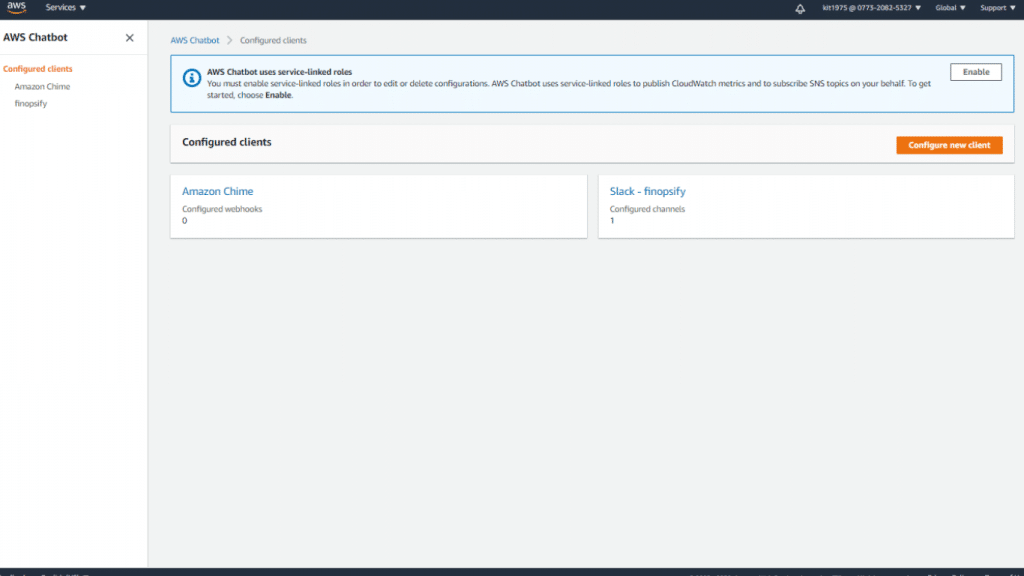
5. Go to the AWS Chatbot console using the following link https://console.aws.amazon.com/chatbot/.

Configure Chime Webhooks - AWS Chatbot

Configure Chime Webhooks – AWS Chatbot


6. Click on the option Configure new client.

Configure Chime Webhooks - Configure New Client

Configure Chime Webhooks – Configure New Client


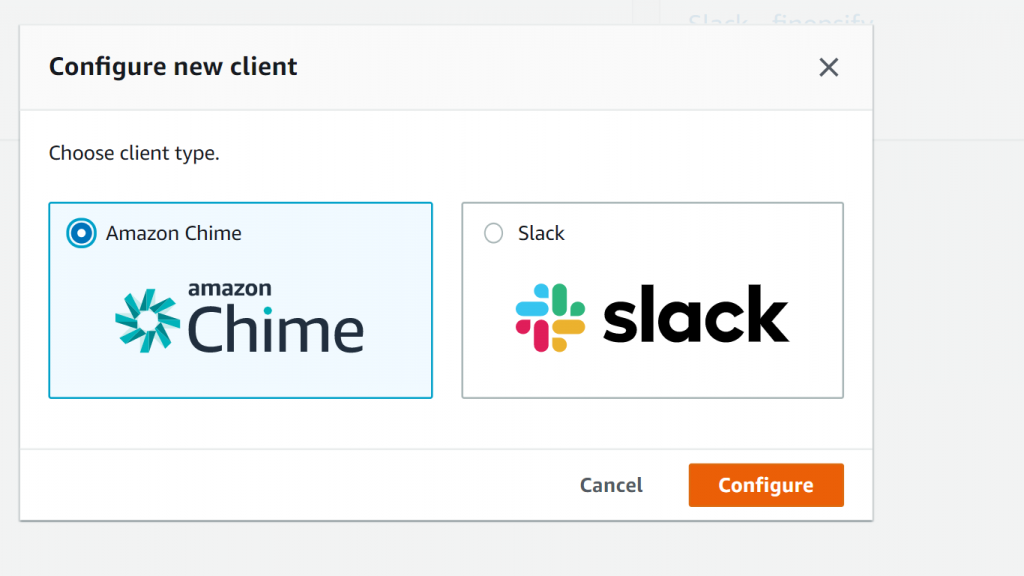
7. Click on the option Amazon Chime then click on Configure.

Configure Chime Webhooks - Amazon Chime Client

Configure Chime Webhooks – Amazon Chime Client


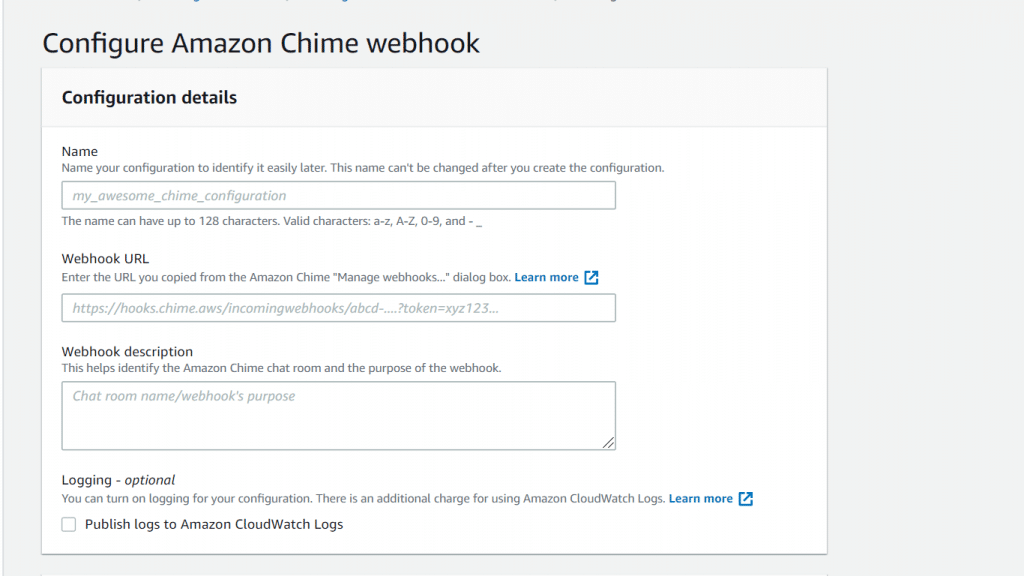
8. Below the section of Configuration details, fill in a particular name to give to your configuration. It has to be a unique name which hasn’t been used before in your account. The name may not get edited later.

Configure Chime Webhooks - Configuration Details

Configure Chime Webhooks – Configuration Details


9. In case you want to enable logging for this configuration, click on the option Send logs to CloudWatch.

Keep in mind

In case you choose to use CloudWatch Logs while you configure chime webhooks, you will be charged extra for this.

10. To configure chime webhooks, in the section of Configure Amazon Chime webhook, go over the below steps.

    • Start by pasting the webhook URL which you copy from Amazon Chime.
    • In the section of Webhook description, utilize the shown naming convention for the sake of describing what the webhook is for: Chat_room_name/Webhook_name. By doing so, you will be aided in associating Amazon Chime webhooks with their set AWS Chatbot configurations.

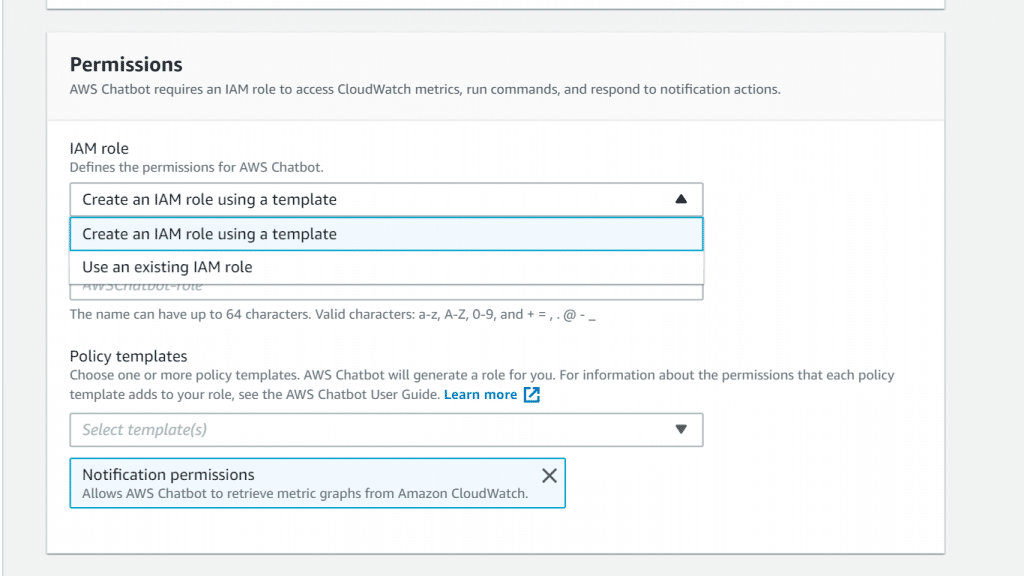
11. In the section of IAM permissions, specify the required IAM permissions for AWS Chatbot.

Configure Chime Webhooks - IAM Permissions

Configure Chime Webhooks – IAM Permissions


      • In the section of Role, click on the option Create a new role from template. In case you decide to utilize an already existing role, go ahead and pick it from the listed roles under IAM Role. If you’d like to utilize an existing IAM role, you may be required to start modifying it for being utilized with AWS Chatbot.
      • In the section of Policy templates, click on the option Notification permissions. It represents the IAM policy given by AWS Chatbot, which grants the required Read and List permissions for CloudWatch events, logs and alarms. Also, for Amazon SNS topics.
      • In the section of Role name, fill in a unique name having the following acceptable characters: A-Z, a-z, 0-9.

12. Start setting up the selected SNS topics in the section of sending notifications to the Amazon Chime webhook.

Configure Chime Webhooks - Notifications

Configure Chime Webhooks – Notifications


        • In the section of SNS Region, pick a specific AWS Region that hosts the SNS topics for the selected AWS Chatbot subscription.
        • In the section of SNS topic, pick a specific SNS topic for the selected client subscription. This chosen topic determines the content being sent to the Amazon Chime webhook. In case the region contains extra SNS topics, you may pick them from the same dropdown list.
        • In case you’d like to add to the notification subscription an SNS topic from a different Region, click on the option Add another Region.

13. Click on the option Configure.

The notifications that come from the supported services which publish to the selected SNS topics are now going to start showing up in the Amazon Chime chat room.

You may configure chime webhooks as much as required. Your selected SNS topics need to be configured as well in the services that you require to receive notifications in the section of.

Keep in mind

It is possible to get a Slack channel configured in the section of running commands to your account.

How to create a notebook instance

Create Notebook Instance - Featured Image

How to Create Notebook Instance in 3 Steps

How Create Notebook Instance on AWS

In order for you to create notebook instance using the SageMaker Console, follow the below steps:

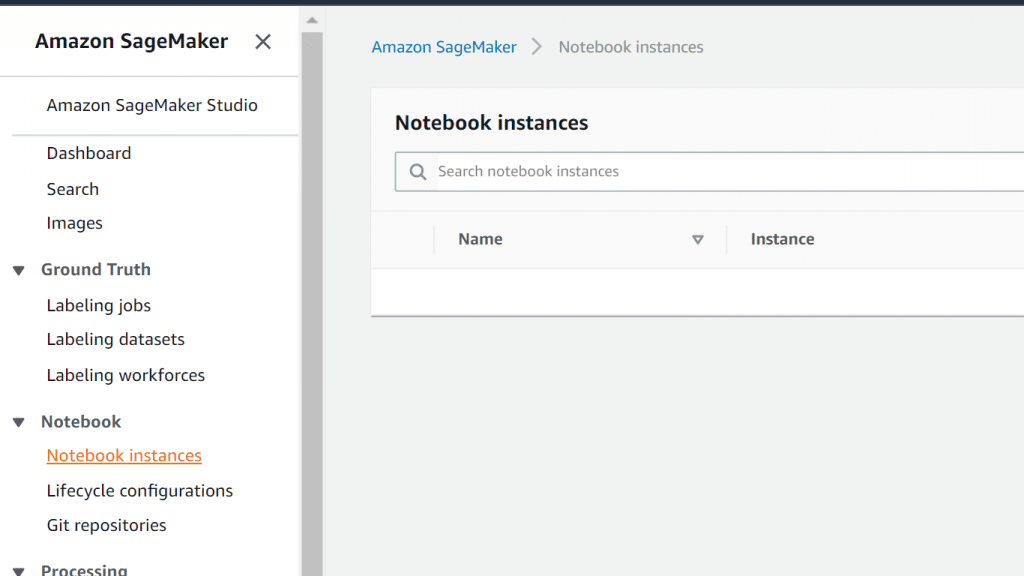
  1. Go straight to the SageMaker console using the following link https://console.aws.amazon.com/sagemaker/.
    Create Notebook Instance - Notebook Instances

    Create Notebook Instance – Notebook Instances


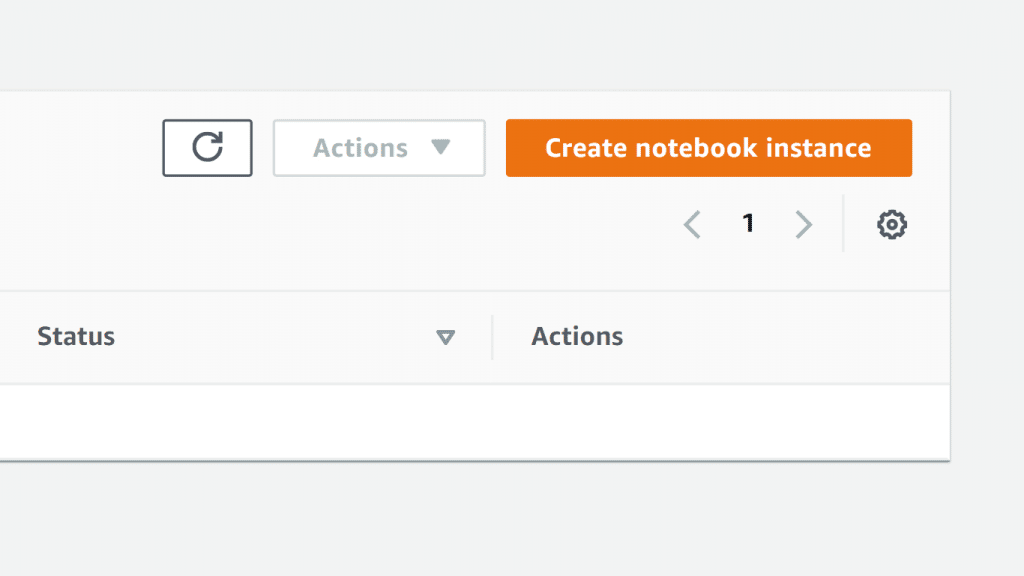
  2. Select Notebook instances, then click on Create notebook instance.
    Create Notebook Instance - Create Notebook Instance

    Create Notebook Instance – Create Notebook Instance


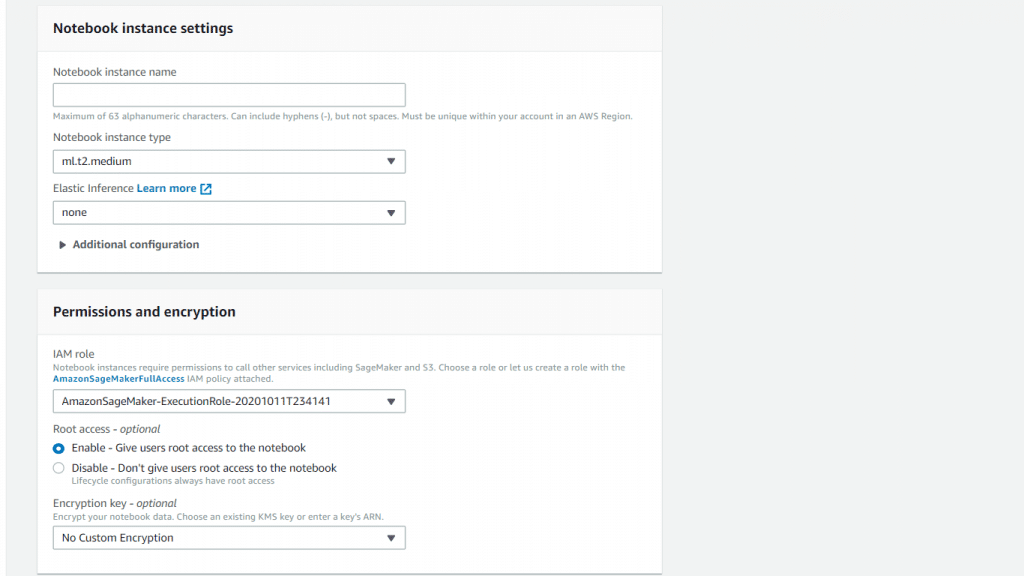
  3. From the page of Create notebook instance, fill in the below needed information:
    Create Notebook Instance - Notebook Instance Information

    Create Notebook Instance – Notebook Instance Information


    • In the section of Notebook instance name, fill in a unique name to give to your notebook instance.
    • In the section of Notebook instance type, select your required instance size which works best with your use case.
    • In the section of Elastic Inference, select one of the inference accelerator types in order to get it associated with the notebook instance in case you are aiming to conduct inferences from the notebook instance. Otherwise, select the option none.
    • You can optionally use Additional configuration for allowing expert users to create a shell script for running upon creating or starting the instance. This script (named lifecycle configuration script) may be utilized for the sake of specifying the notebook’s environment or performing different functions.
    • You can optionally use Additional configuration for setting the size (GB) of the ML storage volume attached to your select notebook instance. It is possible for you to select a size which ranges from 5 GB to 16,384 GB (1 GB increments). The volume may be utilized for the sake of cleaning up the training dataset or for storing validation or some data for a temporary period.
    • In the section of IAM role, pick to go with an already existing IAM role which includes the needed permissions for accessing SageMaker resources or just click on Create a new role. In case of clicking on Create a new role, a new IAM role will be created by SageMaker having the name AmazonSageMaker-ExecutionRole-YYYYMMDDTHHmmSS. Along with the role you will find attached the AWS managed policy AmazonSageMakerFullAccess. This role will give the needed permissions for providing the notebook instance with the ability to call SageMaker and S3.
    • In the section of Root access, you can click on Enable for enabling root access for every single notebook instance user. Otherwise, click on Disable for disabling root access for users. In case you choose to enable root access, every one of the notebook instance users will get administrator privileges and will be able to access as well as edit every available file that is on it.
    • You can optionally choose Encryption key to allow you to encrypt data on the ML storage volume attached to the notebook instance using a KMS key. In case you aim for storing sensitive data on the ML storage volume, take into consideration the encryption of the data.
    • You can optionally choose Network for allowing you to send your notebook instance into a VPC, which will add extra security and restrict access to resources in the VPC from sources located outside of the VPC.

Now, you are all done with the main process to create notebook instance, and you can head to add the optional settings if you’d like as shown below.

Create Notebook Instance - Notebook Instance Optional Settings

Create Notebook Instance – Notebook Instance Optional Settings


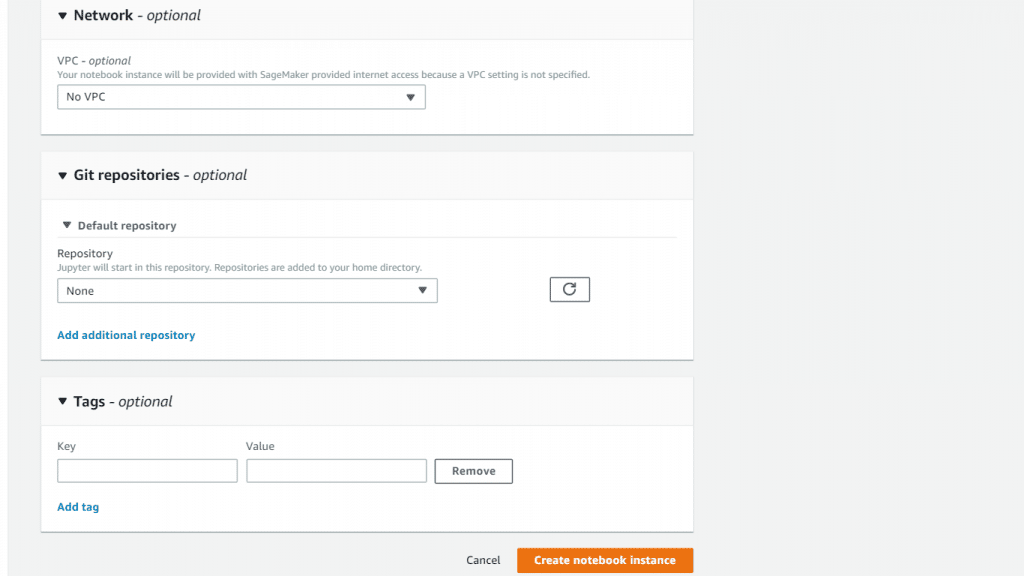
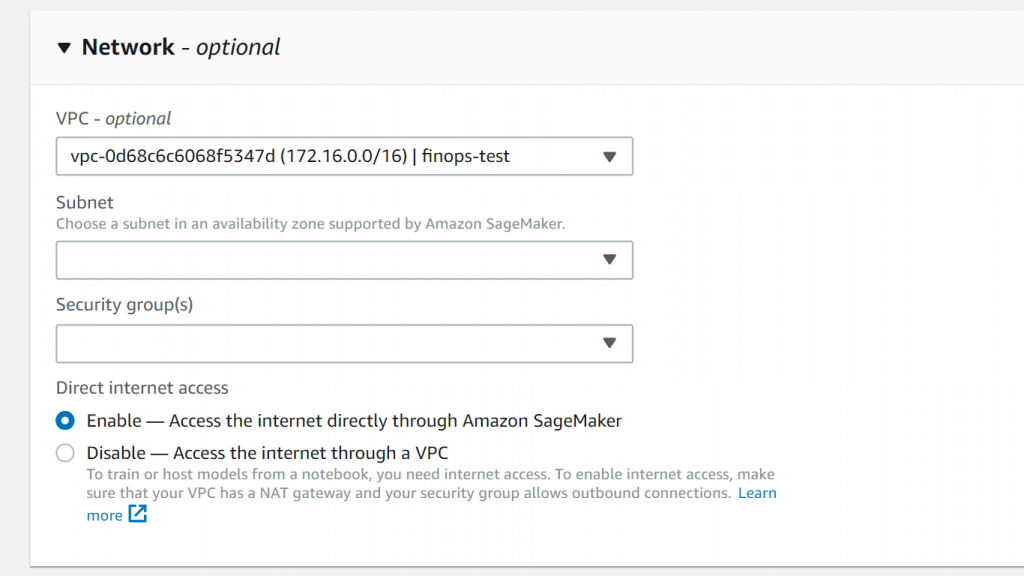
As part of the process for create notebook instance, follow the steps below to learn how to add this notebook instance to a VPC:

Create Notebook Instance - Notebook Instance Network Options

Create Notebook Instance – Notebook Instance Network Options

  1. Select the required VPC and a specific SubnetId.
  2. In the section of Security Group, select your VPC’s default security group.
  • In case you want to grant your notebook instance with internet access, you can enable direct internet access. For the section of Direct internet access, click on Enable. With internet access enabled, your notebook instance may get less secure.
  1. You can optionally associate Git repositories with the notebook instance, by simply clicking on a default repository and up to three additional repositories.
  2. You can also optionally add Tags as much as you need for your notebook instance. (Up to 50 Tags Maximum)
  3. Click on Create notebook instance.

After a bit, you will find that Amazon SageMaker is going to launch an ML compute instance which will be a notebook instance, and it will attach to itt an ML storage volume. This notebook instance will contain a preconfigured Jupyter notebook server as well as a couple of Anaconda libraries.

You can also click on Go straight to JupyterLab to head straight to the JupyterLab dashboard. This dashboard allows you to access the notebook instance and a couple of sample SageMaker notebooks which include total code walkthroughs. The provided walkthroughs will teach you the way SageMaker can be utilized for performing general machine learning tasks.

As soon as the console shows that the status of your notebook instance becomes InService, this means that it is now ready to be utilized. Click on Go straight to Jupyter which is located beside the notebook name in order to go straight to the classic Jupyter dashboard.


After you get the hang of how to create Notebook instance, it’s time to learn how you can access it:

For accessing your SageMaker notebook instances, go with a specific option of the ones listed below:

Utilize the console after you create notebook instance.

Click on Notebook instances. You can find your account’s notebook instances listed in the console. If you’d like to head to a notebook instance that includes a standard Jupyter interface, click on Go straight to Jupyter for the selected instance. If you’d like to head straight to a notebook instance having a JupyterLab interface, click on Go straight to JupyterLab for the selected instance.

Create Notebook Instance - Actions for Jupyter

Create Notebook Instance – Actions for Jupyter

Your sign-in credentials will be utilized by the console for sending to SageMaker a CreatePresignedNotebookInstanceUrl API request. Then, SageMaker will return your notebook instance’s URL, and the console will open a different browser tab and take you straight to the URL The Jupyter notebook dashboard.

Keep in Mind

This given URL from a call to CreatePresignedNotebookInstanceUrl will just stay available for a period of 5 minutes. In case you try to utilize the URL when the 5-minute limit ends, you will get sent to the Management Console sign-in page.

Utilize the API after you create notebook instance.

You can call the CreatePresignedNotebookInstanceUrl API to receive the URL for your notebook instance. After that, you may utilize the URL returned by the API in order to head straight to the notebook instance.

Go to the Jupyter notebook dashboard for the sake of creating and managing notebooks, as well as for writing code.

That is how simple it is to learn how to create notebook instance using the SageMaker Console. Now you are all set to work with notebook instances, so go on and have a blast with onboarding the SageMaker Studio!

See Also

Create AWS Endpoints