How Create Notebook Instance on AWS
In order for you to create notebook instance using the SageMaker Console, follow the below steps:
- Go straight to the SageMaker console using the following link https://console.aws.amazon.com/sagemaker/.
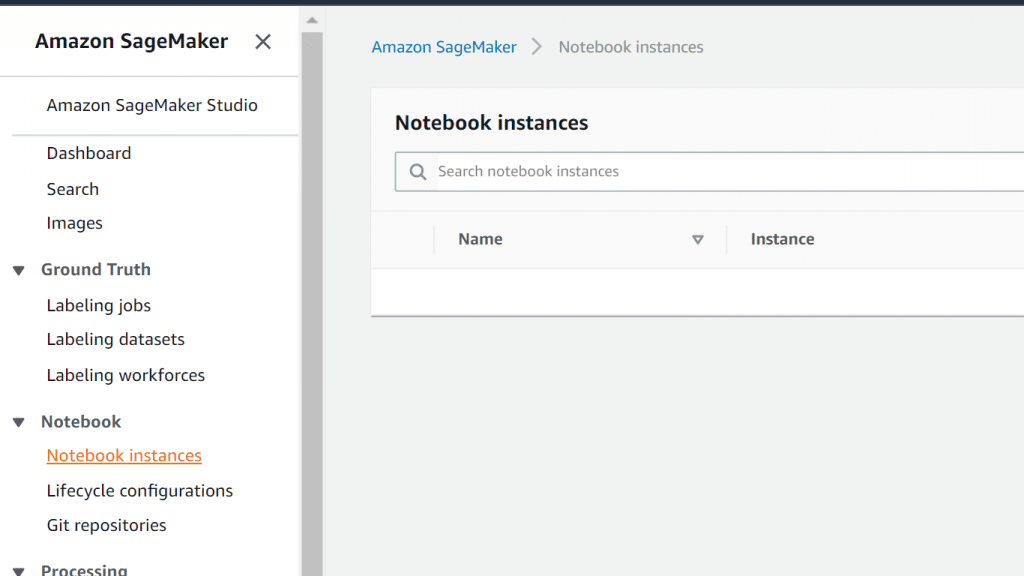
Create Notebook Instance – Notebook Instances
- Select Notebook instances, then click on Create notebook instance.
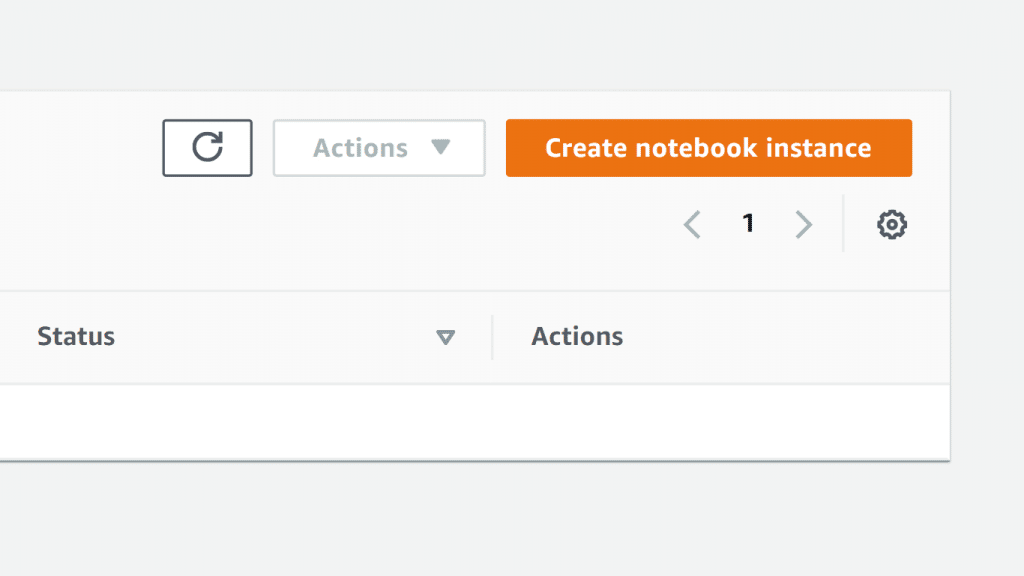
Create Notebook Instance – Create Notebook Instance
- From the page of Create notebook instance, fill in the below needed information:
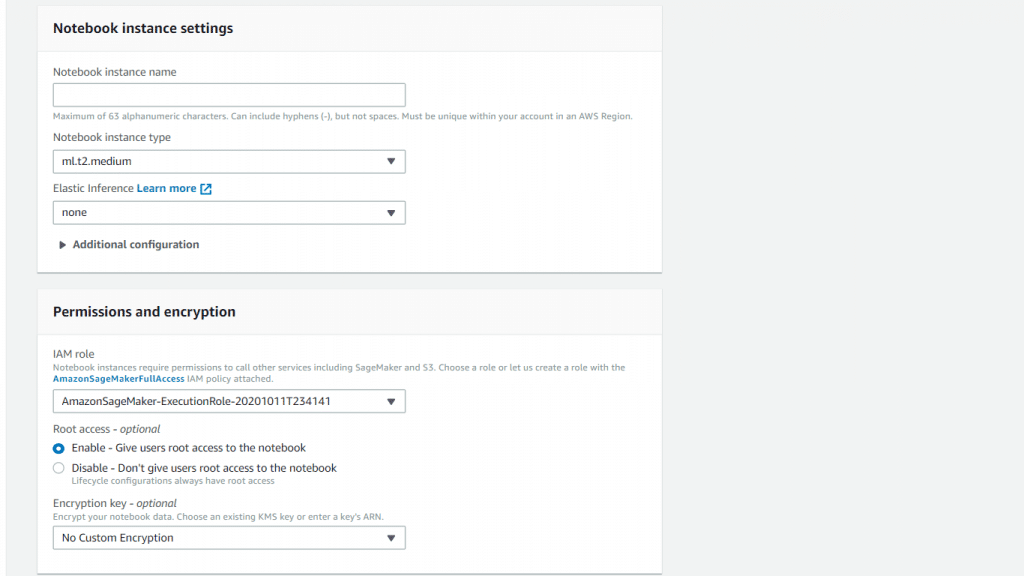
Create Notebook Instance – Notebook Instance Information
- In the section of Notebook instance name, fill in a unique name to give to your notebook instance.
- In the section of Notebook instance type, select your required instance size which works best with your use case.
- In the section of Elastic Inference, select one of the inference accelerator types in order to get it associated with the notebook instance in case you are aiming to conduct inferences from the notebook instance. Otherwise, select the option none.
- You can optionally use Additional configuration for allowing expert users to create a shell script for running upon creating or starting the instance. This script (named lifecycle configuration script) may be utilized for the sake of specifying the notebook’s environment or performing different functions.
- You can optionally use Additional configuration for setting the size (GB) of the ML storage volume attached to your select notebook instance. It is possible for you to select a size which ranges from 5 GB to 16,384 GB (1 GB increments). The volume may be utilized for the sake of cleaning up the training dataset or for storing validation or some data for a temporary period.
- In the section of IAM role, pick to go with an already existing IAM role which includes the needed permissions for accessing SageMaker resources or just click on Create a new role. In case of clicking on Create a new role, a new IAM role will be created by SageMaker having the name AmazonSageMaker-ExecutionRole-YYYYMMDDTHHmmSS. Along with the role you will find attached the AWS managed policy AmazonSageMakerFullAccess. This role will give the needed permissions for providing the notebook instance with the ability to call SageMaker and S3.
- In the section of Root access, you can click on Enable for enabling root access for every single notebook instance user. Otherwise, click on Disable for disabling root access for users. In case you choose to enable root access, every one of the notebook instance users will get administrator privileges and will be able to access as well as edit every available file that is on it.
- You can optionally choose Encryption key to allow you to encrypt data on the ML storage volume attached to the notebook instance using a KMS key. In case you aim for storing sensitive data on the ML storage volume, take into consideration the encryption of the data.
- You can optionally choose Network for allowing you to send your notebook instance into a VPC, which will add extra security and restrict access to resources in the VPC from sources located outside of the VPC.


Now, you are all done with the main process to create notebook instance, and you can head to add the optional settings if you’d like as shown below.

Create Notebook Instance – Notebook Instance Optional Settings
As part of the process for create notebook instance, follow the steps below to learn how to add this notebook instance to a VPC:

Create Notebook Instance – Notebook Instance Network Options
- Select the required VPC and a specific SubnetId.
- In the section of Security Group, select your VPC’s default security group.
- In case you want to grant your notebook instance with internet access, you can enable direct internet access. For the section of Direct internet access, click on Enable. With internet access enabled, your notebook instance may get less secure.
- You can optionally associate Git repositories with the notebook instance, by simply clicking on a default repository and up to three additional repositories.
- You can also optionally add Tags as much as you need for your notebook instance. (Up to 50 Tags Maximum)
- Click on Create notebook instance.
After a bit, you will find that Amazon SageMaker is going to launch an ML compute instance which will be a notebook instance, and it will attach to itt an ML storage volume. This notebook instance will contain a preconfigured Jupyter notebook server as well as a couple of Anaconda libraries.
You can also click on Go straight to JupyterLab to head straight to the JupyterLab dashboard. This dashboard allows you to access the notebook instance and a couple of sample SageMaker notebooks which include total code walkthroughs. The provided walkthroughs will teach you the way SageMaker can be utilized for performing general machine learning tasks.
As soon as the console shows that the status of your notebook instance becomes InService, this means that it is now ready to be utilized. Click on Go straight to Jupyter which is located beside the notebook name in order to go straight to the classic Jupyter dashboard.
After you get the hang of how to create Notebook instance, it’s time to learn how you can access it:
For accessing your SageMaker notebook instances, go with a specific option of the ones listed below:
Utilize the console after you create notebook instance.
Click on Notebook instances. You can find your account’s notebook instances listed in the console. If you’d like to head to a notebook instance that includes a standard Jupyter interface, click on Go straight to Jupyter for the selected instance. If you’d like to head straight to a notebook instance having a JupyterLab interface, click on Go straight to JupyterLab for the selected instance.
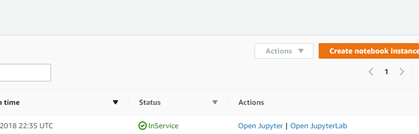
Create Notebook Instance – Actions for Jupyter
Your sign-in credentials will be utilized by the console for sending to SageMaker a CreatePresignedNotebookInstanceUrl API request. Then, SageMaker will return your notebook instance’s URL, and the console will open a different browser tab and take you straight to the URL The Jupyter notebook dashboard.
Keep in Mind
This given URL from a call to CreatePresignedNotebookInstanceUrl will just stay available for a period of 5 minutes. In case you try to utilize the URL when the 5-minute limit ends, you will get sent to the Management Console sign-in page.
Utilize the API after you create notebook instance.
You can call the CreatePresignedNotebookInstanceUrl API to receive the URL for your notebook instance. After that, you may utilize the URL returned by the API in order to head straight to the notebook instance.
Go to the Jupyter notebook dashboard for the sake of creating and managing notebooks, as well as for writing code.
That is how simple it is to learn how to create notebook instance using the SageMaker Console. Now you are all set to work with notebook instances, so go on and have a blast with onboarding the SageMaker Studio!
See Also