How to Onboard SageMaker Studio with Quick Start?
There are only specific available Regions that allow for the use of Amazon SageMaker Studio.
In this tutorial we will learn how to onboard to Amazon SageMaker Studio with the help of the Quick start option, that utilizes the AWS IAM authentication.
In order for you to onboard SageMaker Studio through Quick start, go over the below shown steps:
- Head straight to the SageMaker console.
- Click on Amazon SageMaker Studio from the upper left.
Onboard SageMaker Studio – Amazon SageMaker Studio
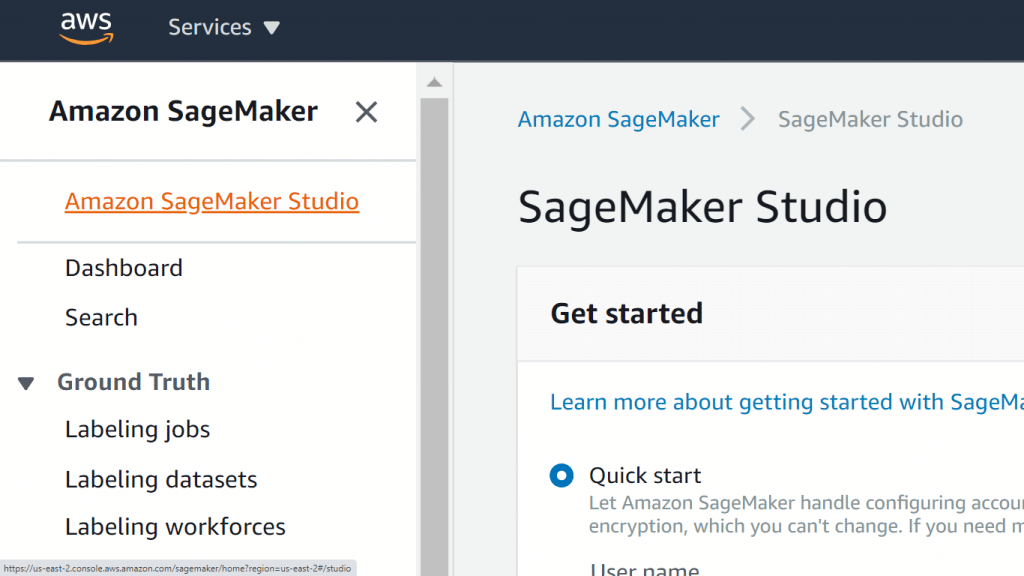
- From the page titled SageMaker Studio, For Get started, click on Quick start.
Onboard SageMaker Studio – Quick Start
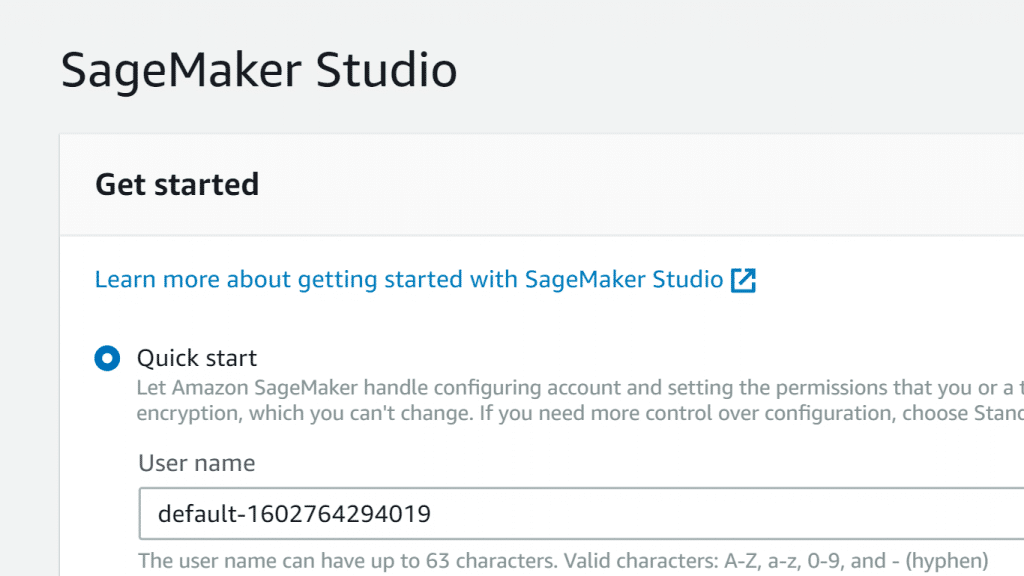
- In the section of User name, you can choose to leave the default name or start creating a new one. It can reach a maximum of 63 characters. The name can include the following characters: a-z, 0-9, A-Z, and hyphen.
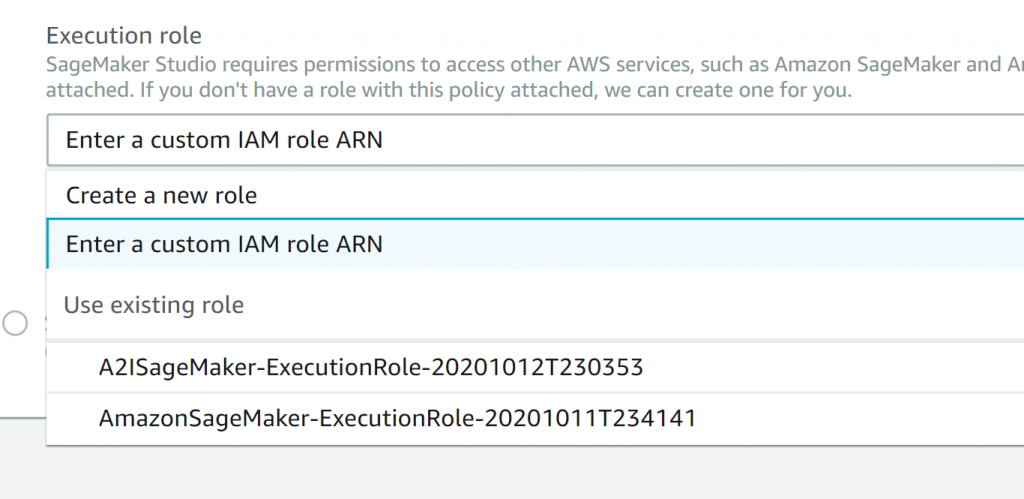
- In the section of Execution role, pick a specific option from the role selector.
Onboard SageMaker Studio – Enter IAM Role


In case you click on Enter a custom IAM role ARN, you need to make sure that this role has the AmazonSageMakerFullAccess policy attached to it.
In case you click on Create a new role, you will find that the Create an IAM role dialog is going to open:

Onboard SageMaker Studio – Create IAM Role
-
- In the section of S3 buckets you specify, enter additional S3 buckets which are accessible to your keep in mindbook users. When change your mind and you no longer want to add access to other buckets, click on None.
- Click on Create role. SageMaker is going to create a new IAM AmazonSageMaker-ExecutionPolicy role having the AmazonSageMakerFullAccess policy attached to it.
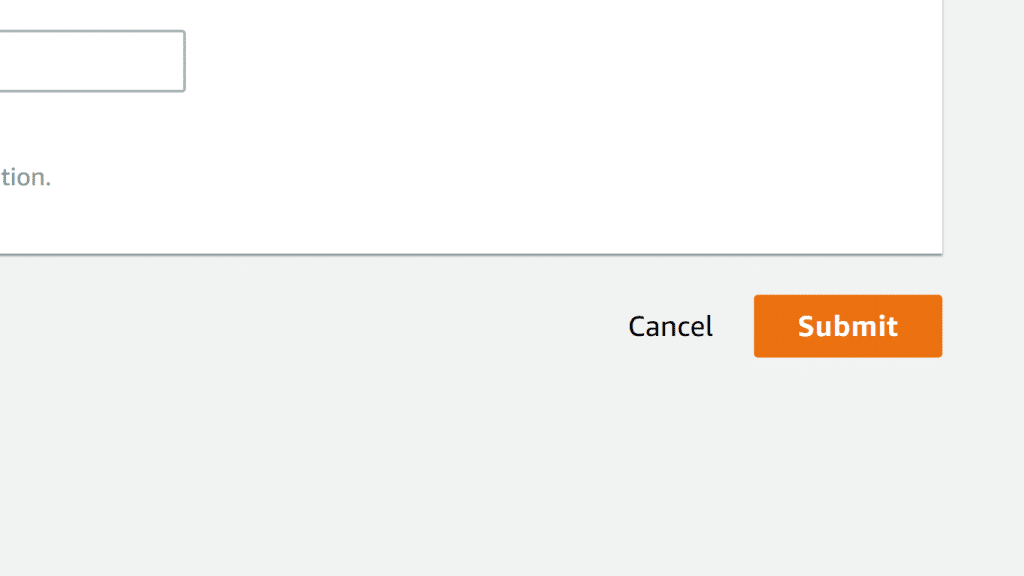
- Click on Submit.
Onboard SageMaker Studio – Submit Button

Keep in mind
In the case that you get an error message telling you that you are required to get a VPC created, follow the below 4 steps. You will go through this procedure as part of the SageMaker Studio onboarding steps upon selecting the option of Standard setup. You can find VPC information below the Network section.
- Select the VPC.
- Select to go with simply 1 or multiple subnets. In case of not specifying any subnets, all the available subnets in the VPC will be chosen.
- Choose which network access type you want.
- Public internet only: Non-EFS traffic will pass through a SageMaker managed VPC, with internet access. Traffic going between the domain and your EFS volume will be sent through the selected VPC.
- VPC only: Studio traffic goes into the selected VPC and subnets. There will not be any Internet access because it is disabled by default.
- Select which security groups you want. In case of selecting the option of Public internet only, this will be an optional step. However, in case of selecting the option of VPC only, then this step becomes obligatory.
After entering the VPC settings, carry on with the rest of the Quick Start Process.
On the SageMaker Studio Control Panel, for Studio Summary, wait until Status becomes Ready.
Upon the Status becoming Ready, your set user name will be enabled and selected. You will also find enabled the following: Add user and Delete user buttons, as well as the Open Studio link.
- Click on Open Studio. You will see that the Amazon SageMaker Studio loading page opens.
As soon as Studio opens you will be able to begin working on it.
After onboarding to SageMaker Studio, follow the below steps for accessing the Studio later.
For the sake of accessing Studio after you Onboard SageMaker Studio, follow the steps listed below:
- Go straight to the SageMaker console.
- Click on Amazon SageMaker Studio at the top left of the page.
- On the Amazon SageMaker Studio Control Panel, click on your user name and then select the option Open Studio.
For the sake of adding more users, after you Onboard SageMaker Studio go over the steps below:
- On the Amazon SageMaker Studio Control Panel, click on Add user.
- Go over steps 4 and 5 of the Quick Start procedure, “Onboarding the Studio through Quick start. “
- Click on Submit.
Now you are all set to go Onboard SageMaker Studio and start making some magic!
How to Delete SNS subscriptions