Create an AWS Outpost
Upon ordering Outpost capacity, you will be able to pick out from various Outpost configurations. Every configuration offers a mixture of EC2 instance types as well as EBS volumes.
What are the requirements before you create an AWS Outpost? (Prerequisites)
- First you should know that an Outpost site represents the physical location selected for AWS to start installing your Outpost equipment. Prior to ordering capacity, you will need to make sure that your site has all the needed requirements for AWS Outposts.
- You should already possess an AWS Enterprise Support plan.
Step One: How can you create an AWS Outpost?
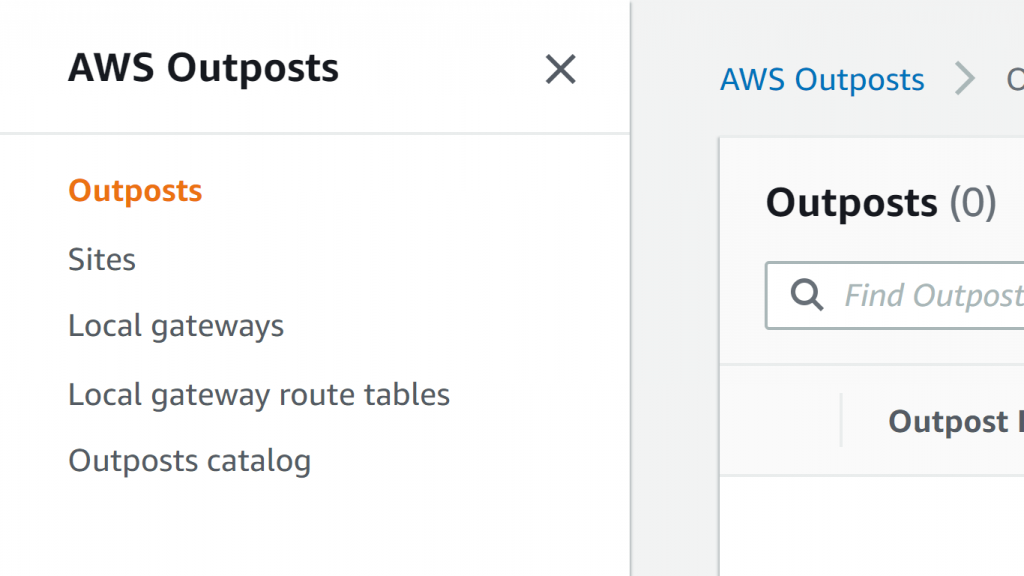
- Go straight to the AWS Outposts console using the following link https://console.aws.amazon.com/outposts/.
Create an AWS Outpost – Outposts console
- Choose Outposts from left navigation pane.
Create an AWS Outpost – Outposts section
- Click on Create Outpost.
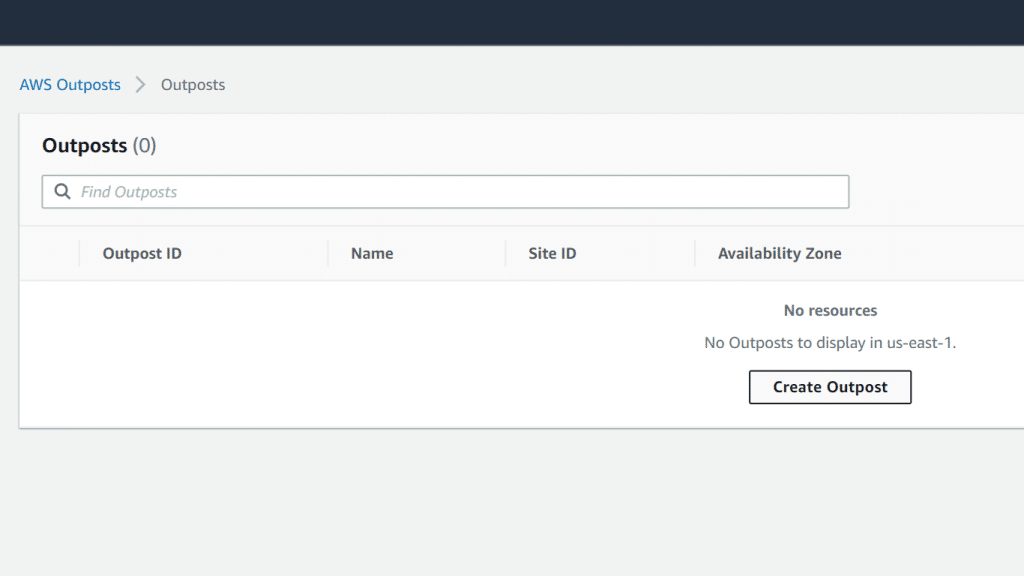
Create an AWS Outpost – Create Outpost
- Enter a Name and a Description.
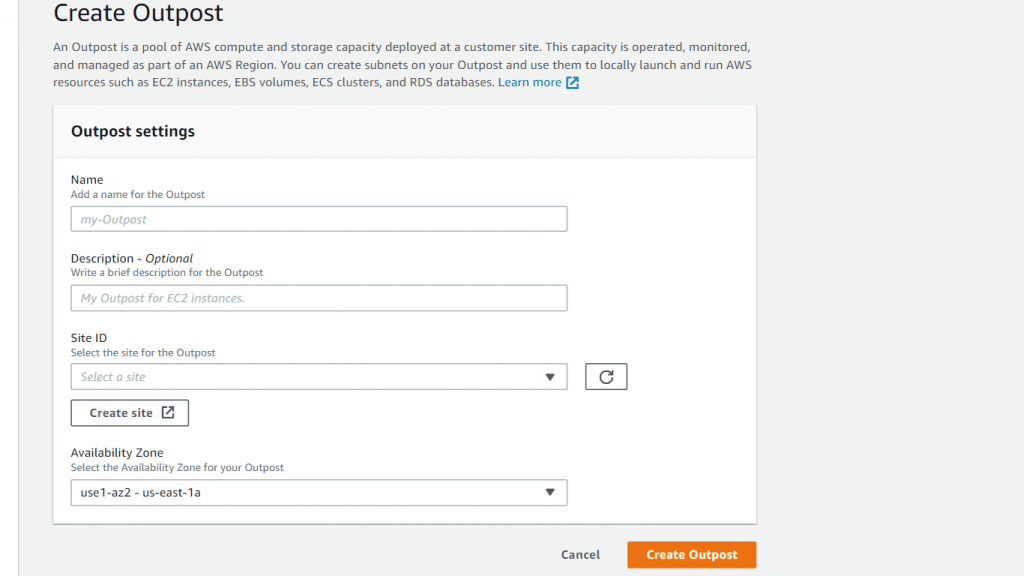
Create an AWS Outpost – Outposts settings
- For Site ID section, click on Create site. Finish then submit the form, and pick your newly created site.
- Pick an Availability Zone.
- Click on Create Outpost.


This is how quick and simple it is to create an AWS Outpost, and now carry on to learn how to start working with Outposts.
Step Two: How to order Outpost capacity after you create an AWS Outpost?
- Go straight to the AWS Outposts console using the following link https://console.aws.amazon.com/outposts/.
- From navigation pane, click on Outposts catalog, then go over the below steps:
- Pick a capacity configuration. In case the already available capacity configurations do not fulfill your requirements, it is possible for you instead to go with requesting a custom capacity configuration.
- Click on Place order.
- Pick your newly created Outpost.
- Click on Place order.
- With the AWS Outposts console, you will be able to view your order’s status. You will find that initially the status of your order is going to be set as order received. Within 3 business days, you will be contacted by an AWS representative. As soon as your order’s status becomes Order processing, you are going to get an email confirmation. In case more info is needed for the AWS installation team, you will be contacted by an AWS representative.
You can contact the AWS Support in case of having some questions regarding your order.
- As a final step to fulfilling your order, a date and time will be scheduled with you. Also, you are going to get a checklist of the items needed for verification or being provided prior to the installation. You will find the AWS installation team coming to your site the day you have scheduled the date and time. AWS team is going to start rolling the rack to the position which was identified and your electrician may then begin powering this rack. Network connectivity is going to be established by the team for the rack over the uplink which you have previously provided, then they will start configuring the capacity of the rack. The installation finishes as soon as you have confirmed that your Outpost’s EC2 and EBS capacities are available from your account.
After you create an AWS Outpost, how can you work with Outposts?
You are able to manage Outposts in a manual manner for the sake of completing tasks for example: to add tags, or update names and descriptions.
It is possible for you to tag your Outposts for the sake of better identifying them or categorizing them in association with your organization’s requirements.
- Go straight to the AWS Outposts console using the following link https://console.aws.amazon.com/outposts/.
- From navigation pane, click on Outposts.
- Pick your needed Outpost, then click on Actions, Manage tags.
- Now, you can add or remove a tag if you want.
For adding a tag, click on Add new tag then go through the below:
-
- In the section of Key, fill in a key name.
- In the section of Value, fill in a key value.
For removing a tag, click on Remove which is located at the right side of the tag’s Key and Value.
- Click on Save changes.
Managing Outpost name and description after you create an AWS Outpost
The Outpost’s name and description can be changed as needed.
- Go straight to the AWS Outposts console using the following link https://console.aws.amazon.com/outposts/.
- From navigation pane, click on Outposts.
- Pick the needed Outpost, then click on Actions, Edit Outpost.
- Change the name as well as the description as required.
In the section of Name, fill in a name.
In the section of Description, fill in a description.
- Click on Save changes.
Viewing Outpost details after you create an AWS Outpost
Outpost details may be viewed through either the Outposts console, or the CLI;
How to view Outpost details using the AWS Outposts console?
- Go straight to the AWS Outposts console using the following link https://console.aws.amazon.com/outposts/.
- From navigation pane, click on Outposts.
- Pick the needed Outpost, then click on Actions, View details.
How to view Outpost details using the AWS CLI?
You can use the GetOutpost CLI command to view details when you create an AWS Outpost.