Configure Chime Webhooks
In order for you to Configure Chime Webhooks, you will need to start by Setting up AWS Chatbot with Amazon Chime:
To be able to set up AWS Chatbot for Amazon Chime, you must copy the webhook URL provided for your team’s chat room from Amazon Chime.
What must be done prior to going forwards with how to configure chime webhooks?
You will need to be an admin of an Amazon Chime chat room. Also, you must have the possibility to be able to manage webhooks.
To configure Chime Webhooks for your Amazon Chime client, go over the below listed steps:
- Go to Amazon Chime.
- In the section of Amazon Chime, pick a specific chat room which you’d like to set up to receive notifications through AWS Chatbot.
- Click on the Room settings icon located at the upper right, then click on the option Manage Webhooks and Bots.
Amazon Chime will show you the webhooks associated with the chat room.
Keep in mind
It is possible to get various webhooks in just one Amazon Chime chat room.
4. For the selected webhook, click on the option Copy URL then click on Done.
In case you would like to create a new webhook for the chat room, click on the option Add webhook. Fill in the Name field with a specific name to give to the webhook, then click on the option Create. Now, carry on to learn how to configure chime webhooks.
5. Go to the AWS Chatbot console using the following link https://console.aws.amazon.com/chatbot/.
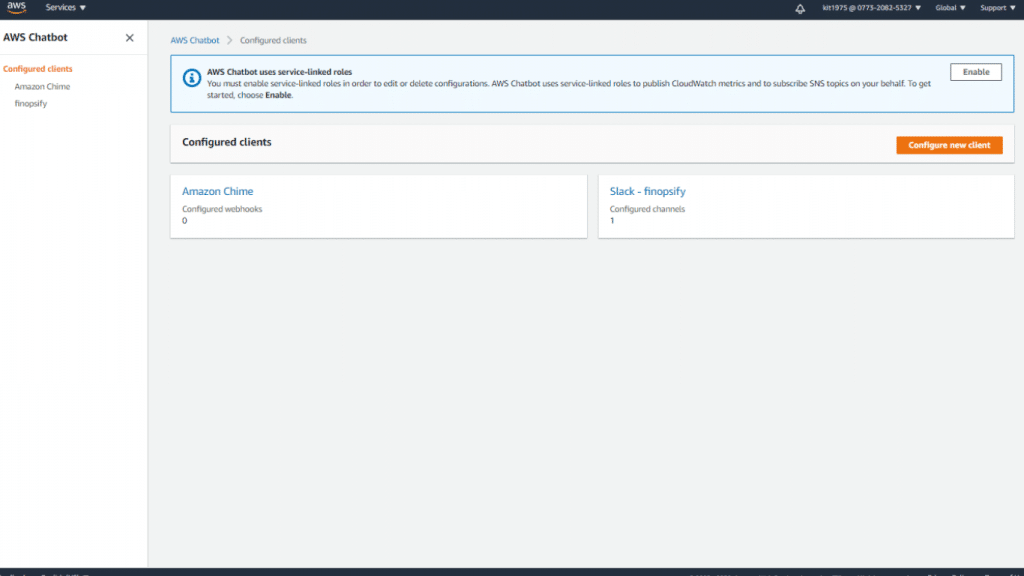
Configure Chime Webhooks – AWS Chatbot
6. Click on the option Configure new client.
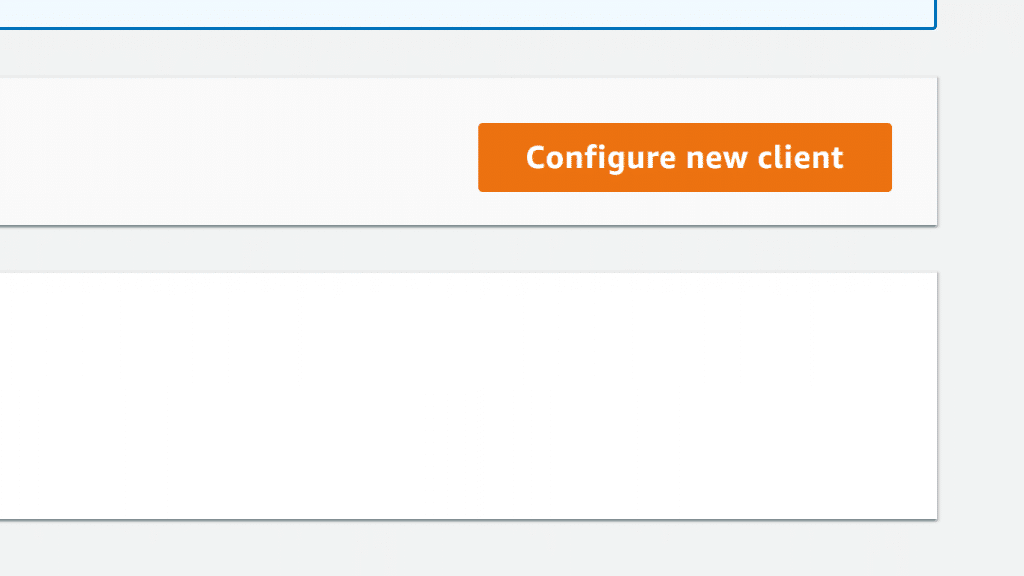
Configure Chime Webhooks – Configure New Client
7. Click on the option Amazon Chime then click on Configure.
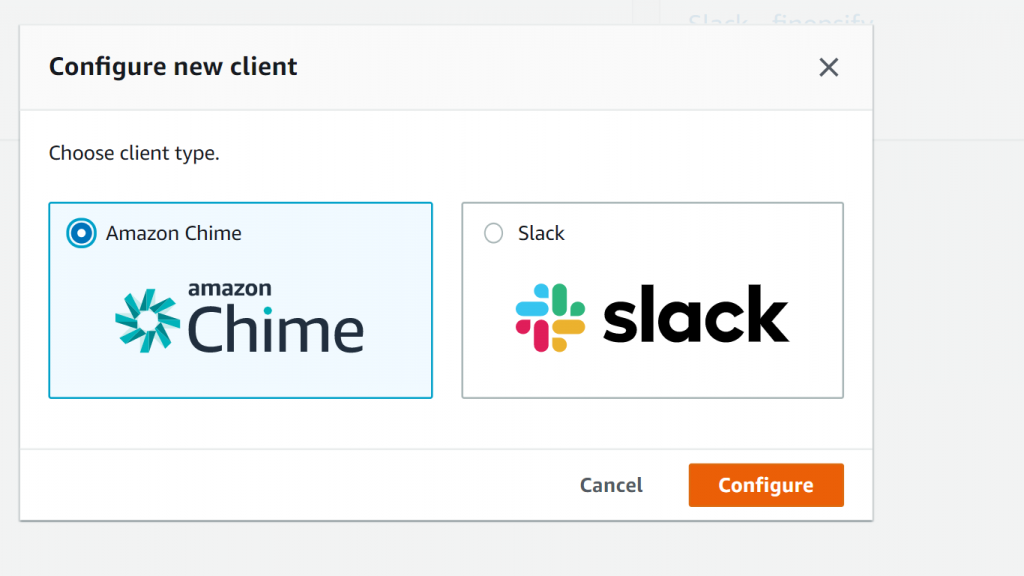
Configure Chime Webhooks – Amazon Chime Client
8. Below the section of Configuration details, fill in a particular name to give to your configuration. It has to be a unique name which hasn’t been used before in your account. The name may not get edited later.
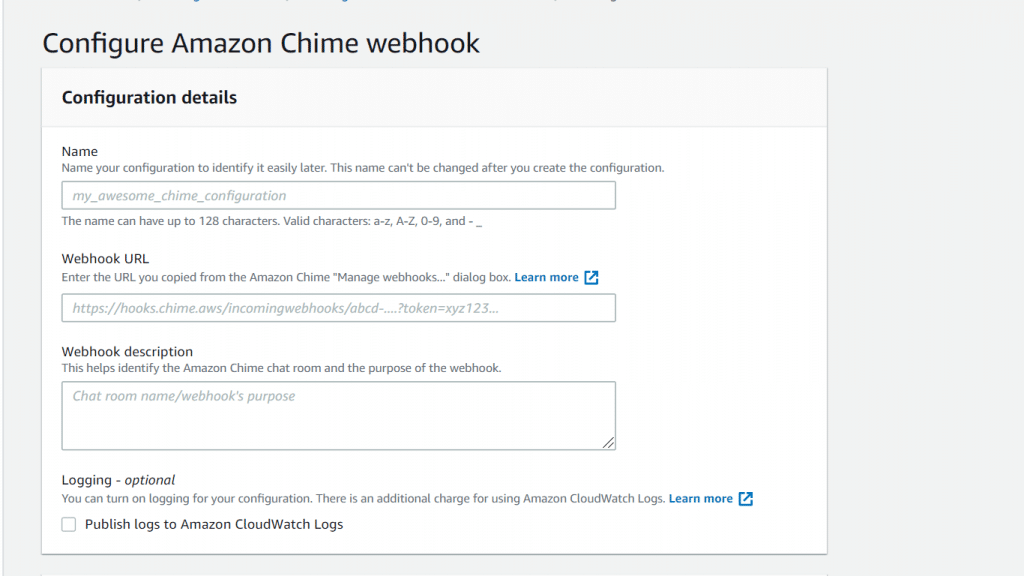
Configure Chime Webhooks – Configuration Details
9. In case you want to enable logging for this configuration, click on the option Send logs to CloudWatch.
Keep in mind
In case you choose to use CloudWatch Logs while you configure chime webhooks, you will be charged extra for this.
10. To configure chime webhooks, in the section of Configure Amazon Chime webhook, go over the below steps.
-
- Start by pasting the webhook URL which you copy from Amazon Chime.
- In the section of Webhook description, utilize the shown naming convention for the sake of describing what the webhook is for: Chat_room_name/Webhook_name. By doing so, you will be aided in associating Amazon Chime webhooks with their set AWS Chatbot configurations.
11. In the section of IAM permissions, specify the required IAM permissions for AWS Chatbot.
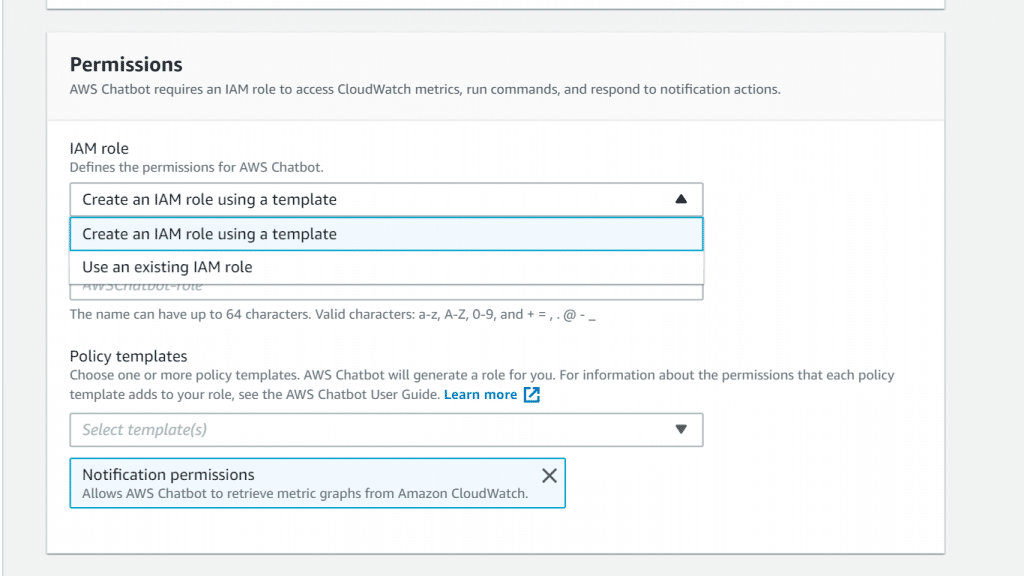
Configure Chime Webhooks – IAM Permissions
-
-
- In the section of Role, click on the option Create a new role from template. In case you decide to utilize an already existing role, go ahead and pick it from the listed roles under IAM Role. If you’d like to utilize an existing IAM role, you may be required to start modifying it for being utilized with AWS Chatbot.
- In the section of Policy templates, click on the option Notification permissions. It represents the IAM policy given by AWS Chatbot, which grants the required Read and List permissions for CloudWatch events, logs and alarms. Also, for Amazon SNS topics.
- In the section of Role name, fill in a unique name having the following acceptable characters: A-Z, a-z, 0-9.
-
12. Start setting up the selected SNS topics in the section of sending notifications to the Amazon Chime webhook.
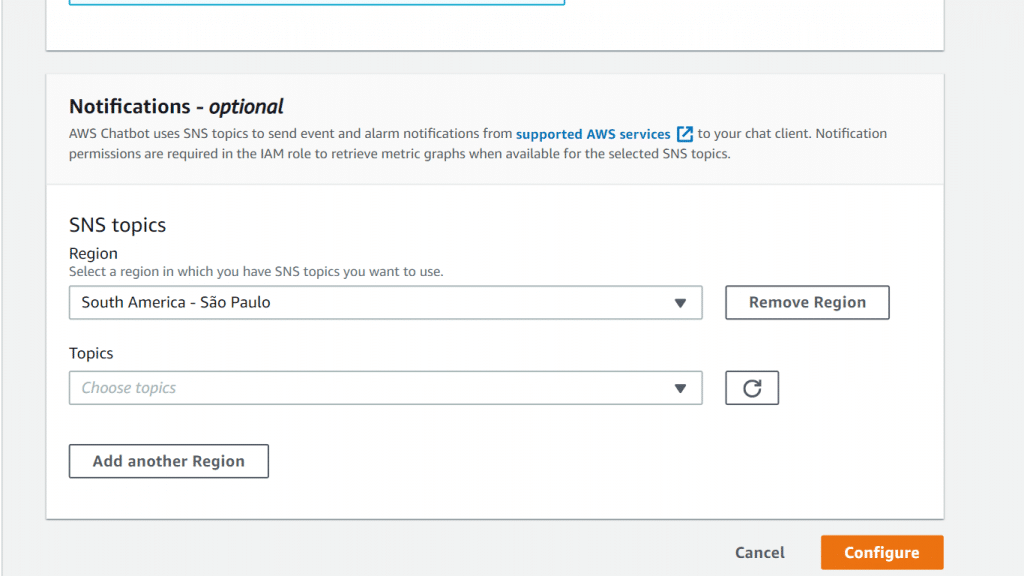
Configure Chime Webhooks – Notifications
-
-
-
- In the section of SNS Region, pick a specific AWS Region that hosts the SNS topics for the selected AWS Chatbot subscription.
- In the section of SNS topic, pick a specific SNS topic for the selected client subscription. This chosen topic determines the content being sent to the Amazon Chime webhook. In case the region contains extra SNS topics, you may pick them from the same dropdown list.
- In case you’d like to add to the notification subscription an SNS topic from a different Region, click on the option Add another Region.
-
-
13. Click on the option Configure.
The notifications that come from the supported services which publish to the selected SNS topics are now going to start showing up in the Amazon Chime chat room.
You may configure chime webhooks as much as required. Your selected SNS topics need to be configured as well in the services that you require to receive notifications in the section of.
Keep in mind
It is possible to get a Slack channel configured in the section of running commands to your account.