AWS SageMaker: Create A Model
To create a model through the AWS Console, go over the below steps:
But first, you may ask why do you need to create a Model for SageMaker?
A SageMaker Model refers to the custom inferencing module which is made up of two important parts: custom model and docker image that has the custom code.
Your model must get hosted in one of your S3 buckets and it is highly important that it be a “tar.gz” type of file which contains a “.hd5” type of file. So, let’s say that you have a model with a name “final_fifa_2020_v5.hd5”, you will need to have a “final_fifa_2020_v5.tar.gz” located in the chosen S3 bucket which includes your model file.
Why is this necessary when you create a model?
It is necessary since this is the way that SageMaker is built: In order for it to read the specified file, you must first untar it then copy this file into the “/opt/ml/model/” directory.
In case you want to create a model through the AWS console GUI, you will find this to be a very easy process.
- Sign in to your AWS account and pick your desired region.
- Head straight to Amazon SageMaker console using the following link https://console.aws.amazon.com/sagemaker/home (Or through using the Services menu and searching for Amazon SageMaker).
Because in this article we aim to learn how we can build our own inferencing model, we should for now ignore the Ground Truth, Notebook, Processing and Training sections, and jump directly to the Inference section.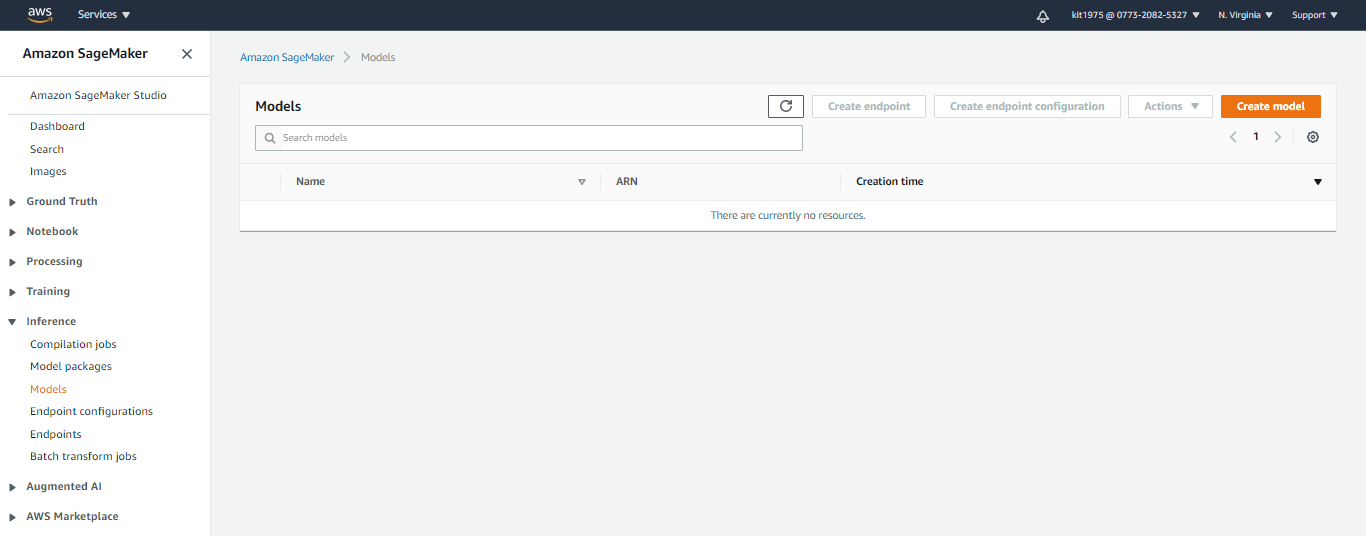
- From below the Inference section, select the option Models so that you get sent to the SageMaker models view. Noting will be shown in the list in case you have no models created before.
- Pick the Create model button which is located in the upper right corner.
- At this point you will need to supply the necessary parameters for creating a model.
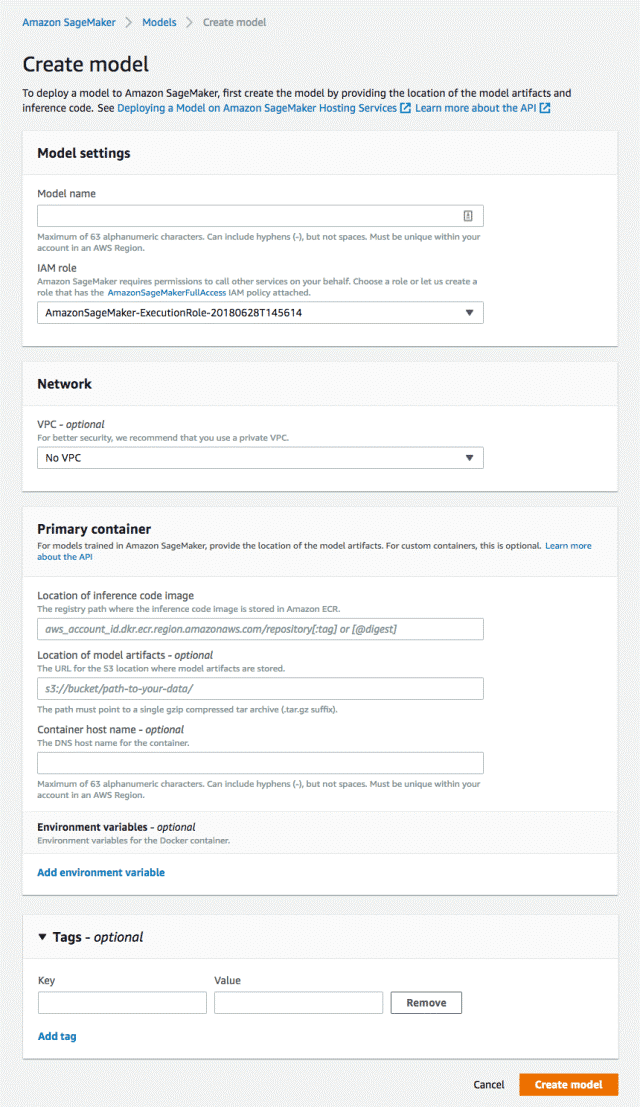
Create A Model – Create Model Settings Page


Go over what you need to do for each of the below needed parameters.
- First: Model Settings
- Model Name
You simply have to enter a unique name for your new model. - IAM Role
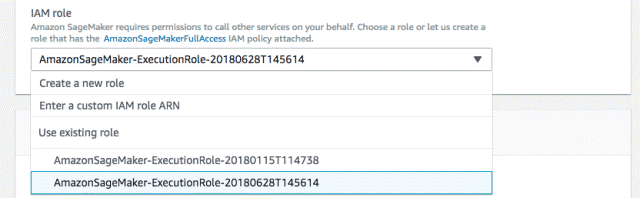
Create A Model – Select Existing IAM Role
In this section you will have to specify the IAM role you want to use for operating this particular model. In case you have previously created roles, you may select a specific one from the provided list. However, it is preferably better if you go ahead with creating a new one for every model.
- Model Name

In case you click on Create a new role, you will see a pop-up window which will allow you to start configuring your new role.

Create A Model – Create an IAM Role
You will find that it’s possible for you to restrict the role to just one specific S3 bucket. You can either choose to enter the bucket name where you have the custom model hosted in, or any other S3 bucket or simply none at all.
- Second: Network
- VPC (Virtual Private Cloud)
In case you have a VPC configured that you’d like to utilize with this model, you may choose it. In case you’d like not to do so, simple leave the network section as it is.
- VPC (Virtual Private Cloud)
- Third: Primary Container
In this section you get to enter the details required for the custom docker image as well as which model to be used.
-Location of inference code image
This section refers to your docker image’s ECS name in the AWS ECR. For getting your image ID, head straight to ECS using the Services menu then click on Repositories which is located below Amazon ECR on the left panel.
Your image ID should be similar to the one shown below:
account_id.dkr.ecr.eu-west-1.amazonaws.com/final_fifa_2020:1.0
And the “0” represents the docker image’s tag which will be deployed using SageMaker.
-Location of model artifacts (optional)
This section represents your custom model’s location, which mostly is an S3 link.
This link may be copied from your S3 bucket, such as follows:

Create A Model – S3 Bucket Link
When you create a model, you will need to copy this link then paste it to be your location. However, you must be certain that the file type is “tar.gz” and that it includes the model “.hd5” file having the exact file name.
-Container hostname (optional)
In case you’d like to set a different DNS, this can be done in this section, but it may be ignored because it is optional.
- Fourth: Tags
Here you can set tags according to what you want to search for. This will help you in finding your model easily and it will aid you for billing purposes, in the case that you already have created a lot of models.
- Upon entering all the required information, to create a model, click on the button Create model and watch as your model gets created.
This is how simple it would be for you to start using Amazon SageMaker in order to create a model, then set off with your journey using the SageMaker Studio.
How to configure a new client on AWS