AWS RDS Parameter Group - Featured Image

How to Manage Your AWS RDS Parameter Group

AWS RDS Parameter Group


How to Create an AWS RDS Parameter Group?

It is possible to start creating a new DB parameter group with the help of the AWS Management Console.

Using the Console

For the sake of creating an AWS RDS parameter group, follow the below steps:

  1. Login to the AWS Management Console. Then, head straight to the Amazon RDS console using the following link https://console.aws.amazon.com/rds/.
  2. From navigation pane, click on the section of Parameter groups.
    AWS RDS Parameter Group - Parameter Groups Section

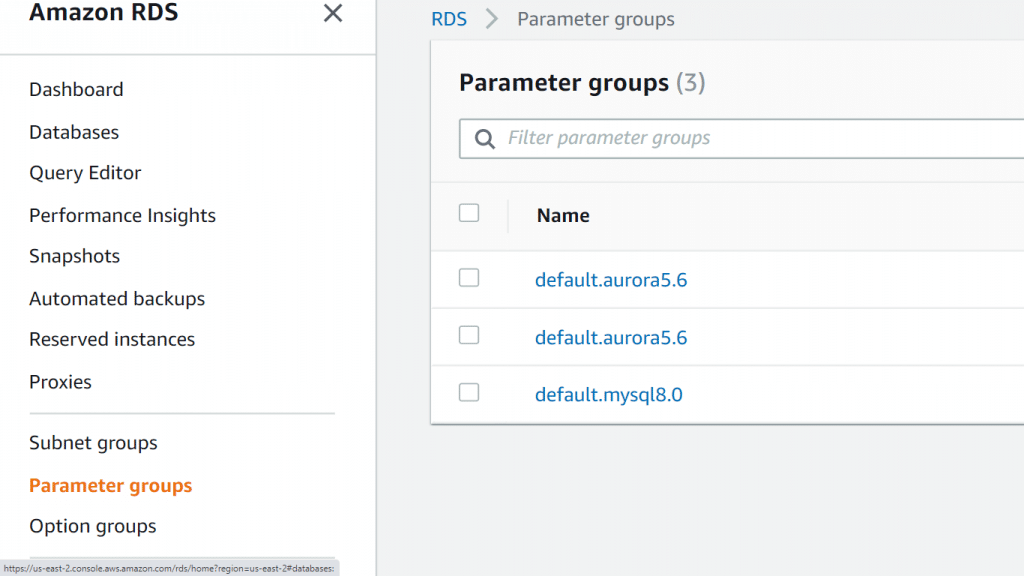
    AWS RDS Parameter Group – Parameter Groups Section


  3. Click on the option Create parameter group.

You will now see the Create parameter group window.

AWS RDS Parameter Group - Create Parameter Group

AWS RDS Parameter Group – Create Parameter Group

  1. From the list of Parameter group family, choose a specific DB parameter group family.
  2. From the list called Type, choose DB Parameter Group.
  3. From the box called Group name, type in the new DB parameter group’s name.
  4. From the box called Description, type in a particular description for your new DB parameter group.
  5. Finally, when you’re done click on the option Create.


How to Modify parameters in an AWS RDS Parameter Group?

It is possible to modify parameter values in a customer-created DB parameter group; the parameter values in a default DB parameter group may not be changed at all. Any change you perform to parameters that are found in a customer-created DB parameter group will get applied to every single DB instance associated with this DB parameter group.

Changes to a few parameters get directly applied to the DB instance with no reboot. Some other parameters get their changes applied merely when the DB instance finishes its reboot. On the RDS console you are capable of checking the status of the DB parameter group which is associated with a specific DB instance using the Configuration tab. For instance, in case the DB instance was not utilizing the latest changes to its associated DB parameter group, you will find on the RDS console the DB parameter group having a “pending-reboot” as its status. For the sake of adding the most recent parameter changes to that DB instance, you will need to start rebooting it manually.

AWS RDS Parameter Group - Configuration Tab

AWS RDS Parameter Group – Configuration Tab

Using the Console

In order for you to modify an AWS RDS parameter group, go through the below steps:

  1. Login to the AWS Management Console. Then, head straight to the Amazon RDS console using the following link https://console.aws.amazon.com/rds/.
  2. From navigation pane, click on the option Parameter groups.
  3. From the listed parameter groups, select which parameter group you’d like to modify.

    AWS RDS Parameter Group - Edit Parameter Group

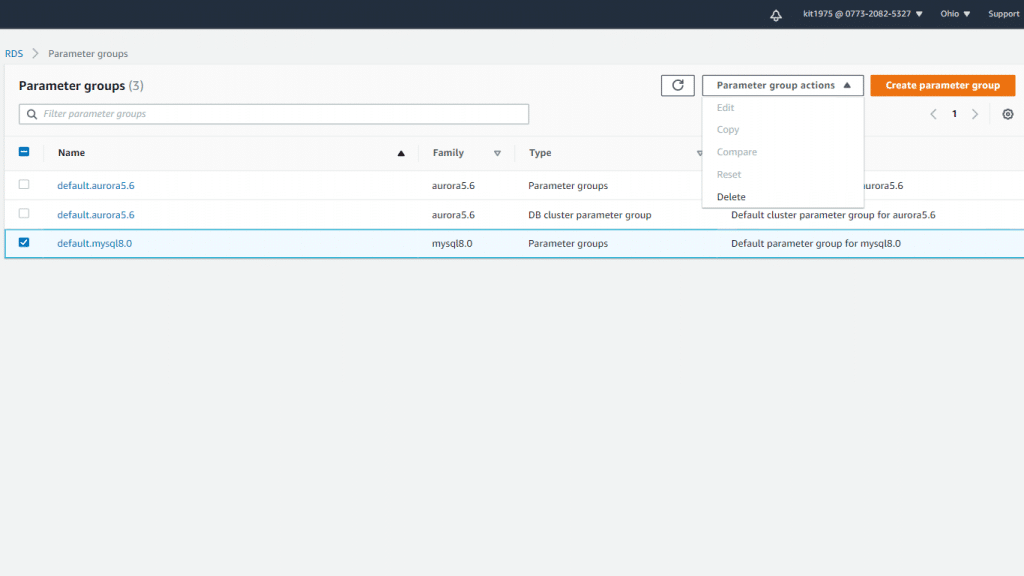
    AWS RDS Parameter Group – Edit Parameter Group

  4. In the section of Parameter group actions, click on the option Edit.
  5. Start making changes to the values of the parameters which you’d like to modify. It is possible to scroll through the available parameters through the arrow keys located at the dialog box’s upper right.

You will not be able to change values in a default parameter group.

  1. Click on the option Save changes when you’re done.


How to Copy an AWS RDS Parameter Group?

Using the Console

For the sake of copying a DB parameter group, follow the below listed steps:

  1. Login to the AWS Management Console. Then, head straight to the Amazon RDS console using the following link https://console.aws.amazon.com/rds/.
  2. From navigation pane, click on the option Parameter groups.
  3. From the list, select the needed custom parameter group for copying it.
  4. In the section of Parameter group actions, click on the option Copy.
  5. For New DB parameter group identifier, fill in a specific name for your new parameter group.
  6. For Description, fill in a fitting description for your new parameter group.
  7. Click on the option Copy.


How to List AWS RDS Parameter Groups?

You are capable of listing all the DB parameter groups that you’ve previously created for your AWS account.

Using the Console

For the sake of listing every single DB parameter group found for an AWS account, go through the below steps:

  1. Login to the AWS Management Console. Then, head straight to the Amazon RDS console using the following link https://console.aws.amazon.com/rds/.
  2. From navigation pane, click on the option Parameter groups.

You will directly see the DB parameter groups displayed in a list.


How to View parameter values for an AWS RDS Parameter Group?

It is possible for you to get a list of every single parameter in a DB parameter group as well as their values.

Using the Console

For the sake of viewing the parameter values for a DB parameter group, go over the below steps:

  1. Login to the AWS Management Console. Then, head straight to the Amazon RDS console using the following link https://console.aws.amazon.com/rds/.
  2. From navigation pane, click on the option Parameter groups.

You will find the DB parameter groups shown in a list.

  1. Select the name of which parameter group you’d like to check out its list of parameters.


How to Compare AWS RDS Parameter Groups?

It is possible to utilize the AWS Management Console for the sake of viewing the differences between 2 parameter groups for the exact same version and same DB engine.

For comparing 2 parameter groups, follow the below steps:

  1. Login to the AWS Management Console. Then, head straight to the Amazon RDS console using the following link https://console.aws.amazon.com/rds/.
  2. From navigation pane, click on the option Parameter groups.
  3. Out of the list, select the two parameter groups which you’d like to compare.
  4. In the section of Parameter group actions, click on the option Compare.

Keep in mind

In case the chosen items weren’t equivalent, it’s not possible for you to click on the option Compare.

You may also like

AWS RDS Snapshot Pricing

What are the DB parameter values?

It’s possible to specify the value for a DB parameter to be whichever one of the below:

  • Constant integer
  • Parameter formula
  • Constant string character
  • Log expression
  • Parameter function


What are DB parameter formulas?

They represent an expression which resolves to an Boolean value or an integer value, and this expression gets enclosed in braces as follows: {}. It is possible for you to specify formulas for a DB parameter value or an argument to a DB parameter function.


The Syntax is as follows:


{FormulaVariable}

{FormulaVariable*Integer}

{FormulaVariable*Integer/Integer}

{FormulaVariable/Integer}

You can learn more about AWS RDS Instance Pricing and how they operate.

AWS RDS Option Group - Featured Image

How to Manage Your AWS RDS Option Group

AWS RDS Option Group

How to Create an AWS RDS Option Group?

Using the Console

You can create an AWS RDS Option Group through the AWS Management Console.

To create a new option group through the console, follow the below steps:

  1. Log in to the AWS Management Console. Then, head straight to the Amazon RDS console using the following link https://console.aws.amazon.com/rds/.
  2. From the navigation pane, click on the section of Option groups.
    AWS RDS Option Group - Option Groups

    AWS RDS Option Group – Option Groups


  3. Click on the option Create group.

From the Create option group window, go through the below process:

AWS RDS Option Group - Create Option Group

AWS RDS Option Group – Create Option Group


  1. In the section of Name, fill in a name for the option group that is unique within your AWS account. The name can contain only letters, digits, and hyphens.
  2. In the section of Description, fill in a short description for the option group. It will be utilized for display purposes.
  3. In the section of Engine, select which DB engine you’d like to go with.
  4. In the section of Major engine version, select which major version of the DB engine you’d like to go with.
  5. To go further, click on the option Create. To cancel the operation, click on the option Cancel.

How to Copy an AWS RDS Option Group?

Keep in mind

It’s not possible for you to copy an option group to another AWS Region.

Using the AWS CLI

For the sake of copying an option group, utilize the AWS CLI copy-option-group command. Add the below needed options:

--source-option-group-identifier

--target-option-group-identifier

--target-option-group-description
Here is an Example;

Below is an example of creating an option group having the name new-option-group, and it’s a local copy of the option group my-option-group.

Unix, Linux, or macOS:

aws rds copy-option-group \

--source-option-group-identifier my-option-group \

--target-option-group-identifier new-option-group \

--target-option-group-description "This will be my new option group"

Windows:

aws rds copy-option-group ^

--source-option-group-identifier my-option-group ^

--target-option-group-identifier new-option-group ^

--target-option-group-description "This will be my new option group"

How to Add an option to an AWS RDS Option Group?

Using the Console

It is possible for you to utilize the AWS Management Console to add an option to an AWS RDS Option Group.

To add an option to an option group through the console, follow the below steps:

  1. Log in to the AWS Management Console. Then, head straight to the Amazon RDS console using the following link https://console.aws.amazon.com/rds/.
  2. From the navigation pane, click on the section of Option groups.
  3. Select which option group you’d like to modify, then click on Add option.

    AWS RDS Option Group - Add Option

    AWS RDS Option Group – Add Option

4. For the window of Add option, go through the below process:

    1. Select which option you’d like to add. You may be required to provide extra values according to which option you tend to choose. For instance, if you click on the OEM option, you will need to fill in a port value and set a particular security group.
    2. To enable the option on all associated DB instances upon adding it, in the section of Apply Immediately, click on the option Yes. In case you click on option No, which is the default choice, you will find that the option will get enabled for every associated DB instance while its next maintenance window is occurring.

      AWS RDS Option Group - Option Details

      AWS RDS Option Group – Option Details

5. As soon as the settings become as you need them to be, click on the option Add option.

How to List the options and option settings for an AWS RDS Option Group?

You are capable of listing every single option and option set for a specific option group.

Using the Console

You are capable of utilizing the AWS Management Console to list all the options and option settings for a specifically chosen option group.

For listing the options and option settings for an option group, go over the below steps:

  1. Log in to the AWS Management Console. Then, head straight to the Amazon RDS console using the following link https://console.aws.amazon.com/rds/.
  2. From the navigation pane, click on the section of Option groups.
  3. Select the name of the option group that you have to check its details. Now you will find all the options and option settings in your selected option group gets listed.

How to Modify an option setting?

Keep in mind

In the case of specifying a security group to be a value for an option in a particular option group, you start managing the security group by modifying the AWS RDS Option Group. It is not possible for you to alter or remove this security group through the modification of a specific DB instance. In addition to this, the security group will not be found in the DB instance details that are located on the Management Console or in the AWS CLI command’s output of describe-DB-instances.

Using the Console

You are capable of utilizing the AWS Management Console for the sake of modifying an option setting.

For modifying an option setting through the console, go over the below steps:

  1. Log in to the AWS Management Console. Then, head straight to the Amazon RDS console using the following link https://console.aws.amazon.com/rds/.
  2. From the navigation pane, click on the section of Option groups.
  3. Choose which option group you want to modify its option, then click on the option Modify option.
  4. From the window of Modify option, in the section of Installed Options, select which one of the options you’d like to modify its setting. Perform all the necessary changes.
  5. For the sake of enabling the option upon adding it, in the section of Apply Immediately, click on the option of Yes. In case of clicking on the option No, which is the default choice, the option will get enabled for every single associated DB instance while its next maintenance window occurs.
  6. As soon as the settings become as needed, click on the option Modify Option.

How to Remove an option from an AWS RDS Option Group?

Using the Console

You are capable of utilizing the AWS Management Console for the sake of removing an option from an AWS RDS Option Group.

To remove an option from an option group through the console, go over the below steps:

  1. Log in to the AWS Management Console. Then, head straight to the Amazon RDS console using the following link https://console.aws.amazon.com/rds/.
  2. From the navigation pane, click on the section of Option groups.
  3. Choose which option group you’d like to remove its option, then click on the option Delete option.
  4. From the window of the Delete option, go over the following procedure:
    • Choose the check box of the option which you’d like to delete.
    • In order for the deletion to work directly upon doing it, in the section of Apply immediately, click on the option Yes. In case you choose to click on the option No, which is the default choice, you will find that the option will get deleted for every single associated DB instance while its next maintenance window takes place.

      AWS RDS Option Group - Delete Option

      AWS RDS Option Group – Delete Option

5. As soon as the settings become exactly as you need them to be, click on the option Yes, Delete.

How to Delete an AWS RDS Option Group?

In the case of trying to delete an option or group associated with an RDS resource, you will get an error just like the one shown below. This error will be returned.

An error occurred (InvalidOptionGroupStateFault) when calling the DeleteOptionGroup operation: The option group 'optionGroupName' cannot be deleted because it is in use.

To find the Amazon RDS resources associated with an option group, you will need to go over the below steps:

  1. Log in to the AWS Management Console. Then, head straight to the Amazon RDS console using the following link https://console.aws.amazon.com/rds/.
  2. From the navigation pane, click on the section of Option groups.
  3. Select the option group’s that you wish to get their details shown.
  4. Go over the Associated Instances and Snapshots section of the associated Amazon RDS resources.

Keep in mind

It’s not possible for you to modify the option group of an automated DB snapshot.

Using the Console

You are capable of deleting an option group through the AWS Management Console.

For deleting an option group through the console, go over the below steps:

  1. Log in to the AWS Management Console. Then, head straight to the Amazon RDS console using the following link https://console.aws.amazon.com/rds/.
  2. In the navigation pane, click on the section of Option groups.
  3. Select your needed option group to delete it.
  4. Click on the option of Delete group.
  5. As soon as the confirmation page opens, click on the option Delete to finally complete the deletion of your selected option group. Otherwise, go ahead and click on the option of Cancel for the sake of canceling the deletion step.

Using the AWS CLI

For the sake of deleting an option group, you can also utilize the AWS CLI delete-option-group command using the below-needed parameter.

--option-group-name

Check out an Example

The below example shows how you can delete an option group having the name testoptiongroup.

Unix, Linux and macOS:

aws rds delete-option-group \

--option-group-name testoptiongroup

Windows:

aws rds delete-option-group ^

--option-group-name testoptiongroup

Using the RDS API

For the sake of deleting an option group, you will need to simply call the Amazon RDS API DeleteOptionGroup operation. Add the below parameter:

OptionGroupName

You can learn more about Amazon RDS pricing and how it is calculated.

Billing and Cost Management - Featured Image

How to Use AWS Billing and Cost Management Dashboard

Billing and Cost Management

What is AWS Billing and Cost Management Dashboard?

Using the Billing and Cost Management service you will be capable of paying your AWS bills. You can also start monitoring your usage, and analyzing as well as controlling your cloud costs.

The credit card which you supplied upon sign up for a new AWS account, will be directly charged. Those charges will be shown on the monthly credit card bill.

You are capable of checking or updating your credit card info, in addition to the ability to  designate another credit card for your AWS charges, using the Payment Methods page provided on the Billing and Cost Management console.

Billing and Cost Management - Payment Methods

Billing and Cost Management – Payment Methods

The Billing and Cost Management section of AWS offers you handful tools that can aid you in analyzing your cost drivers and usage trends, finding info regarding your cost and usage, as well as doing something for the sake of budgeting your spending.


What are the steps that you can do using the Billing and Cost Management Dashboard?

Go over the below steps to learn how you can get the chance to quickly go through the offered features of the Billing and Cost Management console and the dashboard.

First Step: Reviewing your usage

The Billing and Cost Management dashboard provides you with various different ways for the sake of viewing and monitoring your usage. Below you can check out the way that you can swiftly and easily display the options that you have utilized till now for this current month.

Billing and Cost Management - Usage

Billing and Cost Management – Usage

For opening the Billing and Cost Management console and reviewing your usage and charges using the Billing and Cost Management Dashboard:

  1. Login to the AWS Management Console. Then, head straight to the Billing and Cost Management console using the following link https://console.aws.amazon.com/billing/. The console will display the Dashboard, and there you get to check your current month-to-date usage graphs.
  2. From the left navigation pane, select your needed applicable action:

Cost Explorer

Click on Cost Explorer for the sake of tracking and analyzing your usage. Keep in mind that it’s free to use Cost Explorer for every single account.

Budgets

Click on Budgets for the sake of managing your account’s budgets.

It is also possible to go over the status of your free tier along with the offered AWS Free Tier usage alerts through AWS Budgets.

Bills

Click on Bills if you’d like to view details regarding your current charges.

Orders and Invoices

Click on Orders and invoices if you’d like to view your past payment transactions.

Second Step: Turning on reports

As well as the previously mentioned features in the first step, the AWS Billing and Cost Management provides you with a set of billing reports regarding your usage. They display the services which were utilized, how much time they were used, how much data you have transferred in and out of storage, and the average utilized storage space.

Third Step: Downloading or printing your bill

Billing and Cost Management ends the billing period on midnight every last day of the month, then calculates the bill. A lot of the bills become ready to get downloaded during the 7th accounting day of the month.

Billing and Cost Management - Bill

Billing and Cost Management – Bill

For downloading your bill:

  1. Login to the AWS Management Console. The head straight to the Billing and Cost Management console using the following link https://console.aws.amazon.com/billing/.
  2. From navigation pane, select the option Bills.
  3. In the section of Date, select which bill’s month you’d like to operate with.
  4. Click on Download CSV for the sake of downloading a comma-separated variable file. Otherwise, for printing it, click on Print.

Fourth Step: Setting up budgets for monitoring your account

Billing and Cost Management - Budgets

Billing and Cost Management – Budgets

For creating a budget:

Follow the below process for creating a cost-based budget using the Billing and Cost Management Dashboard.

  1. Login to the AWS Management Console. Then, go straight to the Billing and Cost Management console using the following link https://console.aws.amazon.com/billing/.
  2. from navigation pane, select the option Budgets.
  3. In the upper part of the page, click on Create budget.
  4. In the section of Select budget type, select Cost budget.
  5. Click on Set up your budget.
  6. In the section of Name, type in your budget’s name. It needs to be completely unique in your account. It can include A-Z, spaces, a-z as well as those characters:

=+-%@_.:/

  1. In the section of Period, select how constantly you’d like your budget to reset the actual and forecasted spend. Select Monthly if you’d like it to reset each month, Quarterly if you’d like it to reset each 3 months, or Annually if you want it to reset each year.
  2. In the section of Budgeted Amount, type in your chosen total amount to be spent for the selected budget period.
  3. You can optionally choose for Budget effective dates, either Recurring Budget if you want your budget to reset when the budget period ends or Expiring Budget if you want a budget which won’t reset when the budget period ends.

In the section of Start Month, select which month you’d like the budget to begin.

Under Expiring Budget, in the section of End Month, select which month you’d like the budget to finish.

Budget time will be in UTC.

  1. You can optionally choose from under Budget parameters (optional), for Filtering, a single or multiple filters. According to what budget type you choose, the set of filters shown on the console will vary.
  2. You can optionally choose from under Budget parameters (optional), for Advanced options, a single or multiple filters from the ones mentioned below. In case of being signed in using an organization member account instead and not a management account, you may not get to find every single one of the advanced options.

Refunds

Received refunds.

Credits

Credits added to your account.

Upfront reservation fees

Any upfront fees that are charged to your account. When you purchase an All Upfront or Partial Upfront Reserved Instance from AWS, you pay an upfront fee in exchange for a lower rate for using the instance.

Recurring reservation charges

Recurring account charges. Upon buying a Partial Upfront or No Upfront Reserved Instance, you will be paying a recurring charge to get a lower rate of utilizing this instance.

Taxes

Taxes included in the charges of your budget.

Support charges

Support plan charges by AWS. Upon buying a support plan, you will start paying a monthly charge for getting service support.

Other subscription costs

Use blended costs

Cost of used instance hours. The blended rate will not add the RI upfront costs nor the RI discounted hourly rate.

Use amortized costs

Amortized cost used reservation hours.

  1. Click on Configure alerts.
  2. For the section of Configure alerts, for Alert 1, click on Actual for the sake of creating a notification for actual spend or Forecast for creating a notification based on your forecasted spend.
  3. In the section of Alert threshold, fill in the amount which you’d like to get notified when it’s reached. It could be a % or an absolute value. Let’s say, we have a budget of 200$, and you’d like to get be notified when you reach 160$ which means 80% of your entered budget, you have to add 160 as your absolute budget or 80 to be your percentage budget.

Beside the amount, click on Absolute amount to get notified whenever the threshold amount is exceeded and select % of budgeted amount in order to get notified whenever the threshold % of the budget is exceeded.

  1. You can optionally fill in the needed email addresses of the people that you want to get the notification by entering them into the section of Email contacts, then selecting Add email contact. You can divide a number of email addresses using commas. You can add a maximum of 10 email addresses to one notification.

To get a notification, you must set an email address. You can as well set an Amazon SNS topic.

  1. You can optionally fill in the ARN of your Amazon SNS Topic in the section of SNS topic ARN, then click on Verify.

Each notification is capable of being subscribed to just a single SNS topic. You can learn how to Create an SNS Topic and then Subscribe to an SNS Topic.

In order to start receiving a notification, you will need to enter an email address. You may as well specify an SNS topic.

  1. Click on the option of Confirm budget.
  2. Go over your budget settings then click on Create.

Keep in Mind

Upon finally creating a budget using SNS notifications, Amazon SNS will send you a confirmation email straight to the inbox of your specified email addresses. I will have the following subject line: “AWS Notification – Subscription Confirmation”. The recipients of this email will need to click on Confirm subscription from the confirmation email in order to start getting notifications.

Fifth Step: Finding answers regarding your questions related to your bill

In case you have some questions regarding your bill, you can check the AWS Knowledge Center. In case of failing to find your needed answers from using the Knowledge Center, you can instead head to the account and billing support and check with them for free.

How to Deploy Without Git Provider

Purchasing Saving Plans on AWS

Create a Video Stream - Amazon Kinesis Services

How to Create a Video Stream for AWS Kinesis in 3 Steps?

Create a Video Stream


Step 1.

You will need to Create an AWS Account Key:

First and before anything, you must have an AWS Account Key for the sake of being able to access Kinesis Video Streams programmatically.

For creating an AWS Account Key, follow the below simple steps:

  1. Login to the AWS Management Console then head to the IAM console using the following link https://console.aws.amazon.com/iam/.
  2. Click on the section Users from the navigation bar, then select the Administrator user.
    Create a Video Stream - Admin User

    Create a Video Stream – Admin User


  3. Click on the Security credentials tab, then select Create access key.
    Create a Video Stream - Security Credentials

    Create a Video Stream – Security Credentials


  4. Record the given Access key ID. Click on the option Show below Secret access key. Record the given Secret access key.

You will need to save the Access key and the Secret Access key to use them later on.


Step 2.

Time to Create a Video Stream for Kinesis

How to Create a Video Stream Using the Kinesis Console?

  1. Login to the AWS Management Console then go to the Kinesis console using the following link https://console.aws.amazon.com/kinesis.
    Create a Video Stream - Kinesis Video Streams

    Create a Video Stream – Kinesis Video Streams


  2. From the page of Video streams, click on the option Create video stream.
    Create a Video Stream - Video Streams Page

    Create a Video Stream – Video Streams Page


  3. From the page of Create a new video stream, enter ExampleStream for the section of stream name. Leave the radio button of Default configuration chosen.
    Create a Video Stream - New Video Stream Setup

    Create a Video Stream – New Video Stream Setup


  4. Click on the option Create video stream.
  5. When Kinesis Video Streams finishes creating the stream, go over the details found on the ExampleStream page.

This is how easy it is for you to create a video stream for the first time using the Amazon Kinesis Console.

How to Create a Video Stream Using the AWS CLI?

  1. Make sure that you already installed and configured the AWS CLI.
  2. After that, you will need to run the below Create-Stream command using the AWS CLI:


$ aws kinesisvideo create-stream --stream-name "MyKVStream" --data-retention-in-hours "24"

You will get a response that looks like the one shown below:

{

"StreamARN": "arn:aws:kinesisvideo:us-west-2:123456789012:stream/MyKVSStream/123456789012"

}

Step 3.

Send Data to a Kinesis Video Stream (After you create a video stream)

In this step you will learn how you can send media data from a camera straight to the Kinesis video stream that you just created in the previous step. Here we will be working with the C++ Producer Library as a GStreamer plugin.

For simply sending media from various devices on different operating systems, this step will go with GStreamer. It represents an open source media framework which standardizes access to cameras as well as a variety of media sources.

The example of GStreamer application can be supported with the below operating systems:

  • Ubuntu
  • Microsoft Windows
  • Raspbian (Raspberry Pi)
  • macOS

Downloading the C++ Producer SDK

You can find the GStreamer sample in the C++ Producer SDK. You are capable of downloading the C++ Producer SDK on GitHub through the below given Git command:

$ git clone https://github.com/awslabs/amazon-kinesis-video-streams-producer-sdk-cpp 

Compiling the GStreamer Example

It’s possible to compile and install the GStreamer sample using the directory of the kinesis-video-native-build with the below commands:

  • Ubuntu and Raspbian:
    • First you should run those:
$ sudo apt-get update

$ sudo apt-get install libgstreamer1.0-dev libgstreamer-plugins-base1.0-dev gstreamer1.0-plugins-base-apps

$ sudo apt-get install gstreamer1.0-plugins-bad gstreamer1.0-plugins-good gstreamer1.0-plugins-ugly gstreamer1.0-tools
    • In case you’re on Raspbian, you should run
      $ sudo apt-get install gstreamer1.0-omx

      as soon as you run the commands shown previously.

    • Head to the directory of kinesis-video-native-build and start running the
      ./min-install-script
  • Windows:
    • In mingw32 or mingw64 shell, head to the directory of
      kinesis-video-native-build

      and start running the ./min-install-script

  • macOS:
    • Start installing homebrew
    • Then, run
      brew install pkg-config openssl cmake gstreamer gst-plugins-base gst-plugins-good gst-plugins-bad gst-plugins-ugly log4cplus
    • Head to the directory of kinesis-video-native-build and start running
      ./min-install-script


Running the GStreamer Example

The GStreamer application will send media using your camera to the Kinesis Video Streams service. You are capable of running the GStreamer example app for your operating system along with the below commands. You can start running the example app using the kinesis-video-native-build/downloads/local/bin directory.

Utilize the below parameters for the following command:

  • First – The Access key: This is the AWS access key which you have recorded for your account details in the 1st step of this article.
  • Second – The Secret key: This is the AWS secret key which you have previously recorded for your account details in the 1st step of this article.
  • Third – The AWS Region: A specific region of your choice which supports the Kinesis Video Streams.


How to Run the GStreamer Example on Ubuntu?

You are capable of running the GStreamer example app on Ubuntu using the below command. Set your camera device along with the device parameter.

$ gst-launch-1.0 v4l2src device=/dev/video0 ! videoconvert ! video/x-raw,format=I420,width=640,height=480 ! x264enc bframes=0 key-int-max=45 bitrate=512 tune=zerolatency ! h264parse ! video/x-h264,stream-format=avc,alignment=au,profile=baseline ! kvssink stream-name="MyKinesisVideoStream" storage-size=512 access-key="YourAccessKey" secret-key="YourSecretKey" aws-region="YourAWSRegion"

How can you Run the GStreamer Example on Raspbian (Raspberry Pi)?

You are capable of running the GStreamer example app on Raspbian using the below command. Set your used camera device along with the device parameter.

$ gst-launch-1.0 v4l2src device=/dev/video0 ! videoconvert ! video/x-raw,format=I420,width=640,height=480 ! omxh264enc control-rate=2 target-bitrate=512000 periodicity-idr=45 inline-header=FALSE ! h264parse ! video/x-h264,stream-format=avc,alignment=au,profile=baseline ! kvssink stream-name="MyKinesisVideoStream" access-key="YourAccessKey" secret-key="YourSecretKey" aws-region="YourAWSRegion"

How can you Run the GStreamer Example on Windows?

You are capable of running the GStreamer example app on Windows using the below command:

$ gst-launch-1.0 ksvideosrc ! videoconvert ! video/x-raw,format=I420,width=640,height=480 ! x264enc bframes=0 key-int-max=45 bitrate=512 tune=zerolatency ! h264parse ! video/x-h264,stream-format=avc,alignment=au,profile=baseline ! kvssink stream-name="MyKinesisVideoStream" storage-size=512 access-key="YourAccessKey" secret-key="YourSecretKey" aws-region="YourAWSRegion"

How can you Run the GStreamer Example on macOS?

You are capable of running the GStreamer example app on MacOS using the below command:

$ gst-launch-1.0 autovideosrc ! videoconvert ! video/x-raw,format=I420,width=1280,height=720 ! vtenc_h264_hw allow-frame-reordering=FALSE realtime=TRUE max-keyframe-interval=45 bitrate=512 ! h264parse ! video/x-h264,stream-format=avc,alignment=au,profile=baseline ! kvssink stream-name=MyKinesisVideoStream storage-size=512 access-key="YourAccessKey" secret-key="YourSecretKey" aws-region="YourAWSRegion"


How to Consume Media Data?

You are capable of consuming media data through seeing it on the console, or through the creation of an app which reads media data from a stream through HLS.

Viewing Media Data using the Console

For the sake of checking the media data which is being sent from your camera using the Kinesis Video Streams console, head to the Kinesis Video Streams console using the following link https://console.aws.amazon.com/kinesisvideo/, then click on the MyKinesisVideoStream stream from the page of Manage Streams. The video will be playing in the pane of Video Preview.

Consuming Media Data through HLS

You are capable of creating a client app which consumes data using a Kinesis video stream with Hypertext Live Streaming.

You can also use the AWS Kinesis Console to Create a Data Stream.

Deploy Without Git Provider - AWS Amplify

Fast Amplify Application: Quickly Deploy Without Git Provider

Deploy Without Git Provider


What is the AWS Amplify Console?

It is a full-stack web application hosting service, allowing for everlasting deployment from a selected source code repository. It was introduced in the year 2018 at AWS re:Invent.


How to add the “Deploy To Amplify Console” Button when you’re not using the deploy without Git provider option?

Deploy Without Git Provider - Deploy to Amplify Console

Deploy Without Git Provider – Deploy to Amplify Console

Once you publish your project source code on GitHub, it could be made simple for different developers to start building and deploying your app through adding a “Deploy To Amplify Console” button to the Readme document. When they click on this button, they can open the Amplify Console and propose a 3-step procedure for deploying your code.

It’s simple and easy to add a button to your code repository just like having to add such a line to your Readme document (don’t forget to change the username as well as the repository name found in the GitHub URL):

[![amplifybutton](https://oneclick.amplifyapp.com/button.svg)](https://console.aws.amazon.com/amplify/home#/deploy?repo=https://github.com/username/repository)

Where the part https://github.com/username/repository is replaced by your own repository name.

Also, you have the chance to add this button to whichever HTML document you choose by entering the below code (also need to change repository name):

<a href="https://console.aws.amazon.com/amplify/home#/deploy?repo=https://github.com/username/repository">
    <img src="https://oneclick.amplifyapp.com/button.svg" alt="Deploy to Amplify Console">
</a>

How to Manually Deploy without Git provider?

It’s great to choose to be the one who version controls everything going on, as well as a simple web site for which you are the developer alone. However, in case you choose not to utilize a source code repository to be your deployment source, the Amplify Console provides the ability to deploy one of the following: a zip file, a local folder, an S3 bucket or an HTTPS URL, for example a shared repository on Dropbox.

To deploy without Git provider, follow the below steps:

First, login to the AWS Amplify console using the following link https://us-east-2.console.aws.amazon.com/amplify/home?region=us-east-2#/.

Click on the Get Started Button for the section under Deploy.

Deploy Without Git Provider - AWS Amplify Deploy

Deploy Without Git Provider – AWS Amplify Deploy

When you start to create a new Amplify Console project, choose the option Deploy without Git Provider option.

Deploy Without Git Provider - Choose Provider

Deploy Without Git Provider – Choose Provider

After selecting Deploy without Git Provider, click on Continue.

Deploy Without Git Provider - Choose a Method

Deploy Without Git Provider – Choose a Method

Start by giving your application a unique App name to identify it from other apps, then enter an Environment name to show what type of environment your app will be hosted at (like testing or development).

Now, you will need to select a source file which can either be from your laptop, from Amazon S3 or from an HTTPS URL.

Choose a Method and fill in the needed settings:

For Drag and Drop – Simply drag your files and drop them into the drag and drop area.

For Amazon S3 – Supply a Bucket name and a Zip File.

For Any URL – Enter the necessary URL.

Once you have completed the required fields, click on the button Save and deploy.

Now you have completed all the needed steps to deploy without git provider and deployed your very own application without a Git provider.


What is AWS CloudFormation Integration?

Developers aim for automation, and the deploying of code or infrastructure is quite similar: always make sure that your infrastructure deployments are perfectly automated and repeatable. Using AWS CloudFormation you can get the chance to automate creating your infrastructure in the cloud based on JSON or YAML descriptions. There are 3 new resource types that have been added by the Amplify Console to CloudFormation:

  • AWS::Amplify::App – To create new Amplify Console apps.
  • AWS::Amplify::Domain – To define a DNS domain name.
  • AWS::Amplify::Branch – To Define the Git Branch.

CloudFormation connects to your source code repository for the sake of adding a webhook to it. Your Github Personal Access Token needs to be included for allowing this to occur, and this article contains every needed detail. However, don’t hardcode credentials or OAuth tokens into your Cloudformation templates, but instead rely on parameters.


How to Deploy Multiple Git Branches?


The CI/CD tools you use need to adapt to your team workflow. Amplify Console allows for branch pattern deployments, giving you the ability to directly deploy branches that go with a particular pattern without the need of any additional configuration. Such pattern matchings are according to regular expressions.

Whenever you’d like to test new features, you get to creating a new branch in Git. The Amplify Console as well as the Amplify CLI can start detecting this and provisioning another backend and hosting infrastructure for the serverless application that you have.

  1. For the sake of enabling branch detection, go to the Amplify Console using the following link https://aws.amazon.com/amplify/console/.
  2. Then from the left menu, choose General.
  3. Then, click on Edit and turn Branch Autodetection to enabled:
Deploy Without Git Provider - Branch Autodetection

Deploy Without Git Provider – Branch Autodetection


How to Send Custom HTTP Headers?

It is possible to customize Amplify Console for the sake of sending some customized HTTP response headers. Those Response headers may be utilized for the following purposes: security, informational or debugging. For the sake of adding custom headers, follow the below steps:

Login to the Amplify Console using the following link https://aws.amazon.com/amplify/console/.

Choose App Settings from the left navigation pane.

Click on Build Settings, then edit the buildspec.

For instance, if you’d like to start enforcing TLS transport and preventing XSS attacks, add the below headers:


customHeaders:

- pattern: '**/*'

headers:

- key: 'Strict-Transport-Security'

value: 'max-age=31536000; includeSubDomains'

- key: 'X-Frame-Options'

value: 'X-Frame-Options: SAMEORIGIN'

- key: 'X-XSS-Protection'

value: 'X-XSS-Protection: 1; mode=block'

- key: 'X-Content-Type-Options'

value: 'X-Content-Type-Options: nosniff'

- key: 'Content-Security-Policy'

value: "default-src 'self'"

It is based on YAML.


How to Use Custom Containers for Build?

Amplify Console utilized AWS CodeBuild. The build container image which is set as default is based on Linux 2 and includes Serverless Application Model CLI that is installed before. (To learn about AWS Serverless Projects, check the AWS Serverless Project article). In case you’d ever want to utilize your very own unique container for the build, follow the below steps:

Configure the Amplify Console to do so, by first choosing App Settings from the left navigation pane.

After that, click on Build Settings:

Deploy Without Git Provider - Build Image Settings

Deploy Without Git Provider – Build Image Settings


Then start editing the build image settings section as needed.

Deploy Without Git Provider - Edit Build Image Settings

Deploy Without Git Provider – Edit Build Image Settings

Keep in mind that there will be a couple of requirements on the container image, such as:
– It must have OpenSSH, git, and cURL.

– In case of building NodeJS projects, it must have npm and node.

This is how easy it is for you to navigate your way around the AWS Amplify Console, where you can rapidly deploy applications without the need of any Git provider.

Create and Organization on AWS


Create an Organization - Featured Image

How to Create an Organization – AWS

Create an Organization

What is Consolidated billing for Organizations?

In AWS Organizations, you have the chance to utilize the consolidated billing feature for consolidating billings and payments for various accounts or various AISPL accounts. Each organization contains a management account which is capable of paying the charges incurred from every single member account.

Consolidated billing includes the below benefits:

  • Only One bill: You will have one bill as a combination for the bills of multiple accounts.
  • No additional fee: It is provided for no extra cost.
  • Combined usage: It is possible to get the usage across all accounts in the organization combined for the sake of sharing the following: Volume pricing discounts, Savings Plans, as well as the Reserved Instance discounts. As a result, you will get charged a lower charge for your company, project, or department, than that you get charged for with individual standalone accounts.
  • Simple tracking: Charges may be tracked across multiple accounts, then it is possible to get the combined data for cost and usage downloaded.


Keep in mind

The bills of the member account are used merely for informational purposes. The management account can reallocate the extra Savings Plans discounts. volume discounts or Reserved Instance which are received by your account.

In case you are capable of accessing the management account, you will get to view a combined display of the charges incurred by the member accounts. In addition, you will be able to receive a cost report for every single member account.

You should know that the AWS and the AISPL accounts are not capable of being consolidated with one another. In case your contact address is located in India, you are capable of utilizing AWS Organizations for the sake of consolidating AISPL accounts found in your organization.

Process to Create an AWS Organization

Keep in mind

AWS Organizations will change the name “Master Account” to “Management Account”. It will only be a name change without any functionality change.

You are capable of creating an organization which begins with your account as being the management account which was previously called the master account. When you create an AWS organization, you will be able to select if you want the organization to support every feature, which is the recommended choice, or just to support features for consolidated billing.

Keep in mind

Now, you may just get one root in your organization.

When you complete the process to create an organization, you will be capable of adding accounts to your organization using the below procedures from the management account:

  • Create more AWS accounts that will be directly added to your organization as being member accounts.
  • Upon verifying the email address, start inviting some existing accounts for joining your organization as being new member accounts.

Step One: Start to Create an Organization

It is possible for you to create an organization through the Management Console or a command from the CLI or an SDK API.

Minimum permissions to create an organization:

In order for you to be able to create an organization using your current account, you will need to have the below permissions:

  • organizations:CreateOrganization
  • iam:CreateServiceLinkedRole

You can restrict this permission may be restricted merely to the service principal of “organizations.amazonaws.com”.

How can you create an organization using the AWS Management Console?

  1. Sign in to the Organizations console using the following link https://console.aws.amazon.com/organizations/. You will have to sign in using an IAM user, by assuming an IAM role, or by signing in as root user in the organization’s management account.
    Create an Organization - Console

    Create an Organization – Console


  2. From introduction page, click on Create organization.
    Create an Organization - Create Organization

    Create an Organization – Create Organization


  3. In the confirmation dialog box of Create organization, click on Create organization.

    Create an Organization - Create Organization Confirmation

    Create an Organization – Create Organization Confirmation

Keep in mind

The organization will get created having every single feature set as enabled by default. It is possible as well to get an organization created having just the consolidated billing features set as enabled.

Now, the organization has been created and you will find yourself on the Accounts tab. The management account will have a star located beside the account email.

You are going to get a verification email sent directly to the address set with your management account. Some time may pass and a delay happens prior to receiving this verification email.

Create an Organization - Verification Email

Create an Organization – Verification Email

4. You will to get your email address verified within 24 hours.

Create an Organization - Verify Email

Create an Organization – Verify Email

5. Get accounts added to your organization as much as you want.

Keep in mind

It is possible to get new accounts added to your organization without the need to verify the email address of your management account. In order to start inviting already existing accounts, you will need to have verified that email address before.

Step Two: Email address verification (after you create an organization)

After you finish the process to create an organization and prior to inviting accounts to join, you will need to verify that are the owner of the provided email address for the organization’s management account.

After you create an organization, AWS will send you a verification email to the email address which you have added. The verification email may be delayed.

In 24 hours, you will need to follow the instructions sent in the email for the sake of verifying your email address.

In case you fail to verify your email address during those 24 hours, you are capable of resending the verification request for inviting different accounts to join your organization. In case you fail to receive the verification email, you must check if your email address is correct then fix it if needed.

How can you resend the verification request after you create an organization?

  1. Sign in to AWS Organizations console using the following link https://console.aws.amazon.com/organizations/. You will first need to be signed in as an IAM user, or have assumed an IAM role, or have signed in as the root user in the organization’s management account.
  2. Click on the Settings tab then click Send verification request.
  3. You will need to get your email address verified within 24 hours.

Upon verifying the email address, you will be able to start inviting different accounts to your organization.

In case of changing the management account’s email address, the account’s status will go back to being “email unverified,” and you will need to finish the verification process for the newly added email address.

AWS Cost Optimization