
Amazon S3 File
Follow this step-by-step tutorial for learning how to store your Amazon S3 file on the cloud using Amazon S3.
Amazon S3 represents a service which allows you to start storing your data, which are named objects, at a massive scale.
Go over this tutorial for creating an Amazon S3 bucket, then uploading an Amazon S3 file, and retrieving this file along with deleting it when its no longer needed.
You can follow this tutorial while staying within the AWS Free Tier.
You will need to have an Account to be able to store your files with AWS
Creating a Free Account will only take a couple of Minutes
The AWS Free Tier comes with the following features and advantages:
5GB of storage
2,000 Put Requests using Amazon S3
20,000 Get Requests
First Step: Entering Amazon S3 Console
To go to the AWS Management Console, you will need to click on this link https://console.aws.amazon.com/console/home. It is going to open in a new browser window, to keep you following this step-by-step guide.
As soon as the screen loads, you will have to fill in your user name and password for the sake of getting started. After that, you will need to type S3 into the search bar, then choosing S3 for opening the S3 console.

Amazon S3 File – Search for S3
Second Step: Creating S3 Bucket
For this step, you are going to start creating an Amazon S3 bucket. A bucket is the container you store your files in.
- From the S3 dashboard, select the option Create Bucket.
In case you are attempting to create a bucket for the first time, you are going to view a screen which resembles the below shown screenshot.
In case you previously created an S3 bucket, you will find a list of all your created buckets shown on your S3 dashboard.

Amazon S3 File – Create a Bucket
- Type in a bucket name. A bucket name needs to be as unique as possible across every single existing bucket name in your Amazon S3. You will find that here are also a couple of other restrictions on how you name your S3 buckets as well. Now, choose a specific region for your bucket to get created in.
Once complete, click on the option Next.
- There are a lot of useful options for you to benefit from your S3 bucket such as the following:
– Versioning
– Server Access Logging
– Tags
– Object-level Logging
– Default Encryption
You will not need to get any of them enabled while following our tutorial. If you’d like to learn how to create a bucket with object lock enabled, follow this Locking an S3 Object Guide.
Click on the button Next.
- You are capable as well of setting your permission settings for the S3 bucket. You can choose who gets to be granted the required permissions for your bucket. However, we are going to leave the default values as they are for this tutorial and click on Next.
- Go over all of your configuration settings, then click on Create bucket.
Third Step: Uploading an Amazon S3 File
For this step of the tutorial, we are going to upload a chosen file to your newly created Amazon S3 bucket.
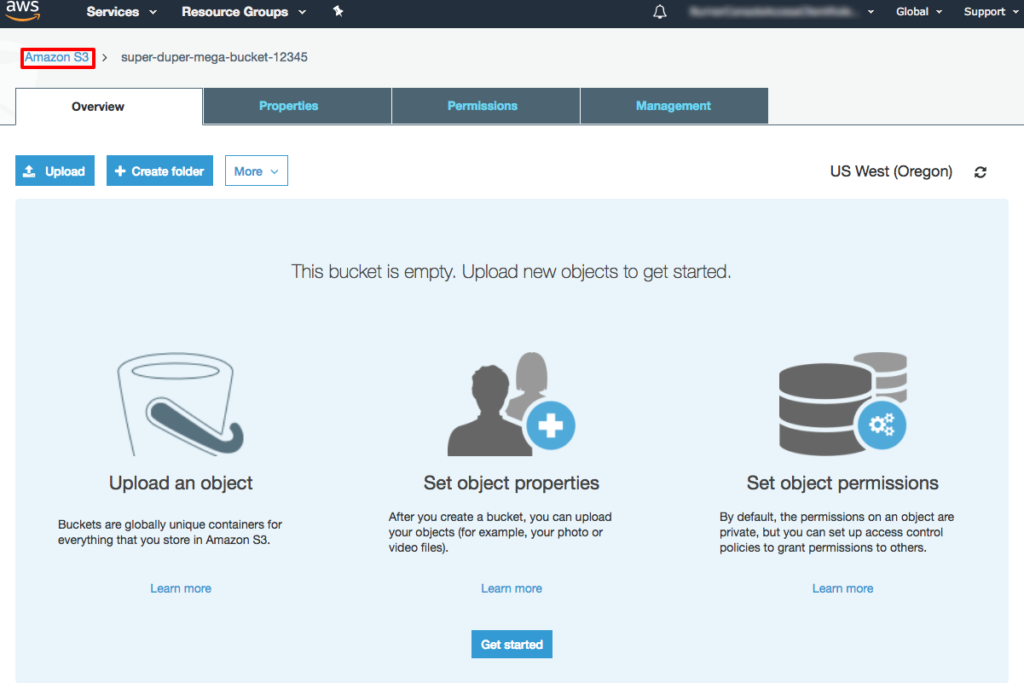
- You can find and locate your new bucket from the S3 console. Select the name of your bucket in order to gain access to this bucket.

Amazon S3 File – Select Bucket
2. After going inside to your bucket’s home page, click on the option Upload from under the Overview Tab.

Amazon S3 File – Upload File
3. For the sake of selecting a file for uploading it, you have two options for uploading files:
Either select Add files and choose the sample file which you would like to store in your S3 Bucket, or simply Drag and Drop this file right into the upload box.
Click on Next when you have chosen a file to upload.
4. You will see that you are also capable of setting your needed permission settings on your object for granting access to chosen users. However, in our tutorial, we are going to leave the default values just as they are, then click on Next.
5. You can start setting your property settings for encryption, metadata and storage class with your selected object. However, we are going to leave the default values as they are, then click on Next.
6. Go over your chosen configurations and make sure they are exactly what you need, then click on Upload. You can find and locate your object has been added into your S3 bucket’s home screen.
Fourth Step: Retrieving your Object
For this step of the tutorial, you are going to download your newly added Amazon S3 file from your Amazon S3 bucket.
- Click on the checkbox located besides the Amazon S3 file which you want to start downloading, and click on Download.

Amazon S3 File – Download File
Fifth Step: Deleting your Object and your Bucket
It is very simple for you to delete your object and your bucket from the Amazon S3 console. Also, keep in mind that it would be the best thing for you to delete your unwanted and unused resources so that you don’t remain being charged a fee for them.
- We are first going to delete an object. Click on the checkbox which is located besides the file which you would like to delete and click on More > Delete.
- Go over and make sure that this is the object which you are aiming to delete. Once certain, click on Delete.
- Go to Amazon S3 by clicking on the Amazon S3 section above for viewing all of your buckets that are located in the selected region.
Amazon S3 File – Go Back to Amazon S3
- Click on the right side of the bucket name of your created bucket for the sake of selecting it, and click on the button Delete. Enter your bucket’s name for deleting it and click on Confirm.
