AWS Neptune Create a Notebook
How to create a notebook on AWS Neptune using the workbench?
In order to go through the AWS Neptune create a notebook process, the Neptune console sets up the Neptune workbench in SageMaker to create a Jupyter notebook.
For creating a Jupyter notebook and go through AWS Neptune create a notebook, you can utilize Neptune workbench:
- The attached security group in the VPC of a running Neptune should have a rule for granting inbound connections.
- Login to the Management Console, then head to the Neptune console using this link https://console.aws.amazon.com/neptune/home.
- From left navigation pane, click on Notebooks.
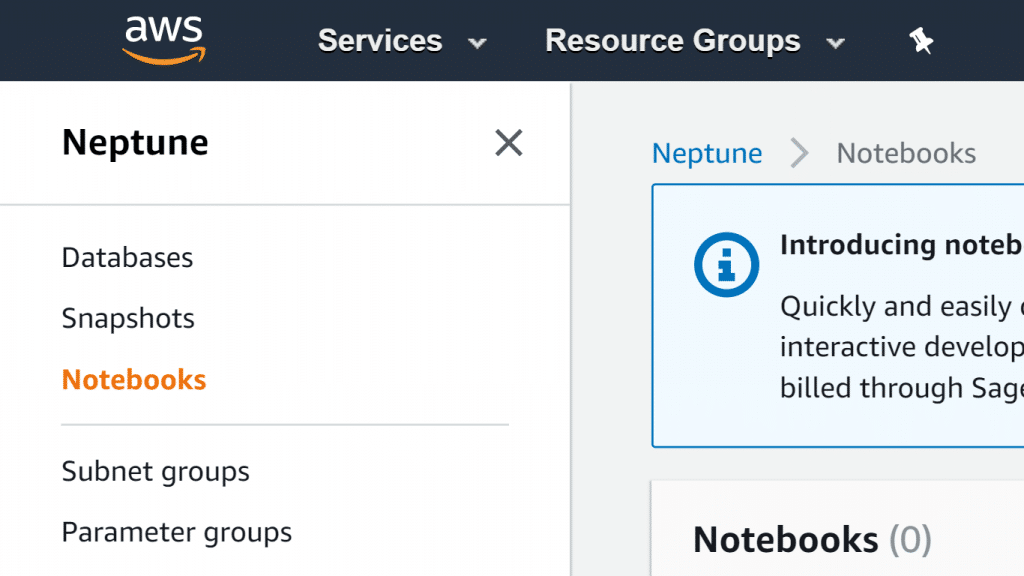
AWS Neptune Create a Notebook – Notebooks navigation pane
- Select the option Create notebook.
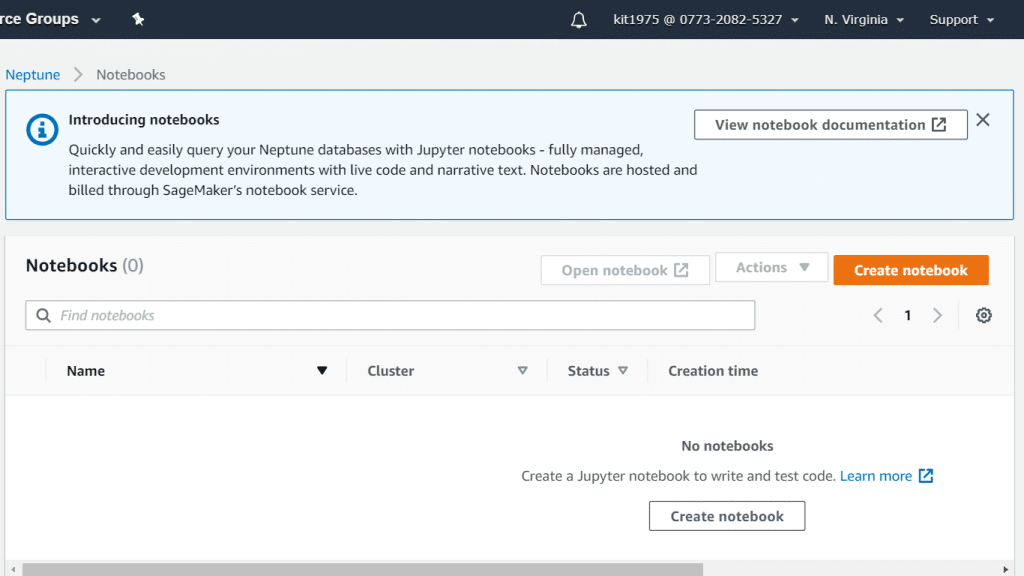
AWS Neptune Create a Notebook – Create Notebook button
- From the listed clusters under Cluster, select the needed Neptune DB cluster. In case of not having an already created DB cluster, you need to click on Create cluster for creating a new one. To learn how to create a new Neptune DB Cluster, go through the Amazon Neptune: Create A Database tutorial.
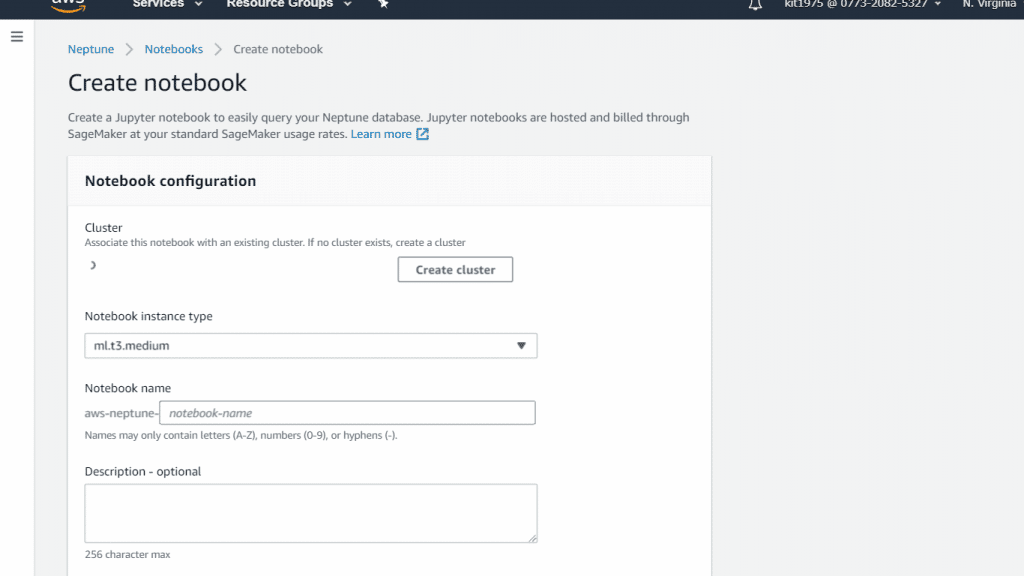
AWS Neptune Create a Notebook – Add a Cluster, Name and description
- Enter a name and an optional description for your notebook.
- If you haven’t yet created an IAM role for notebooks, you need to click on Create an IAM role. Then, fill in a name for your IAM role.
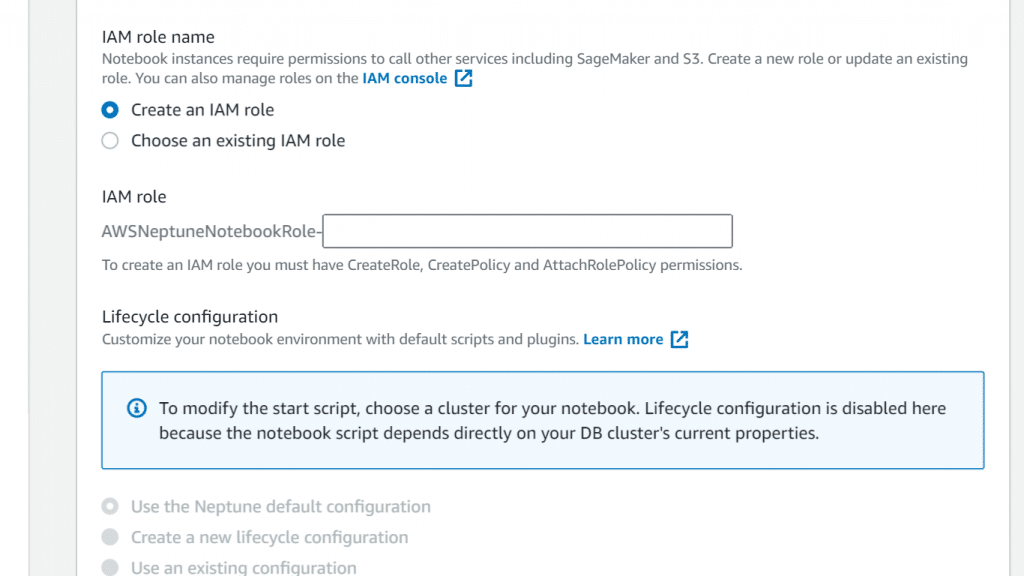
AWS Neptune Create a Notebook – Select IAM Role
- Click on the option Create notebook.
- Upon finally creating the notebook, you need to choose it then click on Open notebook.
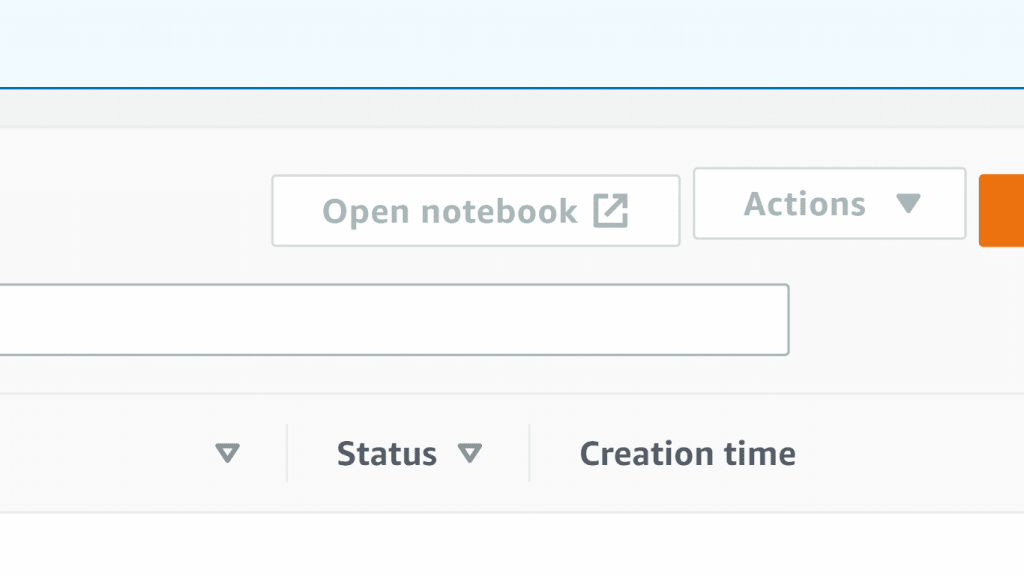
AWS Neptune Create a Notebook – Open Notebook
How to work with Neptune Workbench along with Jupyter Notebooks?
To begin working with Neptune you should try out the Neptune workbench.
It allows you to use Neptune DB cluster with Jupyter notebooks that get hosted
by SageMaker.
SageMaker will charge your for using workbench resources, not included in the Neptune bill.
Keep in Mind
For working with a workbench, the attached security group in the VPC of a running Neptune should have a rule for granting inbound connections.
An IAM can be created for notebooks using the console, or a user can create it. This role’s policy must contain the below:
{

"Version": "2012-10-17",

"Statement": [

{

"Effect": "Allow",

"Action": [

"s3:GetObject",

"s3:ListBucket"

],

"Resource": [

"arn:aws:s3:::aws-neptune-notebook",

"arn:aws:s3:::aws-neptune-notebook/*"

]

},

{

"Effect": "Allow",

"Action": "neptune-db:connect",

"Resource": [

"your-cluster-arn/*"

]

}

]

}

Also, the role should establish the following trust relationship:

{

"Version": "2012-10-17",

"Statement": [

{

"Effect": "Allow",

"Principal": {

"Service": "sagemaker.amazonaws.com"

},

"Action": "sts:AssumeRole"

}

]

}
How to operate to Neptune’s Getting Started notebooks?
The Neptune workbench has multiple notebooks for aiding users in how to write a query and learn how to work with notebooks.
Head to the Getting Started notebooks to know how you can perform AWS Neptune and create a notebook:
- From left navigation pane, click on the right button of Open Notebook.
- As the Neptune workbench is opening while Jupyter is run, there will be at the top a Neptune folder. You need to click on it for accessing the folder.
- In the second level there is a folder named 01-Getting-Started. Click on it and you will find Inside notebooks that will teach you everything you need to know about Neptune:
First: 01-About-the-Neptune-Notebook.ipynb
Second: 02-Using-Gremlin-to-Access-the-Graph.ipynb
Third: 03-Using-RDF-and-SPARQL-to-Access-the-Graph.ipynb
Fourth: 04-Social-Network-Recommendations-with-Gremlin.ipynb
- First of all you need to enter the folder named 01-About-the-Neptune-Notebook.ipynb. Inside of it you will find information about the meaning of a Jupyter notebook and the Neptune workbench. It also provides you with the ways for using a notebook.
- The other three Getting Started notebooks carry information about querying as well. They also have extra opportunities for digging deep into Neptune graphs.
Visualizing Graphs in the Neptune workbench:
In many cases the Neptune workbench can create a visual diagram of your query results as well as returning them in tabular form. The graph visualization is available in the Graph tab in the query results whenever visualization is possible.
Keep in Mind
In order for you to be granted access to fixes and functionality in your notebooks, you will need to stop the notebook. After doing so, restart the notebook instance and you’ll get access.
How to Visualize Gremlin query results?
Visualized query results will be created by Neptune workbench for Gremlin queries having a path returned. For checking this visualization, you need to head to the right tab named Graph located in the tab of Console tab below the running query.
Query visualization hints can alter the visualizer diagrams query output. The hints come after the %%gremlin and before them is the –path-pattern which stands short for -p:
%%gremlin -p comma-separated hints
The hints are named in a way that lets you know the Gremlin steps for jumping through vertices, and they work according to the naming. Every hint must be the same as the next coming Gremlin step in the visualized query, such as:
%%gremlin -p v,oute,invg.V().hasLabel(‘airport’).outE().inV().path().by(‘code’).by(‘dist’).limit(5)
The below are available visualization hints:
vinvoutveineoute
How to Access visualization tutorial notebooks using the Neptune workbench?
There are 2 visualization tutorial notebooks offered by the Neptune workbench with examples in SPARQL as well as in Gremlin showing you the way to start querying your graph data in an effective manner while you can get visualized results.
For Opening Visualization notebooks:
- From the left navigation pane, select the right button named Open Notebook.
- As the Neptune workbench is opening while Jupyter is run, there will be at the top a Neptune You need to click on it for accessing the folder.
- The second level will show a folder called 02-Visualization. Click on the folder. You will find 2 notebooks. They will show you how to use SPARQL and Gremlin for querying graph data. Also, they will teach you the way you can visualize your query results. They are the following:
Air-Routes-SPARQL.ipynb
Air-Routes-Gremlin.ipynb
You can choose one of the 2 notebooks to begin experimenting with its queries.