AWS EMR Create a Notebook
The EMR console can be used for the process of AWS EMR create a notebook, while the CLI and EMR API cannot be used for this.
How to begin with the steps of AWS EMR Create a Notebook?
- Go straight to the EMR console through the following link https://console.aws.amazon.com/elasticmapreduce/.
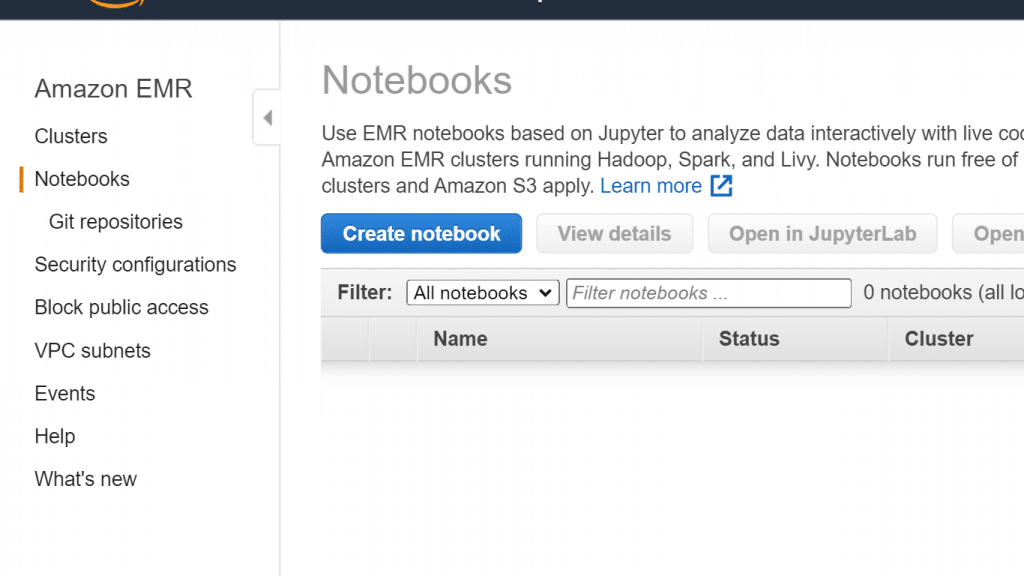
AWS EMR Create a Notebook – EMR Console Notebooks section
- Click on Notebooks, then Create notebook.
- Type in a Notebook name as well as a Notebook description (Optional).
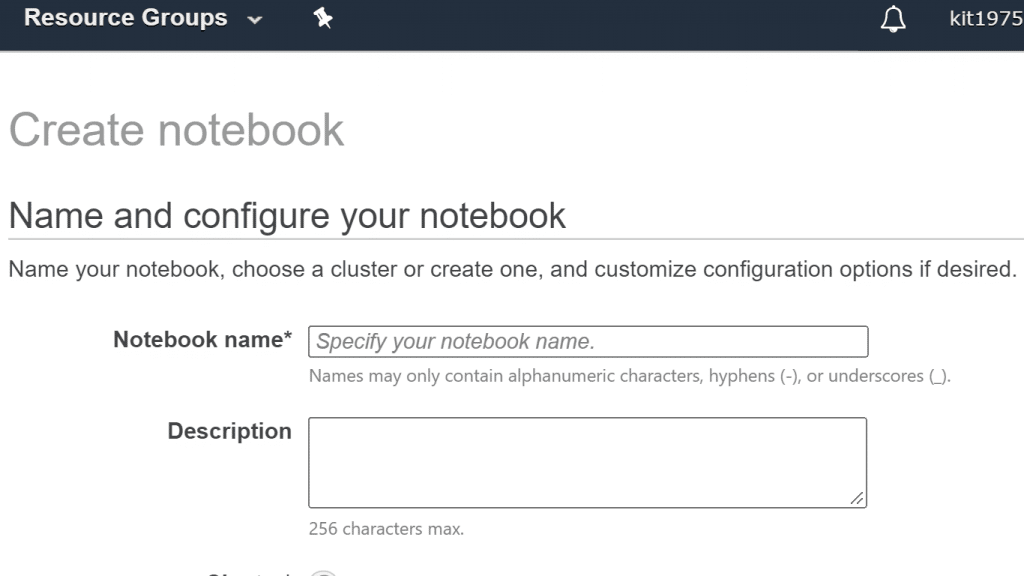
AWS EMR Create a Notebook – EMR Notebook name and description
- For attaching your notebook to an active cluster running Spark, Livy, and Hadoop, keep the default selection on Choose an existing cluster. After that you should click on the button Choose, then choose one of the listed clusters, and select the option Choose cluster. Now you will find that the only shown clusters are the ones having the necessary requirements.
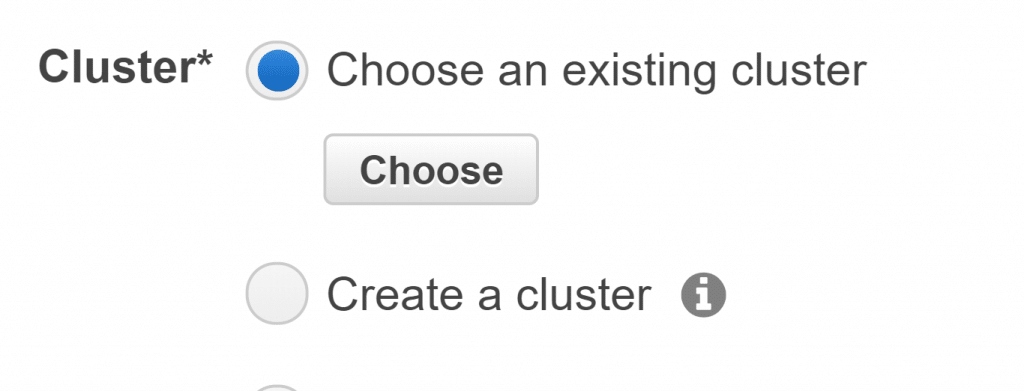
AWS EMR Create a Notebook – Select a Cluster for Notebook


Otherwise,
Click on the option Create a cluster, fill in a specific Cluster name then select the required options. Your cluster will get created in your account’s default VPC with On-Demand instances. Follow the below guidelines when adding options.
| Options | Reference | |
| Cluster name | The unique name of your cluster. | |
| EMR role | Can be default or a custom service role. | |
| Release | The default value is the latest EMR release version, and this value is no modifiable. | |
| Instance | Set the value of needed instances then choose which EC2 Instance type you want. All the instances will be needed for core nodes except 1 instance which will be for the master node.
The chosen instance type will set how many notebooks may be attached at the same time to the cluster. |
|
| EC2 instance profile | Can be default or given a custom service role. | |
| Applications | A listing of the installed apps on your cluster. (Not modifiable) | |
| EC2 key pair | For connecting to cluster instances. | |
- In the section of Security groups, you will need to select the option of Use default security groups. Otherwise, select Choose security groups, then choose available custom security groups in your cluster’s VPC. One for the master instance and a different one for the notebook client instance.

AWS EMR Create a Notebook – EMR Notebook security groups
- In the section of AWS Service Role, you can keep it as default or select one of the listed custom roles. It will be utilized by the notebook’s client instance.

AWS EMR Create a Notebook – AWS service role
- In the section of Notebook location pick which location in S3 you’d like to save the notebook file in. Otherwise, you can set a location of your own in S3 which will be created for you by Amazon EMR.
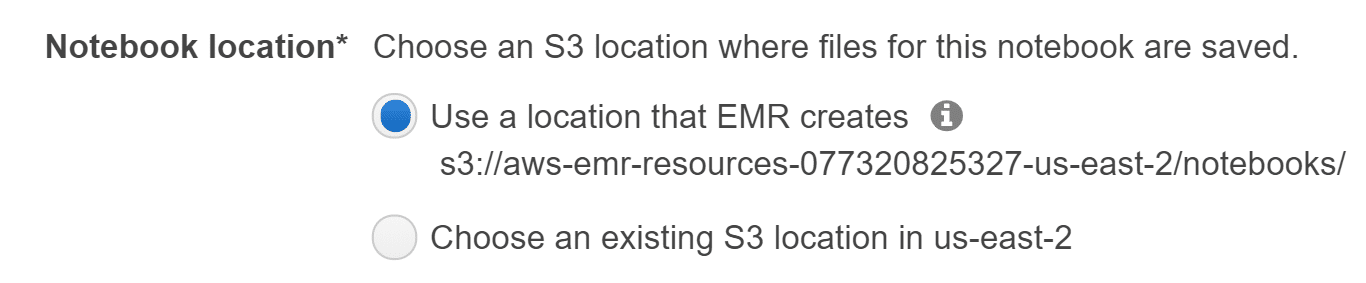
AWS EMR Create a Notebook – EMR Notebook location


A folder will thus be created having its name the Notebook ID, and the notebook gets saved to a file named NameofNotebook.ipynb.
Example:
S3 location= s3://Bucket1/Notebooks1.
Notebook name= FirstNotebook.
Notebook file gets saved to= s3://Bucket1/Notebooks1/NotebookID/FirstNotebook.ipynb.
In case the selected S3 location is encrypted, then a Service Role for EMR Notebooks needs to be set as the key user. The default value is: EMR_Notebooks_DefaultRole.
- In case you have a Git-based repository which you had previously added to EMR and you want to associate with this notebook, you must select Git repository. After this you click on the option Choose repository. Then choose one of the listed repositories. To learn how to add a Git Repository, you can check out our AWS EMR Add Git Repository tutorial.

AWS EMR Create a Notebook – Choose Git Repository
- You can select Tags, and start adding as much key-value tags as needed for your notebook.

AWS EMR Create a Notebook – Add tags to your EMR Notebook
- Click on the option Create Notebook.


What are the Concurrently Attached Notebooks Limits?
Upon creating a cluster supporting notebooks, you will need to take into account the cluster master node’s EC2 Instance type. This will determine how many notebooks can get ready at the same time for running code and queries.
| Type of Master Node EC2 Instance? | How many Notebooks? |
| *.medium | 2 |
| *.large | 4 |
| *.xlarge | 8 |
| *.2xlarge | 16 |
| *.4xlarge | 24 |
| *.8xlarge | 24 |
| *.16xlarge | 24 |
When is a cluster considered as Compatible for being attached to your AWS EMR Notebook?
When the cluster has the below mentioned requirements:
– Launched while Spark, Livy and Hadoop are installed.
– Created with EC2 instances having AMD EPYC processors.
– Created with EMR. The cluster can either be created independently or while creating an EMR notebook.
– Integrated with AWS Lake Formation without the installation of kernels and libraries.
– Created with VisibleToAllUsers value is set as true, which is the default.
– Created with EMR release version 5.18.0 or later.
– Not having multiple master nodes.
– Launched within an EC2-VPC, having private or public subnets. Without any EC2-Classic platform.
– Without any Kerberos authentication.