Amazon Web Service is the most secure and popular cloud services platform available for web users and developers. It’s a one-stop platform to get reliable cloud-based web services for a variety of purposes. Web-users and business owners can explore the different services offered by the platform at reasonable rates. In this article, we will show you to configure S3 Bucket for Web Hosting.
Before we jump on to the configuration process to host a new website with S3 Bucket, let’s collect some useful information about these terms first.
What is Amazon S3?
Amazon S3 is one of the cloud-based services offered by AWS. The service is used to set up a storage mechanism for various objects used by the users. The use of Amazon’s S3 is necessary while hosting a new website as it can store all types of data such as documents, texts, images and more. To make use of this service, you need to create buckets i.e. S3 Buckets.
Amazon S3 Buckets
A Bucket is nothing but a container for storing the objects of S3. Each object stored in a bucket. The buckets can have space for domains that are unique in their nature. The domain names will not be matched with any other domains as they are independent and unique. The domain name has a specific URL which can be accessible by the user.
With the familiar nature of generating a domain name to registering it over the web, S3 Buckets need to be configured first. Once the web hosting with the S3 bucket is configured, we can upload the content to these buckets. We are here to learn about Configuring S3 Bucket for Web Hosting. The following step by step guidelines will help you out.
How to Configure S3 Bucket for Web Hosting?
Step 1:
You can’t have access to Amazon’s Web Services if you do not have your account registered. Make sure you first register your personal AWS Account by fill in all the details. You would be asked to add your personal details along with the credit card details to register a new AWS account.
Step 2:
Once your account is registered, kindly log into your AWS account and click on the Services option. Select the S3 service from the given page. And then select the Create Bucket button.
Step 3:
The Bucket Creation form will be presented to you on your screen. Enter a unique name for the bucket. You need to follow the on-screen instructions to create a new S3 Bucket.
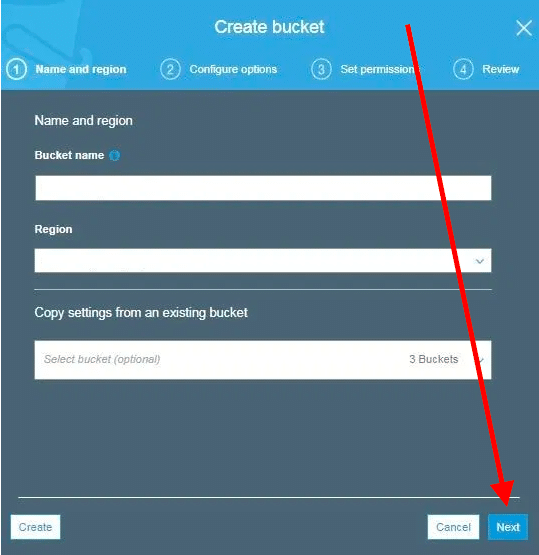
Configure S3 Bucket for Web Hosting – Step 3
Step 4:
Since we are going to host a new static website with this bucket, you need to keep the access of the website available for the public. The configure option tab lets you set this permission.
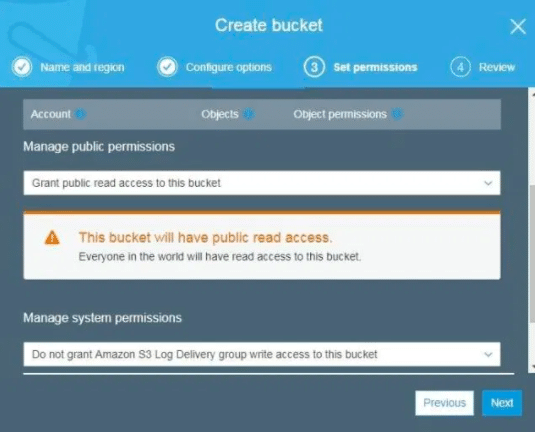
Configure S3 Bucket for Web Hosting – Step 4
Credit @blogs.perficient.com
Step 5:
At last, click the Create Bucket button. The Bucket created by you can now be accessed by the public.
This is how you can create a new S3 Bucket for web hosting. Now, you have to configure this bucket manually. For that, you need to follow a few more steps.
Step 6:
Go to the S3 Bucket created by you from the Services tab. Click the Properties tab to configure the bucket for the static website.
In this section, you will be asked whether to enable or disable the Static Website Hosting or not. Make sure you enable the static website hosting option from this page.
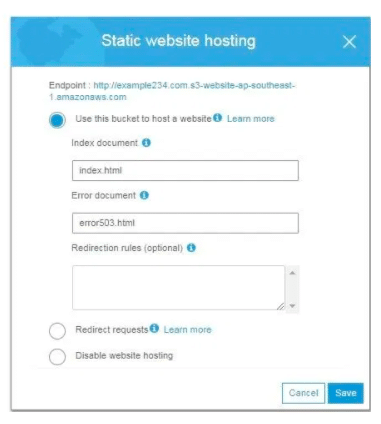
Configure S3 Bucket for Web Hosting – step 6
Step 7:
The same page will have the Permissions tab of the Bucket created by you. From here, you can set up the permissions for the public access to your website or the domain created for the bucket. Make appropriate changes as per your requirements and then click the Save button.
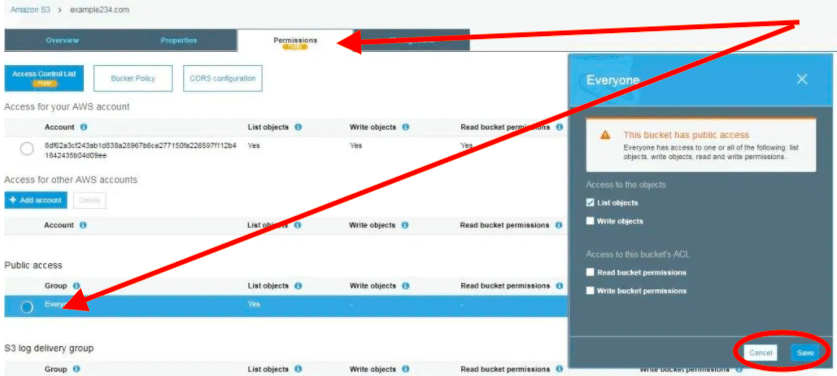
Configure S3 Bucket for Web Hosting – Step 7
Credit @blogs.perficient.com
Step 8:
Go back to the main page of the Bucket i.e. Amazon S3 Bucket and select the domain name created by you.
Step 9:
Click the Upload button to upload your website’s content. You can upload the website content in HTML or CSS. It also supports drag and drops functionality. If you have saved your Website’s Content on the desktop, you can simply drag the file to this section to get uploaded.
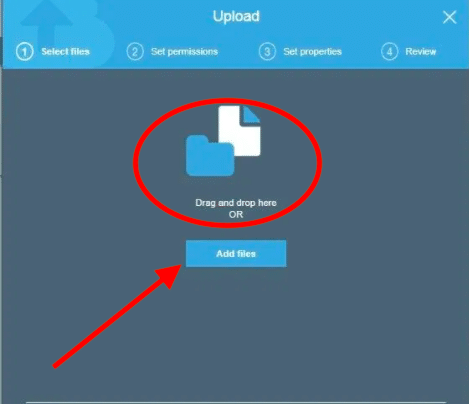
Configure S3 Bucket for Web Hosting – Step 9
Step 10:
Once everything is done, you can now have access to your newly created static website through S3 Bucket using the local server of AWS. You can also use the custom domain the same way and can use the Amazon S3 Buckets for storing the data.
Conclusion:
This is how you can easily configure S3 Bucket for Web Hosting. Web designers and developers make use of the static website for testing purposes. They don’t need to buy a new domain every time just to test out things. The simple steps need to be followed to configure S3 Bucket for web hosting and to launch a new static website on the S3 Platform.