What is EC2 Auto Scaling?
It is the process which enables users to scale their Amazon EC2 instances up or down automatically as per the instructions set by the user. The users set parameters such as minimum and maximum number of instances. Through this feature, the number of Amazon EC2 instances the user is utilizing will increase automatically while the demand is rising in order to maintain performance, and decreases automatically while the demand is decreasing in order to minimize the cost. It’s specifically efficient for applications that shift on hourly, daily or weekly usage. This feature is enabled by Amazon CloudWatch and is available for free. AWS CloudWatch may be referred to for measuring network traffic, CPU utilization, etc.
What is Elastic Load Balancing?
It has a job of automatically distributing incoming request traffic over multiple EC2 instances in aims of achieving higher fault tolerance. It has the ability of detecting wrong instances and automatically rerouting traffic to fit instances till the wrong instances get finally restored in a round-robin process. Learn more about EC2 auto scaling basics
What does Elastic Load Balancing consist of?
- Control Service
The ability to automatically scale handling capacity as a reaction to incoming traffic by simply adding and removing load balancers just as needed.
- SSL Termination
SSL termination saves important CPU cycles, encoding and decoding SSL within your EC2 instances attached to the ELB. SSL connection in the EC2 instance is not necessary and can easily be removed.
- Load Balancer
To monitor and handle incoming requests through the Internet and send them to EC2 instances that are registered with it.
What are the Features of Elastic Load Balancing?
- Load Balancers can be added or removed as needed, without even making any alterations to the overall flow of information.
- ELS is created to take care of ongoing requests per second while slowly increasing the load pattern.
- It is not created to take care of sudden increase in requests like online quizzes, online sales, etc.
- EC2 instances and load balancers can be configured so as to accept traffic.
- Elastic Load Balancing can be enabled by clients within a single Availability Zone or over a variety of zones to get extra consistent application performance.
-
- Open Amazon EC2 console through this link − https://console.aws.amazon.com/ec2/.
- Choose your load balancer region from the region menu found on the right.
- Click on Load Balancers from the navigation pane and select Create Load Balancer option. You’ll notice a pop-up window open where you need to provide the necessary details.
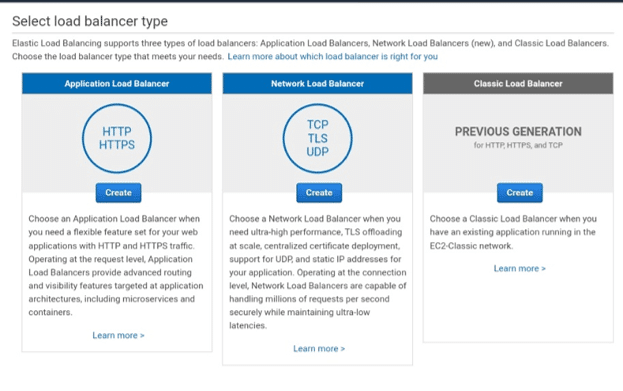
aws load balancer type
-
- Inside the load Balancer name box: Type the name of your load balancer.
- Inside create LB inside box: Choose the exact network you previously selected for instances.
- Choose Enable advanced VPC configuration, if the selected VPC is default.
- Click on the Add button and you’ll notice a new pop-up appear for you to choose subnets from the list of available subnets. Choose only a single subnet per availability zone. This window cannot appear without selecting Enable advanced VPC configuration.
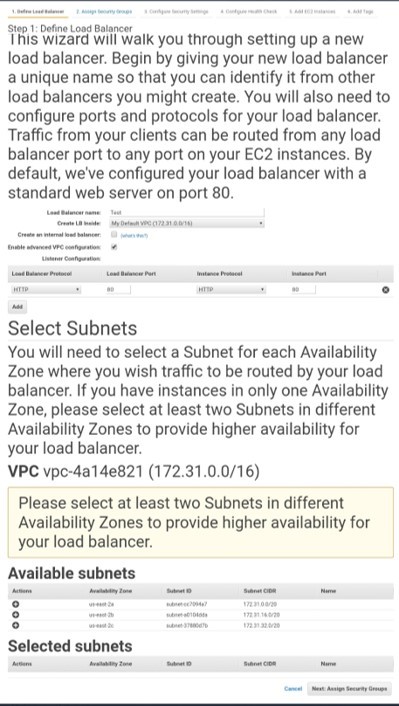
aws load balancer – define
-
- Select Next, and a pop-up window will appear. When done with choosing a VPC as your network, assign security groups to Load Balancers.
- Abide by the instructions to assign security groups to load balancers and click on Next.
- You’ll see that a new pop-up will open with health checkup configuration details of default values. You can set values on your own, yet these are optional. Click Next: Add EC2 Instances.
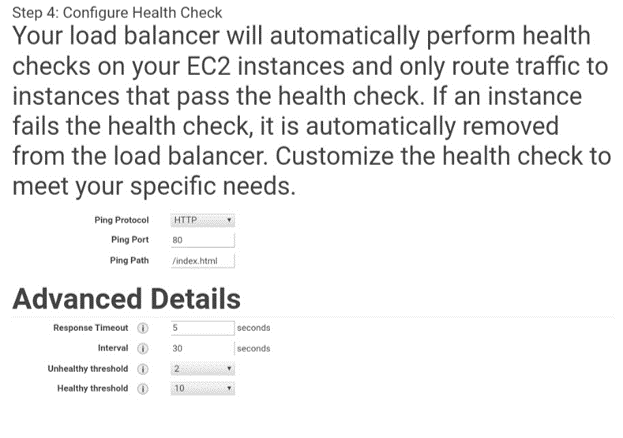
aws load balancer – health check
-
- Again, you’ll see a pop-up window will open but with information about instances like registered instances, add instances to load balancers by choosing ADD EC2 Instance option and fill in the necessary information. Click on Add Tags.
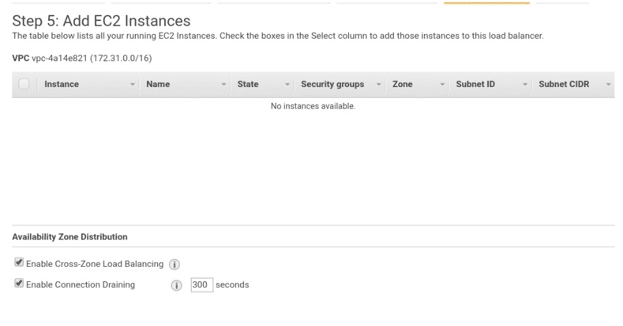
add ec2 instance types
- Adding tags to your load balancer is not obligatory, but in order to do so, you need to click on the Add Tags Page and type in the details such as key, value to the tag. Once done, select Create Tag option. Click on Review and Create button.
- You’ll notice that a review page opens where you can verify the setting. You can also alter the settings by selecting the edit link.
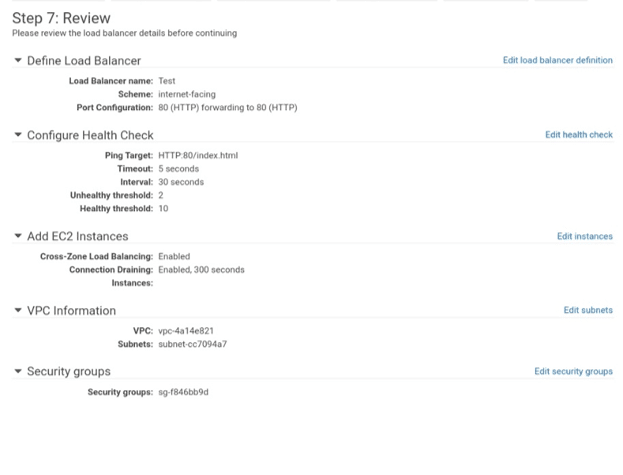
aws load balancer – review
How is a Load Balancer Deleted?
- First: Open the Amazon EC2 console through this link: − https://console.aws.amazon.com/ec2/.
- Second: Select Load Balancers option found on the navigation pane.
- Third: Choose Load balancer and click on the Action button.
- Fourth: Click on the Delete button, and you’ll notice an alert window appear, then click on the Yes, Delete button.