Create Labeling Jobs
Step 1: What to Do Before Starting to Create Labeling Jobs?
Prior to starting with the SageMaker console in order to create a labeling job, you will need to first set up a dataset. Follow the below process:
- Get 2 images saved at publicly available HTTP URLs. They will be utilized for the creation of instructions to finish a labeling task. There aspect ratio needs to be of about 2:1. In this tutorial it doesn’t matter what the images’ content is.
- Get an S3 bucket created for the sake of keeping the input files and the output files. It needs to be in the exact Region where Ground Truth is running. Remember the name of the bucket used because we will need it for step 2.
- Add around five to ten PNG images into this bucket.
- Get a manifest file created for the dataset. Then, get it stored in the S3 bucket. Follow the below procedure:
- Using a text editor, get a new text file created.
- Add a line the same as the one below for every image file found in your dataset:
{"source-ref": "s3://bucket/path/imageFile.png"}Add 1 line for every single PNG file located in your S3 bucket.
-
- Get your file saved in the S3 bucket which has the source files. Record the name since you are going to need it while following step 2.
Keep in mind
You are not obligated to get the manifest file stored into the exact bucket used for the source file. The same bucket is utilized in this exercise as a simpler way to do things.
Add the below permissions policy to whichever user going to create labeling jobs:
{

"Version": "2012-10-17",

"Statement": [

{

"Sid": "sagemakergroundtruth",

"Effect": "Allow",

"Action": [

"cognito-idp:CreateGroup",

"cognito-idp:CreateUserPool",

"cognito-idp:CreateUserPoolDomain",

"cognito-idp:AdminCreateUser",

"cognito-idp:CreateUserPoolClient",

"cognito-idp:AdminAddUserToGroup",

"cognito-idp:DescribeUserPoolClient",

"cognito-idp:DescribeUserPool",

"cognito-idp:UpdateUserPool"

],

"Resource": "*"

}

]

}
Step 2: How to Create Labeling Jobs?
For step 2 we will needing the console in order to create labeling jobs. Here we will give Amazon SageMaker Ground Truth the Amazon S3 bucket location of the manifest file. Also, we are going to be configuring the job parameters.
In order to create labeling jobs, you must follow the below procedure:
- Go to the SageMaker console using the following link https://console.aws.amazon.com/sagemaker/.
- From the navigation pane, click on the option Labeling jobs.
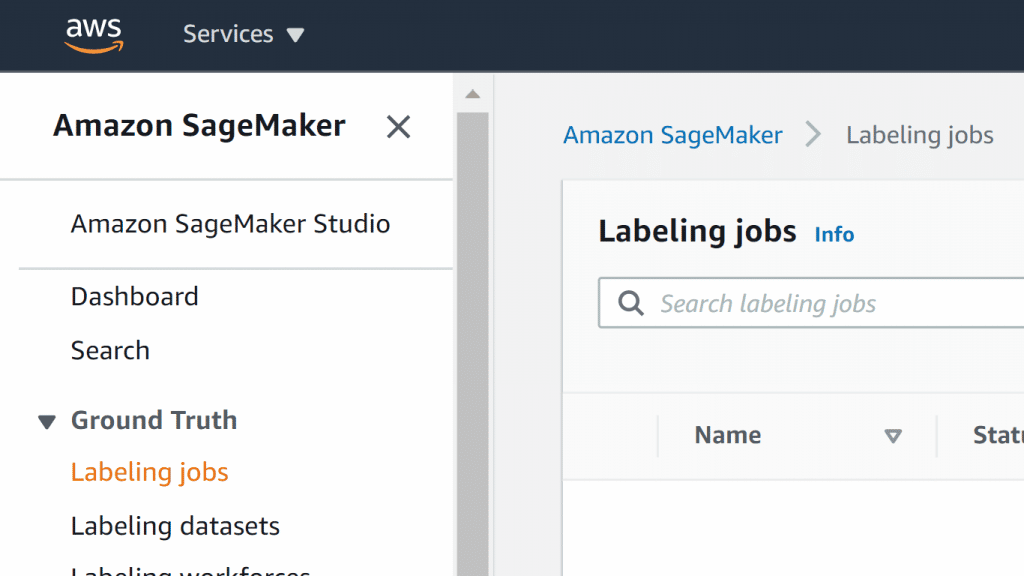
Create Labeling Jobs – Labeling Jobs
- Now, click on the option Create labeling job for starting with the job creation process.
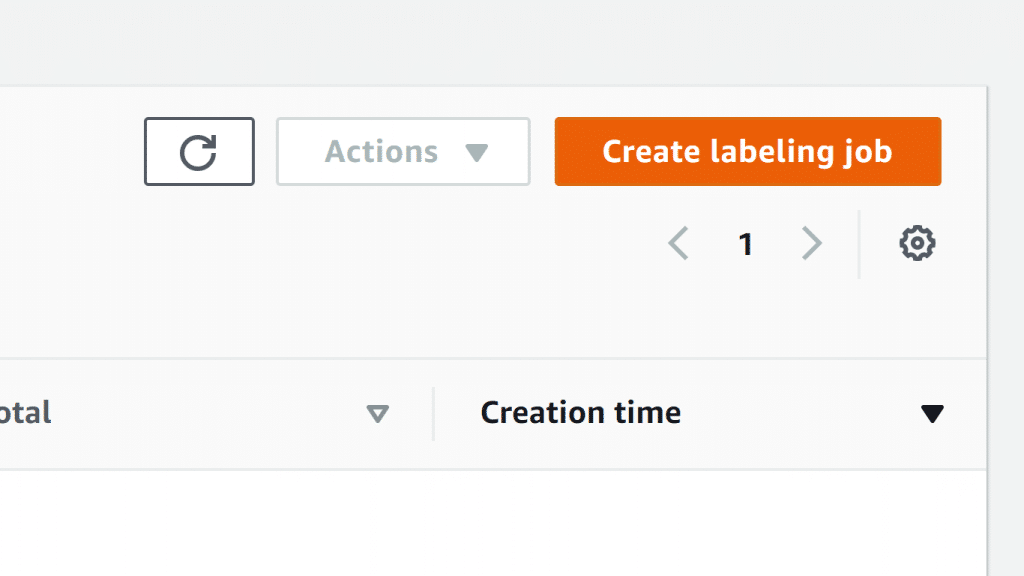
Create Labeling Jobs – Create Labeling Job
- For the section of Job overview, enter the below required information:
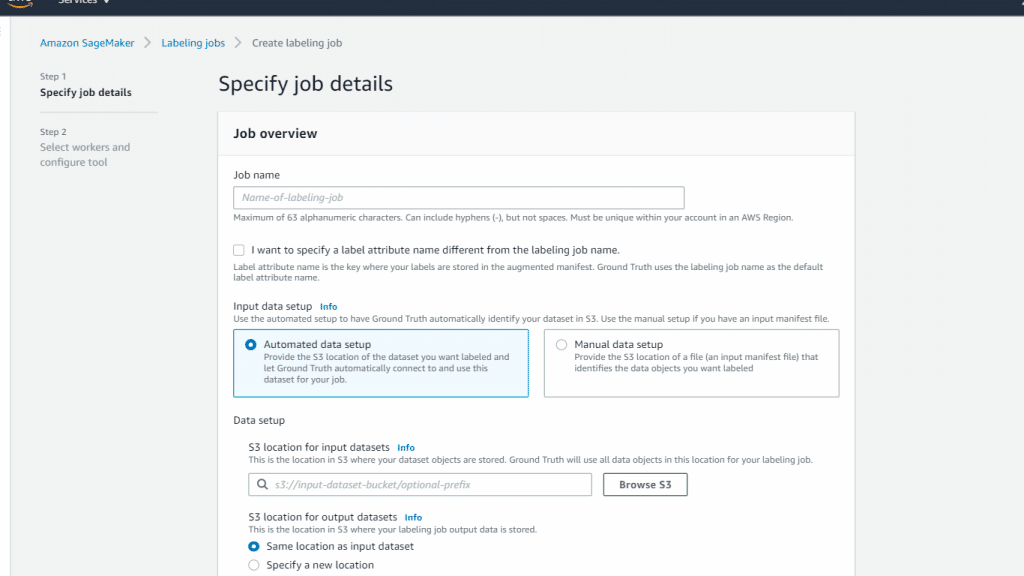
Create Labeling Jobs – Job name and Input Setup
- Job name: Enter a name for describing the job. It will be displayed in your job list. This name should be special in your account for a specific AWS Region.
- Label attribute name: It is recommended for this to be left as unchecked as default.
- Input dataset location: Type in the S3 location of the manifest file which had been created in step 1.
- Output dataset location: The location of your output data.
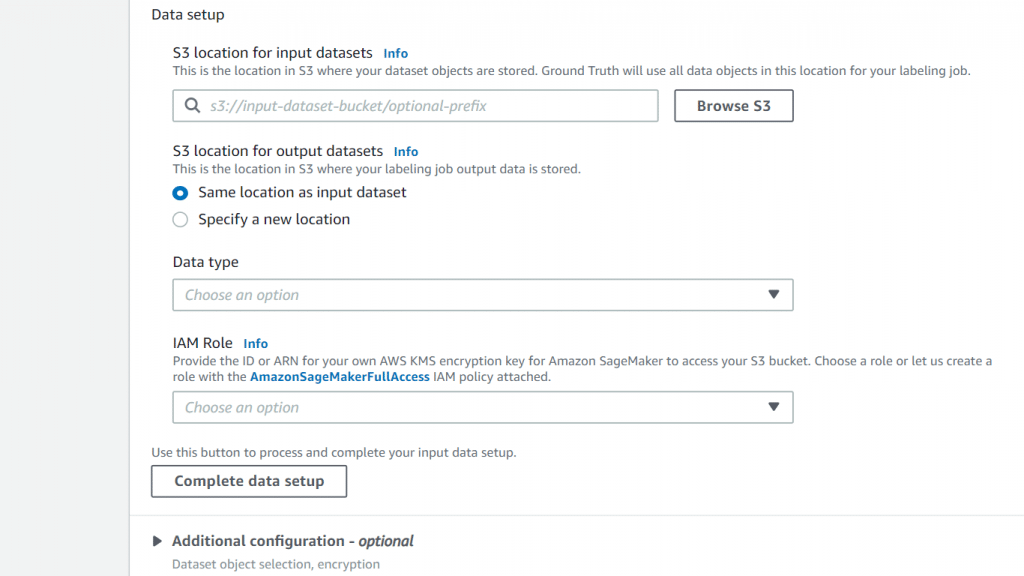
Create Labeling Jobs – Output Setup
- IAM role: Create or click on one of the already available IAM roles with the SageMakerFullAccess IAM policy attached.
- For the section of Task type, in the field of Dataset type, select Bounding box to be the task type.
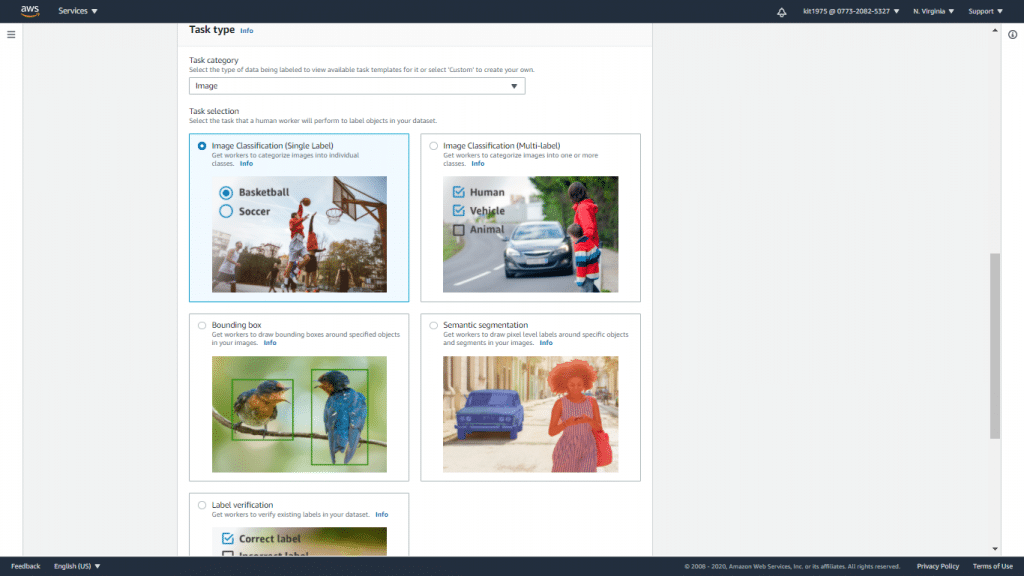
Create Labeling Jobs – Task Type
- Click on the option Next to continue to the page of configuring your labeling job.


Step 3: How to Monitor Your Labeling Job after You Create Labeling Jobs?
After you create labeling jobs, you will find your created jobs listed on the page. This list may be utilized for the sake of monitoring your labeling jobs’ status. It also includes the below fields:
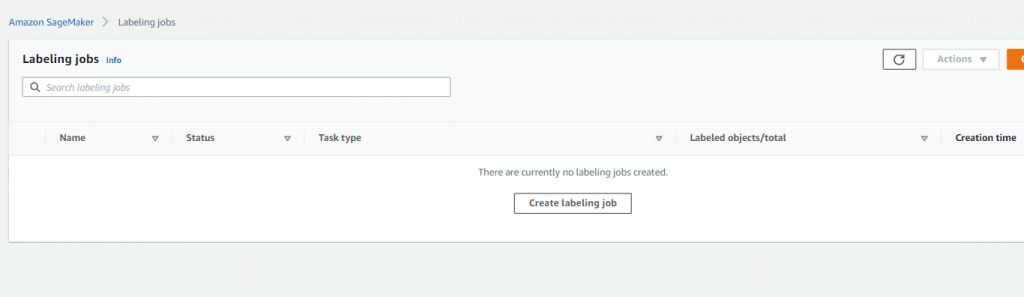
Create Labeling Jobs – Labeling Jobs Fields
- Name: Name of the job.
- Status: Job completion status, which can either be Failed, Stopped, Complete, or In progress.
- Labeled objects/total: Overall number of objects found in the labeling job and the number of those which were labeled.
- Creation time: Date and time when the job was created.
It is also possible for you to get a job cloned, chained, or stopped. Choose a specific job, then choose one of the options below out of the Actions menu:
- Clone: This gets a new labeling job created with its configuration being copied from the chosen job. It is possible to get a job cloned when needing to change to the job and start running it once more.
- Chain: This will create a new labeling job which is capable of building upon the available models and data of failed, stopped or completed jobs.
- Stop: This will cause a running job to be stopped. Stopped jobs are not capable of being restarted.