Cost and Usage Reports
How are Cost and Usage Reports Created?
By utilizing the Cost & Usage Reports page located on the Billing and Cost Management console, you will get the chance to start creating your own Cost and Usage Reports.
Keep in Mind
- A whole day might be needed for the AWS to begin delivering reports to your selected or created S3 bucket. As soon as this delivery begins, AWS will start updating the AWS Cost and Usage Reports files at least one time daily.
- DBRs (Detailed Billing Reports) will not be automatically refreshed, even if you choose Data refresh settings or if you don’t. For the sake of refreshing a DBR, you will need get a support case opened.
What are the steps for creating Cost and Usage Reports?
- Login to the Billing and Cost Management console using the following link https://console.aws.amazon.com/billing/home#/
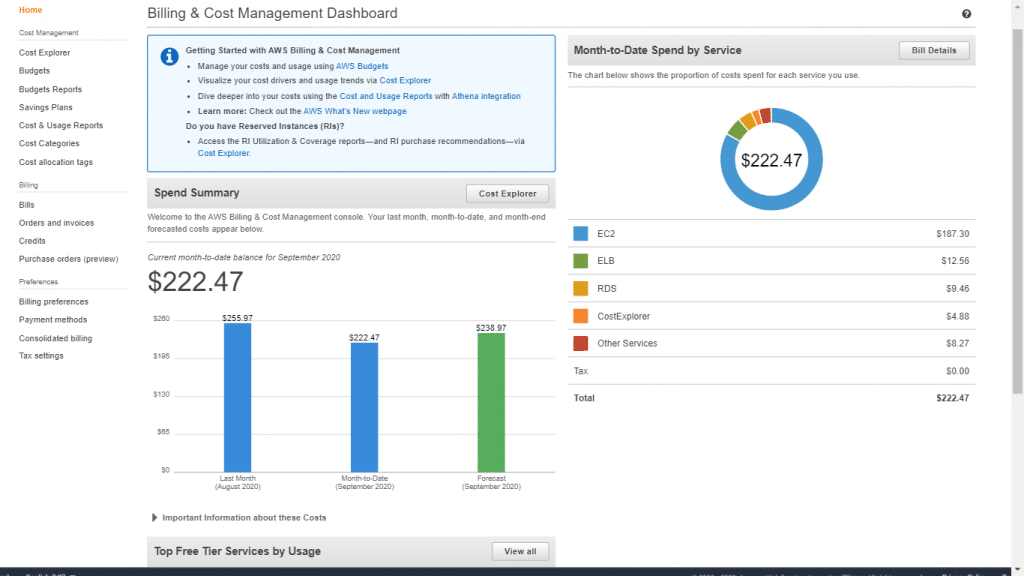
Cost and Usage Reports – Billing and Cost Management console
- From the navigation pane, click on Cost & Usage Reports.
- Click on Create report.
- In the section Report name, type in a unique report name.
- In the section Additional report details, choose Include resource IDs to get every individual resource’s ID added to the report.
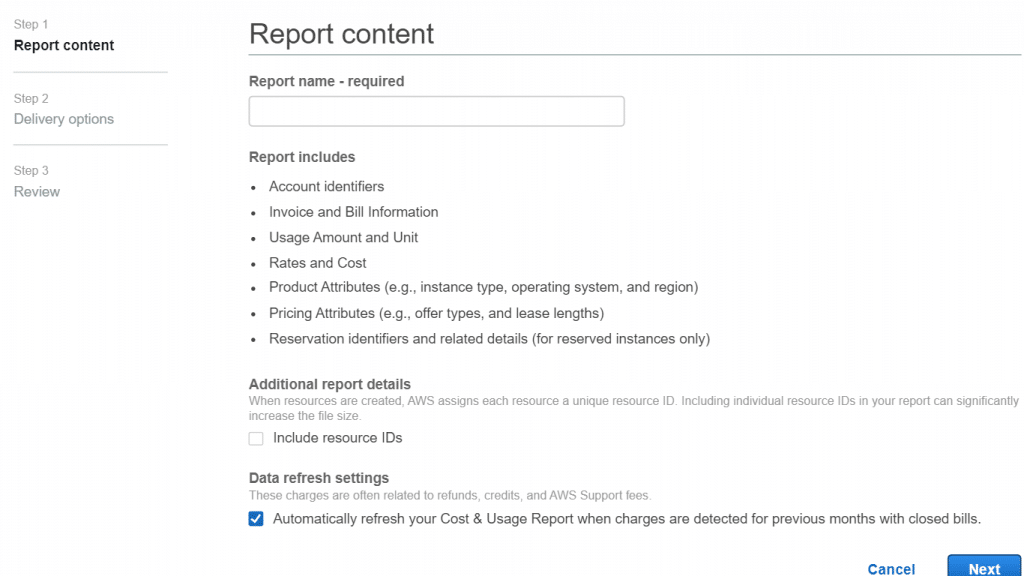
Cost and Usage Reports – Report Content


Important Note for Cost and Usage Reports
If you include resource IDs in your report, individual line items are going to be created for every single resources. By doing so, your Cost and Usage Reports files are going to be greatly increased in size, according to your AWS usage.
- In the section of Data refresh settings, choose if you’d like your AWS Cost and Usage Reports to be refreshed whenever AWS adds support fees, credits or refunds to your account when your bill is complete. After a report gets refreshed, a new one will get uploaded to S3.
- Click on Next.
- In the section of S3 bucket, click on Configure.
- Inside the dialog box of Configure S3 Bucket, choose to perform one of the below options:
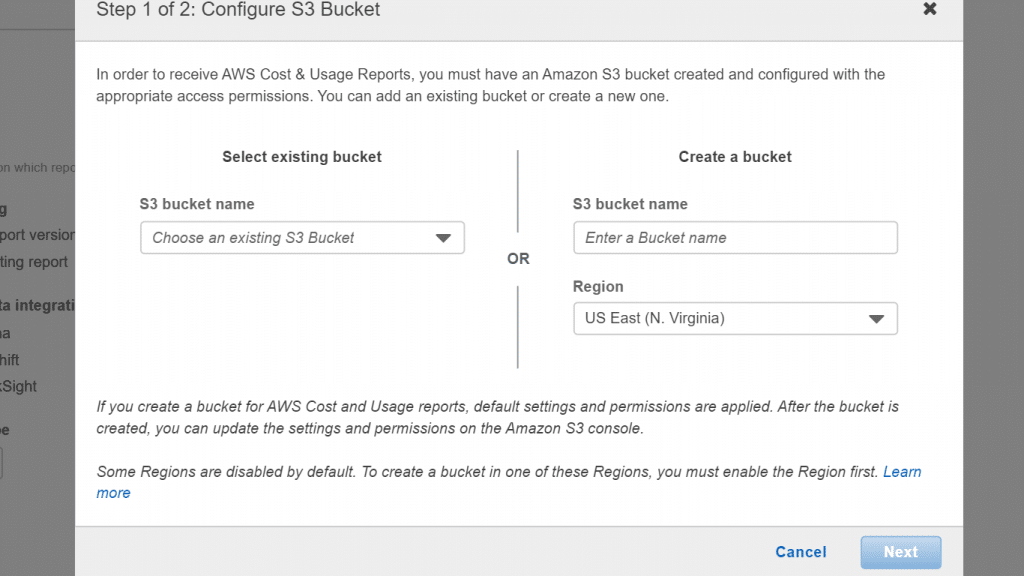
Cost and Usage Reports – Configure S3 Bucket
- Choose an already existing bucket from the list then click on the button Next.
- Type in a name for your bucket and select which Region you’d like to get the new bucket created in. Then, click on Next. To learn more about S3 Buckets, check out the article about AWS S3 Bucket.
- Go over the bucket policy, then choose the option “I have confirmed that this policy is correct”. When done, click on Save.
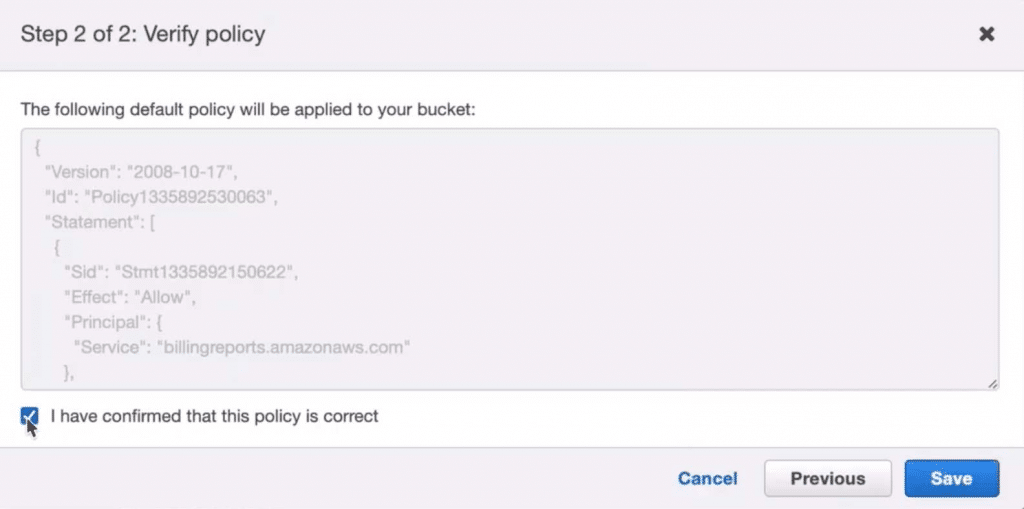
Cost and Usage Reports – Verify Policy
- In the section of Report path prefix, fill in the needed report path prefix to get it prepended to your report’s name.


This is a necessary step for Athena, yet an optional one for Redshift or QuickSight.
In case you choose not to set a prefix, your default prefix will be the previously added name for the report in step Four as well as the report’s date range, having the below format:
/report-name/date-range/
7. In the section of Time granularity, click on one of the options below:
-
- Daily: For aggregating the line items in the report day by day.
- Hourly: For aggregating the line items in the report each hour.
- Monthly: For aggregating the line items in the report each month.
8. In the section of Report versioning, pick either to get every version of the report to overwrite the previous one or to let the latest versions get delivered along with the previous versions.
In case of choosing to Overwrite reports, you would be saving on your S3 storage costs. By getting new report versions, you would be enhancing the auditability of your billing data.
9. In the section named “Enable report data integration for”, pick either to integrate your Cost and Usage Reports with Redshift, Athena, or QuickSight. Your report will be compressed in the below formats:
-
- Redshift or QuickSight: In “.gz” compression
- Athena: In “parquet” format
10. Click on Next.
11. Upon going over all of your report settings, click on Review and Complete.
It is possible to later on head back to the Cost & Usage Reports part of your Billing and Cost Management console to check up when the latest update of your reports took place.
Data Center Relocation Cost Estimate