AWS EC2 Placement Groups
EC2 Placement Groups: Rules and Limitations
General Rules:
Prior to using placement groups, you must know the below rules:
- Name of placement groups: unique within the account for each Region.
- Placement groups cannot be merged.
- Instance: launched in 1 placement group at a time, and it’s not possible to span various placement groups.
- On-Demand Capacity Reservation + zonal Reserved Instances offer a capacity reservation for instances in one Availability Zone. This may be utilized by instances in a placement group. (cannot explicitly reserve capacity for a placement group).
- Instances having a tenancy of host may not possibly get launched in placement groups.
Rules for Cluster Placement Groups:
- One of the below instance types need to be utilized upon the launching of a cluster placement group:
– A1, M4, M5, M5a, M5ad, M5d, M5dn, and M5n [General Purpose]
– C3, C4, C5, C5d, C5n, and cc2.8xlarge [Compute Optimized]
– cr1.8xlarge, R3, R4, R5, R5a, R5ad, R5d, R5dn, R5n, X1, X1e, and z1d [Memory Optimized]
– D2, H1, hs1.8xlarge, I2, I3, and I3en [Storage Optimized]
– F1, G2, G3, G4dn, Inf1, P2, P3, and P3dn [Accelerated Computing]
- Cluster placement group: no spanning of multiple Availability Zones.
- Max network throughput speed of traffic (between 2 instances): limited by the one which is slowest. Apps having high-throughput requirements: instance type must have network connectivity meeting your needs.
- Instances for enhanced networking have the below rules:
– May utilize 10 Gbps for single-flow traffic. Instances outside of a cluster placement group: 5 Gbps for single-flow traffic.
– Traffic going to and from S3 buckets sharing the same Region – over public IP address space or by VPC endpoint – get the chance to utilize every available instance aggregate bandwidth.
- Various instance types may be launched in a cluster placement group. It will cause a reduction in the possibility that the needed capacity is available so that your launching succeeds. (utilize same instance type in all the instances found in a cluster placement group).
- The network traffic to the internet – over a Direct Connect connection – to on-premises resources: 5 Gbps.
Rules for Partition Placement Groups:
- Supports a max of 7 partitions/Availability Zone. Instances number launched in a partition placement group: merely limited by account limits.
- Instances launched in a partition placement group get evenly distributed across all partitions. Instances may not be evenly distributed across all partitions.
- Dedicated Instances in a partition placement group: max of 2 partitions.
- Dedicated Hosts: do not support Partition Placement Groups.
Rules for Spread Placement Groups:
- Supports a max of 7 running instances/Availability Zone. In case of starting an 8th instance sharing same Availability Zone + same spread placement group, it shall not be launched. In case you require over 7 instances in one Availability Zone, utilize various spread placement groups. This does not guarantee the spread of instances between groups, but it makes sure that each group is spread, which limits the effect from specific classes of failures.
- Dedicated Instances + Dedicated Hosts: do not support spread placement groups.
How to Create a Placement Group?
Placement groups can be created through:
- New console
- Old console
- AWS CLI
- PowerShell
Creating placement group through the console

EC2 Placement Groups – create placement group
- Go to the EC2 console by this link https://console.aws.amazon.com/ec2/.
- From under navigation pane, select Placement Groups, Create placement group.
- Fill in a unique name for your group.
- Select the placement strategy you want for your chosen group. When selecting Partition, specify how many partitions you need within the group.
- Select option Create group.
How to Launch Instances in a Placement Group?
It is possible to launch an instance which meets the rules and limitations through one of the below methods:
- Console
- AWS CLI
- PowerShell
Launching instances in a placement group through the console
- Go to the EC2 console through this link https://console.aws.amazon.com/ec2/.
- From under the navigation pane, select Instances.
- Select Launch Instance. Finish the wizard as asked of you, while taking into consideration following the below directions:
- From Choose an Instance Type page, choose the instance type you want which is possible to get launched into a placement group.

EC2 Placement Groups – choose an instance type
- From Configure Instance Details page, you will get the below fields:

EC2 Placement Groups – configure instance details
– Number of instances: fill in the total number of instances you require for this placement group (it may not be possible to add more instances to the placement group later on).
– Placement group: choose Add instance to placement group box. In case of not noticing Placement group on the page, make sure of selecting an instance type which allows for being launched in a placement group, or such an option won’t be available.
– Placement group name: select adding the instances to an already found placement group or rather to a newly created placement group by you.
– Placement group strategy: select the right strategy. In case of selecting the partition, for Target partition, pick Auto distribution so that EC2 performs the perfect effort for evenly distributing your instances over every one of the partitions found in the group. Otherwise, it’s possible to set what partition to get your instances launched in.
Describing Instances in a Placement Group
It’s possible to view the placement data of instances through below methods, or filter them by partition number through CLI.
- Console
- AWS CLI
For viewing placement group + partition number through the console
- Go to the EC2 console by the following link https://console.aws.amazon.com/ec2/.
- From under navigation pane, select Instances.
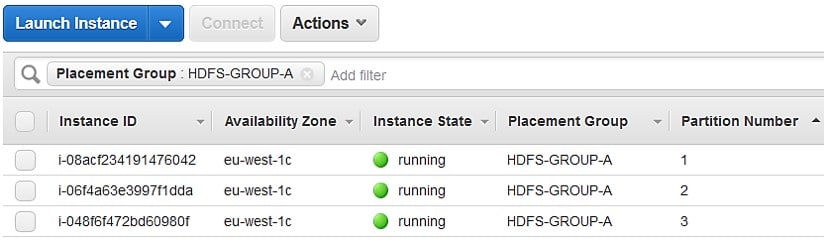
EC2 Placement Groups – launch instance
- Choose your instance and details pane, go ahead and inspect the Placement group. In your instance is not found in a chosen placement group, this field will be empty, or in the other case the placement group name will be shown. In case the placement group is a partition placement group, head to check the Partition number to see the partition number of your instance.

How to Change the Placement Group of an Instance?
It can be done through one of the below ways:
- Send an already found instance to a placement group
- Send an instance to a different placement group
- Delete an instance from a specific placement group
Before you sending or deleting an instance, it should be in stopped state. This can be done through CLI or SDK.
- AWS CLI
- PowerShell
For moving your instance to a placement group through the CLI
- Stop your instance through stop-instances
- Utilize modify-instance-placement command + set a name for the placement group where you want the instance to be moved.
aws ec2 modify-instance-placement –instance-id i-0123a456700123456 –group-name SpreadGroupTrial
- Start your instance through start-instances
For removing your instance from a placement group through the CLI
- Stop your instance through stop-instances
- Utilize modify-instance-placement command + set an empty string as a name for your placement group.
aws ec2 modify-instance-placement –instance-id i-0123a456700123456 –group-name “”
- Start your instance through start-instances
How to Delete a Placement Group?
For the sake of replacing a placement group or getting rid of it because it not needed anymore, you may simply delete it. This can be done through one of the below methods.
- New console
- Old console
- AWS CLI
- PowerShell
For deleting a placement group through the console

EC2 Placement Groups – placement groups
- Go to the EC2 console by the following link https://console.aws.amazon.com/ec2/.
- From under navigation pane, select Placement Groups.
- Choose your placement group and select Delete.
- Upon being asked for confirmation, fill in the Delete field and select Delete.